Image conversion configurations define a group of image settings to be used during export to change the format, size, and/or color of an image, to add watermarks to images, and to specify when to cache images. An image conversion configuration can also be used to ensure that the image is not changed upon export, meaning that the format, size, and color exported are identical to that stored in STEP.
After a one-time setup, an image conversion configuration allows users to easily apply the same settings for multiple image exports. All methods of asset export allow selection of an image conversion configuration.
During export, an image can be converted to a different format, file size, and resolution by using the image conversion feature. To use the same conversion later, this conversion needs to be store as configuration. Each configuration will have its own predefined set of parameters.
An Image Conversion Configuration definition can be exported as comments and submitted to an external source control system for comparison purposes as described in Configuration Management documentation.
Note: When setting up an asset push, any images requiring conversions must use the following method. For more information, refer to the Creating and Maintaining Asset Push Configurations topic. For externally storing asset push items, an Asset Push Sidecar is needed. For more information, refer to the Asset Push Sidecar topic.
Create an Image Conversion Configuration
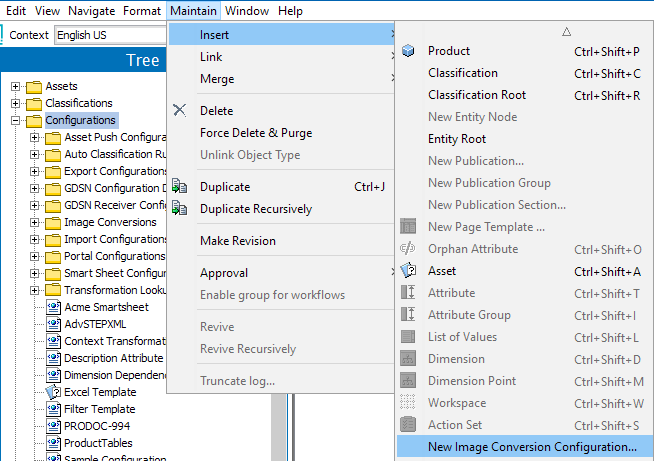
- In the Tree, select a classification folder to store the new configuration.
- Click the Maintain menu > Insert > New Image Conversion Configuration to display the Create Image Conversion Configuration wizard.
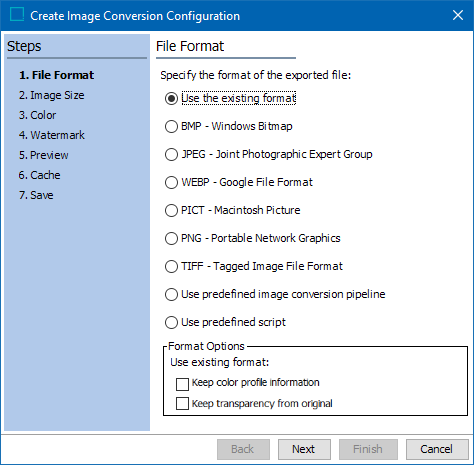
- For the File Format step, select Use the existing format to ensure that no changes will be made to the format upon export.
If changes are necessary, select the desired image format. For details about the individual format options, refer to the Image Formats topic.
Click Next.
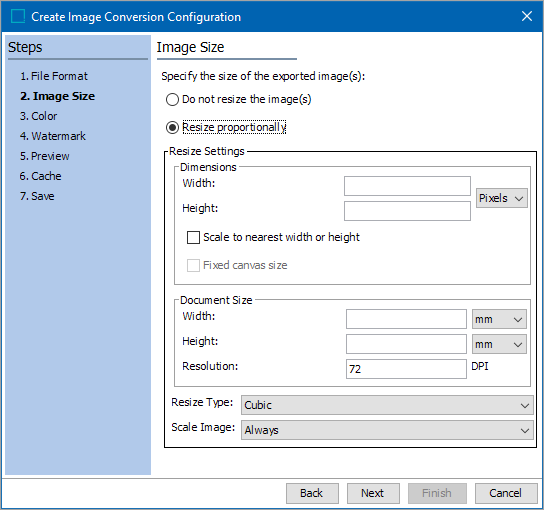
- For the Image Size step, select Do not resize the image(s) to ensure that no changes will be made to the image size(s) upon export.
If changes are necessary, select Resize proportionally, then specify the dimensions, document size, resize type, and scale image settings. For details about the image size options, refer to the Image Size topic.
Click Next.
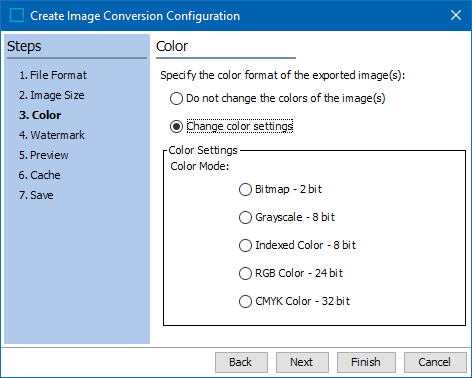
- For the Color step, select Do not change the color of the image(s) to ensure that no changes will be made to the color of the images upon export.
If changes are necessary, select Change color Settings and specify the desired color mode. For details about the color options, refer to the Color topic.
Click Next.
- For the Watermark step, select Do not add watermark if you do not need watermarks to display on the exported images.
If watermarks are necessary, select Add watermarks to image(s) and configure the relevant Watermark settings. For detailed information on these settings, refer to the Watermark topic.

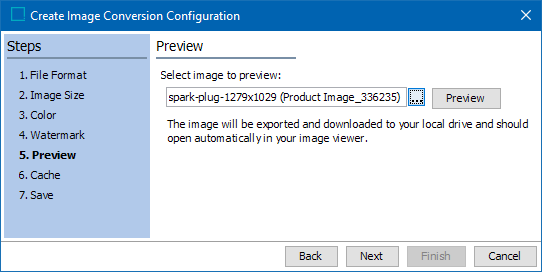
- For the Preview step, click the ellipsis button (
 ) to browse to or search for an image that you would like to preview, then click Preview.
This step provides a visual check on images to ensure that they look correct before they are exported. For example, you can use the preview to determine if the color settings and/or watermarks display as they should. For additional information, refer to the Preview topic.
- For the Cache step, the checkbox enables the ability to cache, and the radio buttons determine when the caching will occur. Caching is available via the Export Manager or asynchronously based on events via the Image Cache event processor. For more information, refer to the Assets and Content with STEPXML section of the Digital Assets documentation or the Image Cache Processing Plugin Parameters and Triggers section of the System Setup documentation.
- Cache on first use - the converted image is not cached until the first time it is accessed for viewing, exporting, or in an image preview.
- Cache on import - the converted image is cached when it is imported.
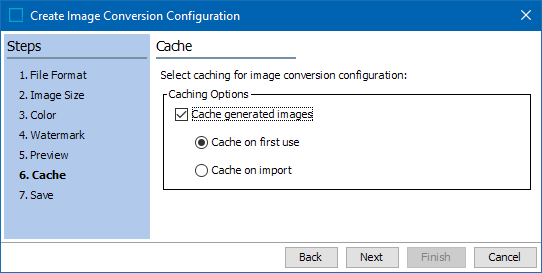
Note: For optimal system performance, it is important to configure the 'Image Cache Event Processor' to listen for incoming selected asset object types and to apply the selected conversions automatically. All user configured image conversions that have been set to 'cache on import' are available.
- For the Save step, enter an ID and name for the Image Conversion Configuration.
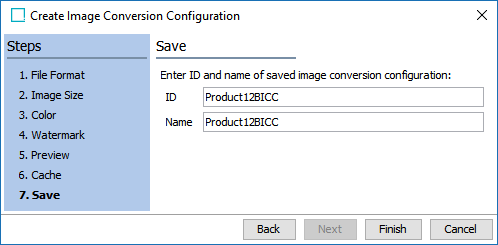
Note: Users can choose to have IDs automatically assigned to Image Conversion Configurations by providing an ID in the 'ID Pattern' parameter, which is located in the Image Conversion Configuration object type. The Image Conversion Configuration object type is located in System Setup > Object Types and Structures > Assets. If this parameter is left empty, users will need to provide an ID (as shown in the image above) each time an Image Conversion Configuration is created.
- Click Finish to save the configuration in the originally selected classification folder.
Edit an Image Conversion Configuration
Once an image conversion configuration has been created, changes can be made using these steps.
- In Tree, expand the classification folder that holds the image conversion configuration to edit, right-click the configuration, and select Edit Image Conversion Configuration.
- Use the Edit Image Conversion Configuration wizard to modify the configuration settings.