In the Watermark step, users can add watermarks to images.
Note: The 'Watermark' step in the Export Images and Documents wizard is available only when a custom image conversion configuration is selected in the Image Conversion step and if 'Use predefined image conversion pipeline' or 'Use predefined script' are not selected in the File Format step.
Businesses use watermarks in product images for reasons that include identifying their company name and preventing competing retailers from stealing images and using them to sell identical products.
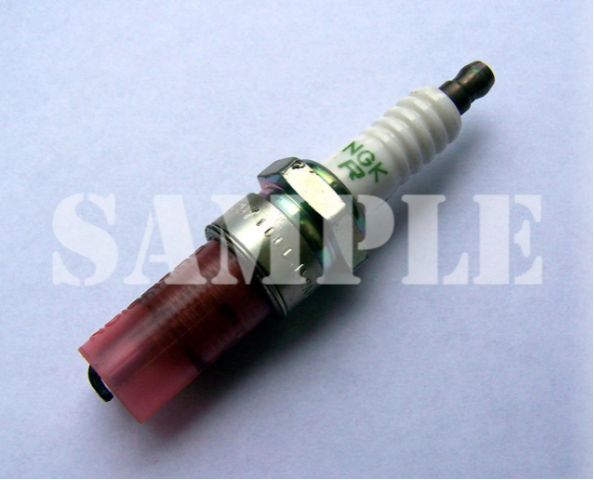
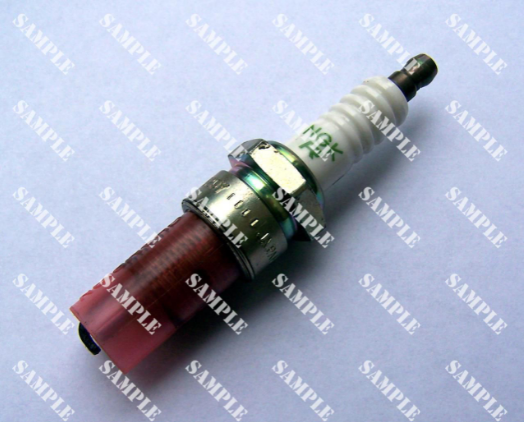
The following screenshot shows an example of a watermark that has been added to an exported image.
In addition to custom image conversion configurations in the Export Images and Documents wizard, watermarks can also be applied to images in the following locations:
- Within image conversion configurations that are used for asset push. For more information, refer to the Image Conversion Configuration topic and the Creating and Maintaining Asset Push Configurations topic.
- STEPXML / Advanced STEPXML data exports that include asset content. For more information, refer to the STEPXML Outbound Parameters topic and the AssetContent Tag in STEPXML topic in the Data Exchange documentation.
- Watermarks can be previewed on images in the Web UI by specifying the ID of a watermark-applying image conversion within the Asset Representation Properties component for either the Pop Up Representation or Representation parameter. For more information, refer to the Asset Representation topic in the Web User Interfaces documentation.
-
Watermarks can be applied to images on import using an inbound integration endpoint (IIEP) that applies an image conversion configuration with a watermark step. For more information, refer to the Content Importer topic.
Configuring Image Watermarks
The Watermark step contains numerous configuration options that allow you to fine-tune how the selected watermark will display on exported images. These settings include whether the watermark should be of a fixed size, scaled in relation to the target image, or tiled; the opacity of the watermark; whether the watermark should be rotated; and where it should appear in the image (e.g., centered).
- Do not add watermark is selected by default. If you need to apply watermarks to your exported images, select Add watermark to image(s).
- All watermark configuration options are available under Watermark settings. These options will differ based on whether Fixed, Scaled, or Tiled is selected for Style.
- Watermark: Click the ellipsis button (
 ) to browse to or search for the image that will be used for the watermark.
Note: Only the PNG image format is supported, since this is the only system-supported image format that supports transparency.
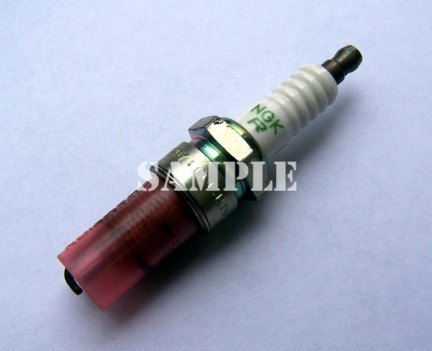
The following screenshot shows an example watermark image in which the content of the watermark (the text 'SAMPLE') is white and the background is transparent. It is strongly recommended to use watermark images with transparent backgrounds to ensure that settings, such as opacity, apply to the content of the watermark only and do not affect the negative space that surrounds the watermark content.

- Style: Three modes of watermarking are supported—Fixed, Scaled, or Tiled. These options are explained below.
Watermark Styles
The fixed and scaled options allow for single watermarks to be added to images, either in a fixed size or scaled in relation to the target image. The tiled option will repeat the watermark in tiles over the underlying image.
- Fixed: The Fixed option allows for a single watermark to be added to an image and its size adjusted (scaled) based on the size of the watermark itself, not in relation to the target image.
- Size: Set the size of the watermark in percentage. 100% will place the watermark over the target image at its actual size.
- Opacity: Set the opacity of the watermark in percentage. 100% will make the watermark appear fully solid; lesser values will lighten the watermark accordingly.
- Angle of Rotation: Set the angle of the watermark on a scale of 0 degrees to 90 degrees, with the additional designation of clockwise or counter clockwise.
-
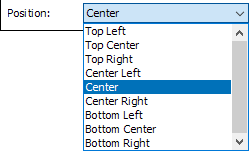
Position: Select where the watermark should be positioned on the target image. The default position is center.
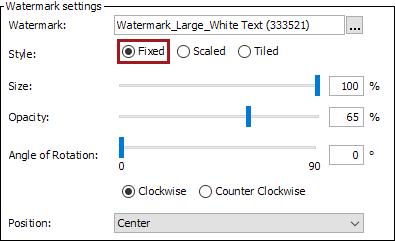
The following screenshot shows the 'SAMPLE' watermark placed in the Fixed style using the following settings: 100% size (actual size), 65% opacity, 0-degree rotation, and center positioned.
- Scaled: The Scaled option allows for a single watermark to be added to an image and its size adjusted (scaled) in relation to the size of the target image.
- Size: Set the size of the watermark in percentage in relation to the size of the target image. 100% will scale the watermark to be the same width as the target image.
- Opacity: Set the opacity of the watermark in percentage. 100% will make the watermark appear fully solid; lesser values will lighten the watermark accordingly.
- Angle of Rotation: Set the angle of the watermark on a scale of 0 degrees to 90 degrees, with the additional designation of clockwise or counter clockwise.
- Position: The available positions are the same as those for the Fixed setting.
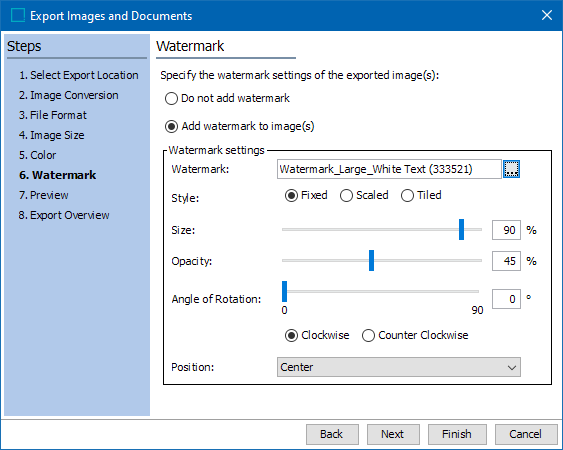
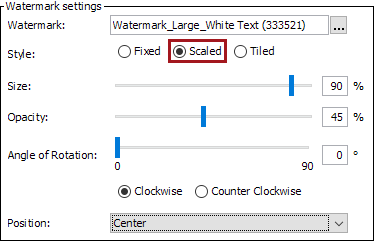
The following screenshot shows the 'SAMPLE' watermark placed in the Scaled style using the following settings: 90% (scaled to 90% of the target image size), 45% opacity, 0-degree rotation, and center positioned.

- Tiled: The Tiled option will tile the watermark at specified intervals over the target image.
- Tile Width: Set the width of each watermark tile in pixels
- Opacity: Set the opacity of the tiled watermark in percentage. 100% will make the watermark appear fully solid; lesser values will lighten the watermark accordingly.
- Angle of Rotation: Set the angle of the tiled watermarks on a scale of 0 degrees to 90 degrees, with the additional designation of clockwise or counter clockwise.
- Spacing: Set the amount of space, in pixels, that should appear between each watermark tile.
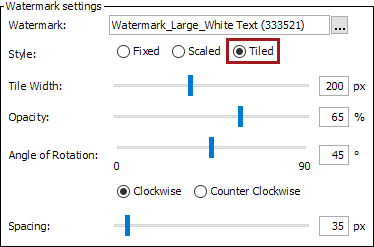
The following screenshot shows the 'SAMPLE' watermark tiled using the following settings: tile width of 200 pixels, opacity of 65%, 45-degree clockwise rotation, and 35 pixels of spacing between each tile.
- Click Next to proceed to the Preview step, where the watermark settings can be previewed in your computer's default asset viewer.