Read-only parameters cannot be edited by users. For example, an attribute value that is important to be viewed by users, but is restricted from editing.
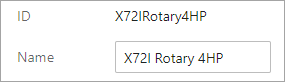
Read-only objects, like the 'ID' attribute in the image above, are identified by:
-
Plain text for the attribute name.
-
Plain text for the value field; no input box is displayed as it is for values that can be modified, like the 'Name' attribute.
-
Optionally, a custom message configured via a JavaScript business condition.
Recommended Use
-
A business condition is required when an attribute or a reference should be read-only dynamically, that is, based on another setting in the node.
-
If an attribute or reference should always be read-only, use the Web UI designer or other validation options to set the read-only requirement on the object permanently. To create custom validation messages without using business rules, refer to the Custom Validation Error Messages topic in the System Setup documentation or the Reference Help Text in the Web UI topic.
Read-only validation can be set in the Web UI as defined in the linked topics below.
Attributes
Validation can be set on attribute objects as defined in:
-
Product Editor Screen topic
Business Conditions
Validation can be set dynamically based on other information on the node via business conditions as defined in:
-
Read Only Bind topic (for use with JavaScript business rules) in the Resource Materials online help documentation
References
Validation can be set on reference type objects as defined in:
-
References Component topic
-
Product Editor Screen topic
Users
Validation can be set for users as defined in:
-
Privilege Rules topic in the System Setup documentation