Business conditions can validate user-entered data in real time and notify the user immediately if an applied business condition has not been fulfilled. For example, to ensure the entered value for the attribute 'Sell Pack Depth' is equal to or greater than 10 cm, a condition is created and applied to the attribute that evaluates whether the entered value meets that requirement. If the value is less than 10 cm, a warning is displayed as the user exits the field.
Important: The number of business conditions configured on a system can have a negative impact on Web UI performance. Before applying business conditions in the Web UI, consider alternative options, like implementing validation base types for attributes when possible, and review recommended practices in the following topics:
Determine the Business Condition Location
Business conditions can be added in the Web UI in three places: Main - Global Representation List, Main - Advanced, and on an individual screen's Validation section. Review your use case and the options below to determine the preferred location to add the business condition.
Global Representation List
The 'Global Representation List' option applies business condition dynamic validation, meaning that validation is performed as attribute and reference values are changed. The benefits of this method include:
-
Validation is applied to all screens unless they are excluded within the business condition.
-
The 'Triggering Data Types' parameter identifies data to be validated dynamically prior to a user or system initiated save, when the screen is loaded, and when the triggering data type values are modified.
Generally, this option requires less maintenance when the same validation is required for all screens.
Use the Global Representation List option unless you need to filter Lists of Values (LOVs), when the Main - Advanced option or the Per Screen - Validation option is required.
Main - Advanced
The Main - Advanced option includes an LOV Filter and Validation for all screens.
Note: This functionality is the same as the Per Screen - Validation option.
-
LOVFilter ensures that an acceptable value is selected from an LOV and prevents the user from selecting a value that violates the condition. For more information, refer to the Business Condition: LOV Cross-Validation topic in the Business Rules documentation.
-
Validation does not automatically validate dynamically. Only attributes are allowed in this functionality and an Attribute Value bind is required in the JavaScript business rule for each attribute to be validated dynamically.
Use the Main - Advanced option only for LOV filtering on all screens.
Per Screen - Validation
The Per Screen - Validation option includes an LOV Filter and Validation for individual screens.
Note: This functionality is the same as the Main - Advanced option.
-
LOVFilter ensures that an acceptable value is selected from an LOV and prevents the user from selecting a value that violates the condition. For more information, refer to the Business Condition: LOV Cross-Validation topic in the Business Rules documentation.
-
Validation does not automatically validate dynamically. Only attributes are allowed in this functionality, and an Attribute Value bind is required in the JavaScript business rule for each attribute to be validated dynamically.
Use the Per Screen - Validation option only for LOV filtering on individual screens.
Configure a Business Condition
-
Create a business condition in the workbench. Refer to the Creating a Business Rule, Function, or Library topic in the Business Rules documentation.
-
Log in to the Web UI and access the designer. Refer to the Designer Access topic.
-
Add the business condition to the appropriate location based on the Determine the Business Condition Location section above.
-
Global Representation List
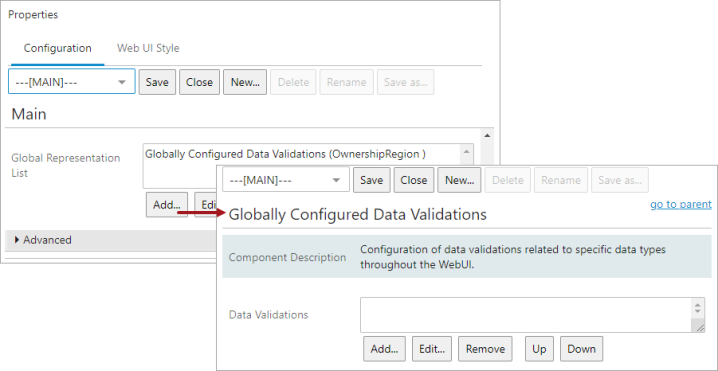
From the screen dropdown, select the MAIN option, and scroll to the Global Representation List parameter. Click the Add or Edit button to open the Globally Configured Data Validations dialog.
-
Main - Advanced
From the screen dropdown, select the MAIN option, and expand the Advanced section to display the Business Conditions parameter. Click the Add or Edit button to open the Business Conditions Properties dialog.

-
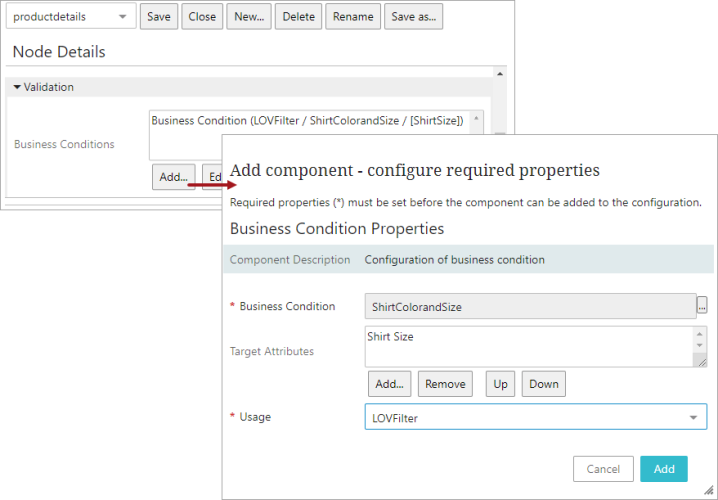
Per Screen - Validation
Select the desired screen from the dropdown, and expand the Validation section to display the Business Conditions parameter. Click the Add or Edit button to open the Business Conditions Properties dialog.
-
-
Configure the business condition based on where it was added.
-
Global Representation List
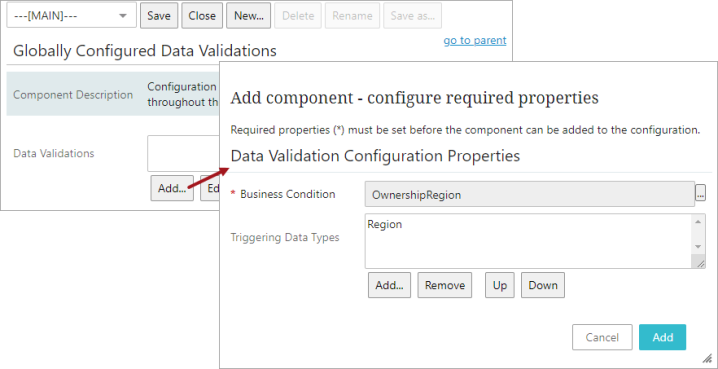
On the Data Validation Configuration Properties dialog, set the following parameters:
-
Business Condition - Click the ellipsis button (
 ) to display the Select Nodes dialog, which includes all business conditions. Select the business condition to evaluate on the screen.
 -
Triggering Data Types - Add the attributes or reference types to be validated dynamically. The total number of triggering data types cannot exceed more than 100, including all mandatory, read-only, and hidden types.
-
-
Main - Advanced or Per Screen - Validation
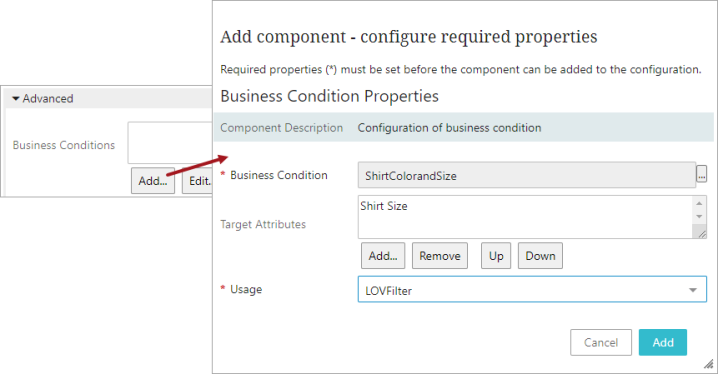
On the Business Condition Properties dialog, set the following parameters:
-
Business Condition - Click the ellipsis button (
) to display the Select Nodes dialog, which includes all business conditions. Select the business condition to evaluate on the screen. -
Target Attributes - Add the attributes that should be marked as wrong if the condition is not met.
-
Usage - Select the desired usage from the dropdown:
-
LOVFilter filters illegal values out when the target attribute is a list of values attribute.
-
Validation marks the target attribute as 'wrong' when the condition fails. For dynamic validation, an Attribute Value bind is required in the JavaScript business rule for each attribute to be validated.
-
-
-
-
Click the Add button.
-
Click Save and Close to exit the designer.
Setup of LOV Cross-Validation in the Web UI
To enable this cross-validation business condition in the Web UI, additional steps must be taken in the Web UI designer.
Navigate to the screen or component the cross-validation will be applied to. In this example, the cross-validation business condition is applied to two 'Attribute Value Components' added to a Node Editor screen.
In the Node Editor, add two Attribute Value Components, one for the 'Defining' attribute, and one for the 'Dependent' attribute.
In this example, an Attribute Value Component has been added for 'List Colors', the 'Defining' attribute, and one for 'List_Size', the 'Dependent' attribute.
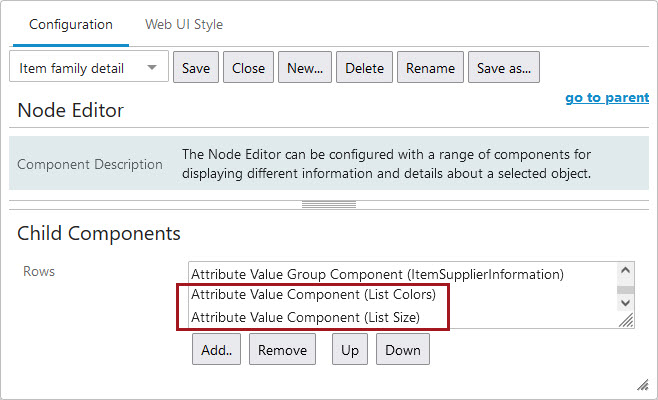
For more information on setting up an Attribute Value Component, refer to the Attribute Value Component topic.
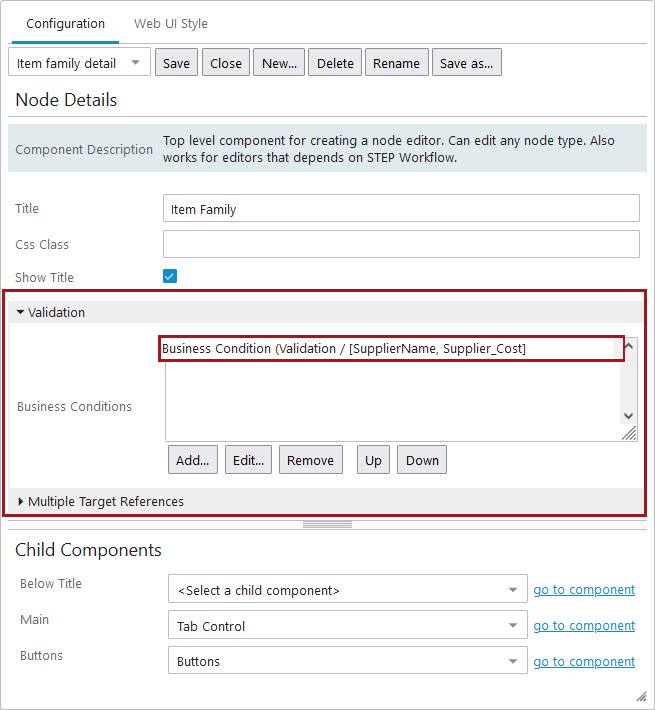
On the Node Details properties screen in the designer (click the 'go to parent' textual button to navigate to this page until 'go to parent' no longer displays), expand the 'Validation' section, and add the business condition that details the cross-validation.
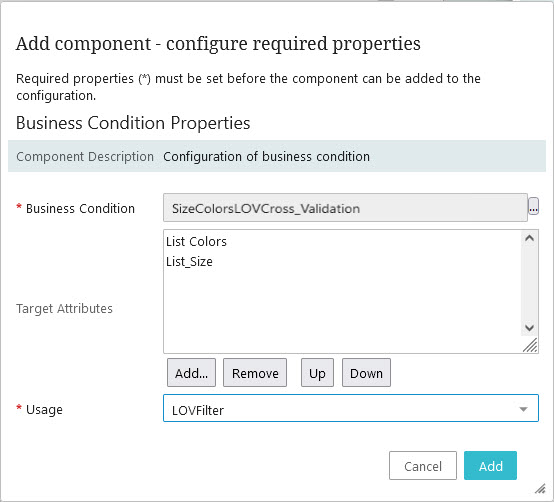
Double-click the added business condition. In the 'Add component - configure required properties' dialog that displays, under the 'Target Attributes' parameter, click the 'Add...' button. In the Node Picker that displays, find and select the two attributes—the 'Defining' and 'Dependent' attributes—referenced in the business condition.
For 'Usage', select 'LOVFilter'.
To set up business conditions in the Web UI, refer to the Business Rules in Web UI topic. For details on using LOV Cross-Validation, refer to the Business Condition: LOV Cross-Validation topic. Both topics are located in the in the Business Rules documentation.