By using the Attribute Management screen in Web UI:
- Users can edit and configure existing attributes
- Users can efficiently manage how each attribute value should display and/or behave across all Web UI screens without requiring screen-by-screen setup in the designer
Using the Attribute Management screen
Once configured and mapped, the Attribute Management screen is displayed when a user has selected an attribute via navigation in the Global Navigation Panel. Three tabs display on the Attribute Management screen by default: Attribute Details, Validity, and Link Attribute.
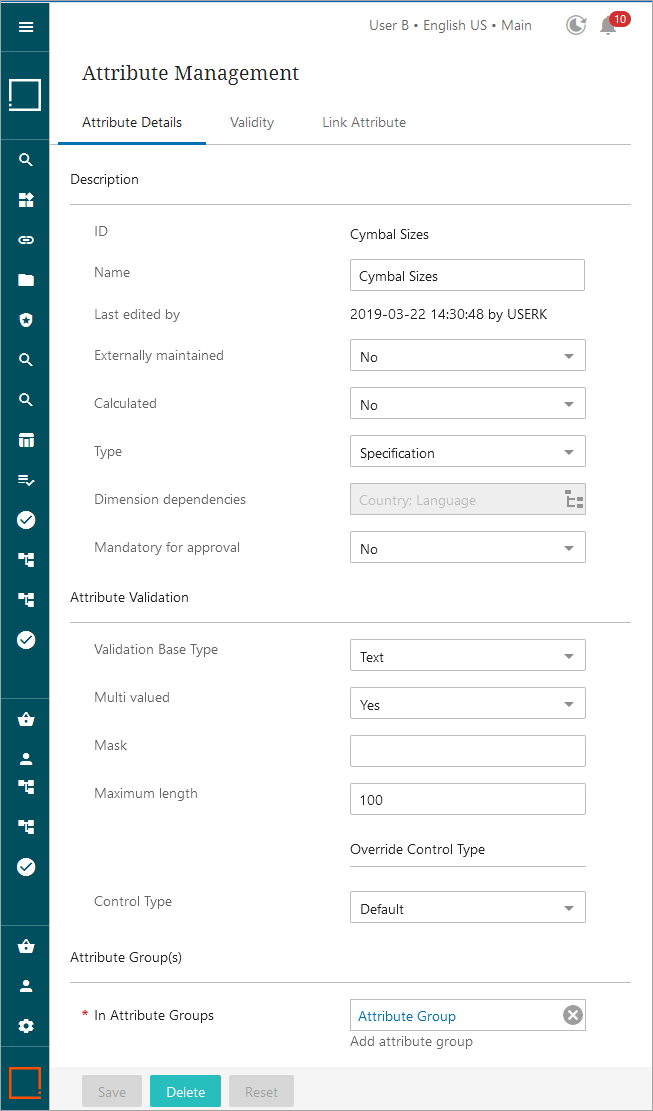
Attribute Details tab
On this tab the user is able to edit and configure an existing attribute, including its default control type and the attribute group(s) to which it belongs. Attribute definitions can be either configured or modified in this tab. Following below are the default parameters available on the Attribute Details tab:
Description section
- ID - The ID of the attribute. Non-editable.
- Name - The Name value of the attribute.
- Last edited by - A timestamp of the last edit to the attribute, followed by the ID of the user who made the change. Non-editable.
- Externally maintained - By setting this to 'Yes' or 'No,' users can determine whether the attribute is internally maintained, i.e., maintained within STEP, or externally maintained, i.e., maintained outside of STEP. For more information about externally maintained attributes, refer to the Externally Maintained Attributes topic in the System Setup documentation.
- Calculated - By setting this parameter to 'Yes' or 'No,' users determine whether an attribute is calculated or manually maintained. For more information on calculated attributes, refer to the Calculated Attributes in Web UI topic.
- Type - Determines whether the attribute is a 'specification'-type attribute, or a 'description'-type attribute. For more information on the definitions of these types of attributes, refer to the Specification Attributes topic and the Description Attributes topic, both of which are located in the System Setup documentation.
- Dimension dependencies - Displays which dimension dependencies have been applied to the attribute. The dimensions can be edited in this field. For more information on dimension dependencies, refer to the Dimension Dependent Attributes topic in the System Setup documentation.
- Mandatory for approval - Determines whether the attribute is mandatory, meaning any object to which the attribute is linked cannot be approved without first adding a value to that attribute.
Attribute Validation section
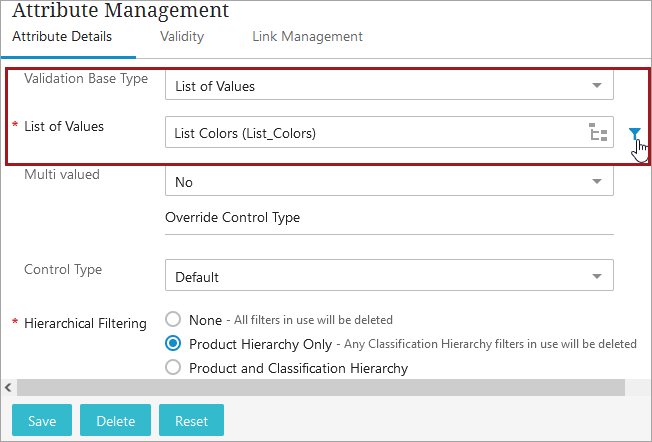
- Validation Base Type - Determines the data type applied to the attribute. Text, integer, number, date, or List of Values (LOV) are examples of validation base types.
-
If 'List of Values' is selected for Validation Base Type, the mandatory parameter, List of Values, will display. Select the appropriate List of Values. If the LOV linked to the attribute contains more values than are necessary for the user to choose from, users can filter which values in the LOV are available to select from through filtering.
To filter:
-
Click the Filter List of Values button,
 , next to the List of Values parameter to open the filter dialog.
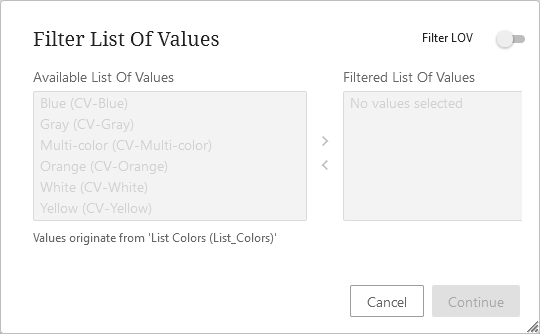
-
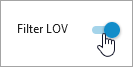
Click the Filter LOV toggle to move it to the right to turn on filtering. Clicking it again will turn it back off.
Note: If filtering is no longer desired, turning the filter off will not clear or reset any previously filtered lists should the lists need to be used again later. Edits to filter lists can only be made when filtering is enabled.
-
Select one value or multiple values, and click the center arrows to move them from one side to the other.
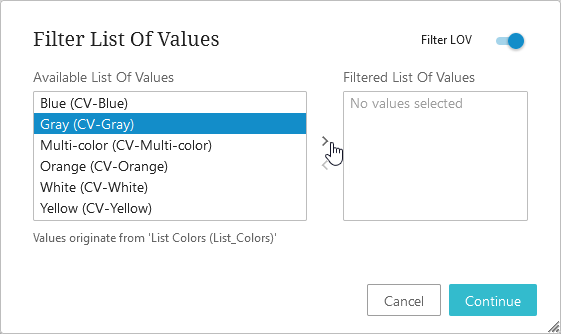
Note: You cannot select values from both sides and move them at the same time.
-
Click Continue to close the dialog.
-
Click Save to save all changes.
- Multi valued - When set to 'Yes,' the attribute can accept multiple values. When set to 'No,' the attribute can accept only one value.
- Mask - Allows users to set an input mask for attribute values. For more information on input masks, refer to the Input Masks topic in the System Setup documentation.
- Maximum length - Will display depending on how the 'Validation Base Type' parameter has been set. Users can set the maximum allowed number of characters for an attribute value in this field. Characters beyond the maximum configured in this field cannot be added.
- Control Type - Will display depending on how the 'Validation Base Type' parameter has been set. Set the attribute's control type. For instance, if the 'Validation Base Type' is set to 'Text', then the options for 'Control Type' are 'Rich Text,' 'Text Area,' and 'Text Box.' For more information about managing the control types in Web UI, refer to the Override Control Type Rule topic.
Note: There is an optional Hierarchical Filtering child component that can be added to enable users to set a filter on an LOV attribute used on a specific product, product family, or classification and defines which values are valid for certain areas within a hierarchy, based on references.
Attribute Group(s) section
- In Attribute Groups - Allows users to edit which attribute groups the attribute is included in. These attribute groups display in a single-column table, each group displaying in a row. Click the 'X' button found on the right side of each row to remove the attribute from the listed attribute group, or click the 'Add attribute group' button below the table to select a new attribute group to include the attribute in. All attributes must be included in at least one attribute group, so users will not be able to save their changes to the attribute if the 'In Attribute Groups' field is missing an attribute group.
Validity tab
On this tab the user can configure which object types the attribute is valid for. The user can add or remove the desired object type using the standard configured actions – 'Add valid object types' and 'Remove selected valid object types.'

- To add valid object types, click on Add valid object types action and browse or search for the desired product object type.
- To remove selected valid object types, select the object types that need to be removed, and click on Remove selected valid object types.
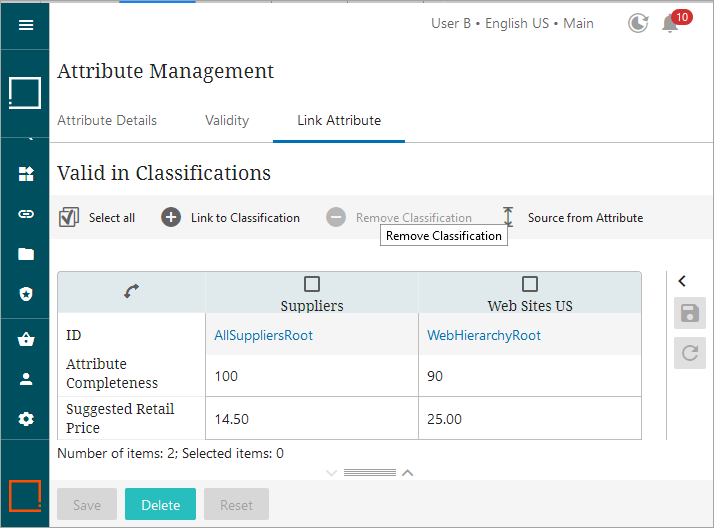
Link Attribute tab
On this tab, users can link the attribute to a product or classification.
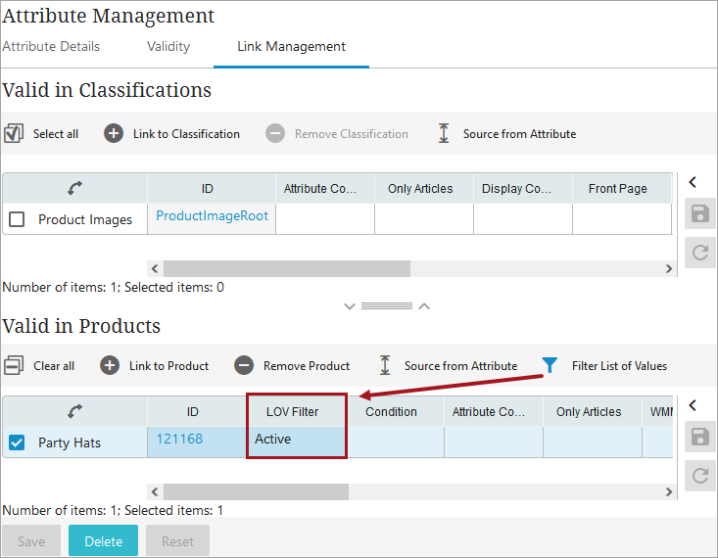
If the attribute is a List of Values attribute, and the Hierarchical Filtering was set to enable LOV filtering in either Product and Classification hierarchies or just Product hierarchies, a Filter List of Values action button will display in the appropriate table. Additionally, an LOV Filter column will display in the designated Classification and/or Product table to notify the user if filters are in use for any linked product(s) and/or classification(s).
Note: There is an optional Hierarchical Filtering child component that can be added to the Attribute Details tab to enable users to set a filter on an LOV attribute used on a specific product, product family, or classification and defines which values are valid for certain areas within a hierarchy, based on references.
If the LOV linked to the attribute contains more values than are necessary for the user to choose from, users can filter which values in the LOV are available to select from through filtering. These filters can be applied to a specific product, product family, or classification. In the example below, a product family called 'Party Hats' is selected, and filtering was applied to this product family, as indicated by the LOV Filter column.
To set a filter:
-
Click the checkbox next to a linked product or classification. Filtering will not work if multiple checkboxes are selected.
-
Click on the Filter List of Values action button to bring up the filter dialog.
-
Click the Filter LOV toggle to move it to the right to turn on filtering. Clicking it again will turn it back off.
Note: If filtering is no longer desired, turning the filter off will not clear or reset any previously filtered lists should the lists need to be used again later. Edits to filter lists can only be made when Filtering is enabled.
-
Select values to display, either one at a time or multi select, and click the center arrows to move them from one side to the other.
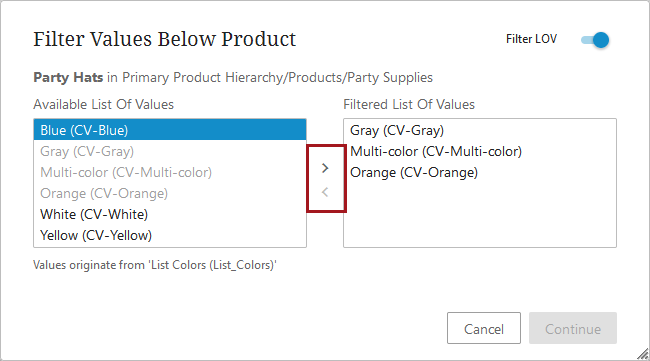
Note: You cannot select values from both sides and move them at the same time.
-
Click Continue to close the dialog.
-
Click Save to save all changes.
Functionality available on each tab is comparable to what is available in the workbench, though some advanced configuration options may not be available in the Web UI. For more information on creating attributes, refer to the Creating Attributes topic in the System Setup documentation. For more information on linking an attribute to a product, refer to the Linking Specification Attributes topic in the System Setup documentation.
Configuring the Attribute Management screen
Before configuring the screen, it is assumed that the general configuration described in the Attribute and LOV Creation and Maintenance in Web UI topic has been completed.
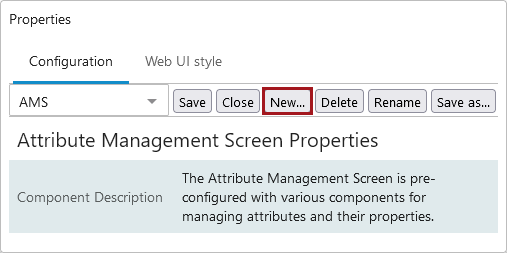
To create the Attribute Management screen, follow the steps below.
- In the Designer, click the New button.
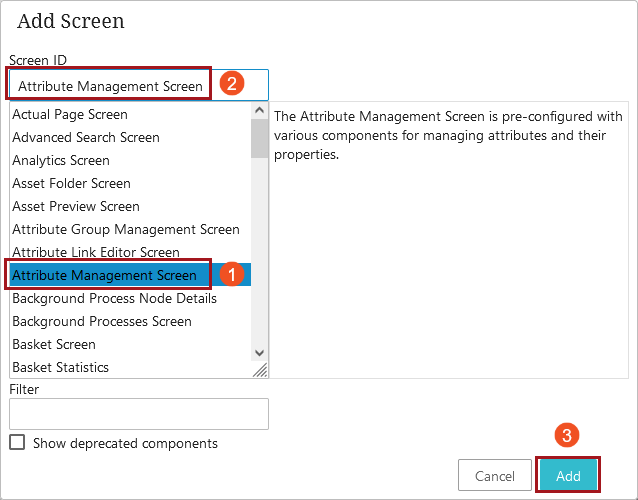
- In the Add screen window, find Attribute Management screen in the list of screen names. Select it and then, in the Screen ID field, type the name you would like to give this screen in your Web UI. Unless there’s a specific business need to change the name, it is simplest to copy the pre-configured screen name. Once the name's been added, click Add.
- The screen comes pre-configured with the required child components, so additional configuration is not required.
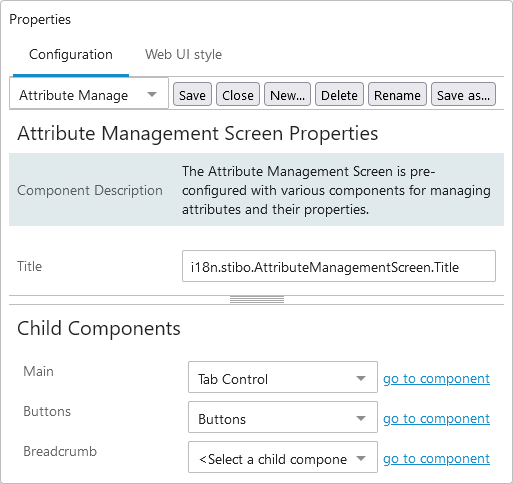
However, the screen is fully configurable and it is possible to add additional components, such as metadata attributes, using standard Web UI configuration options (e.g., addition and configuration of child components). Though possible, it is not recommended to remove the pre-configured components as it may compromise the user's ability to fully edit and maintain attributes.
- Finally, as with all new screens, it must be mapped using the Mappings parameter in the ---[MAIN]--- dropdown in the Designer. The screen can be mapped using the Object Type Condition and selecting the Attribute node (under Basic Object Types > Attribute Group).