Outbound integration endpoint settings can be viewed and edited from the outbound integration endpoint editor. For information about creating a new outbound endpoint, refer to the Creating an Outbound Integration Endpoint topic.

Important: In order to avoid unnecessary Pollers from being generated, which can lead to a decline in system performance, endpoints should be disabled before making changes to unwanted processes. For more information regarding disabling an endpoint, refer to the Running an Outbound Integration Endpoint topic.
Each tab on the editor is defined below and includes parameters to maintain the OIEP.
Outbound Integration Endpoint Tab
This tab holds basic information within the sections defined below.
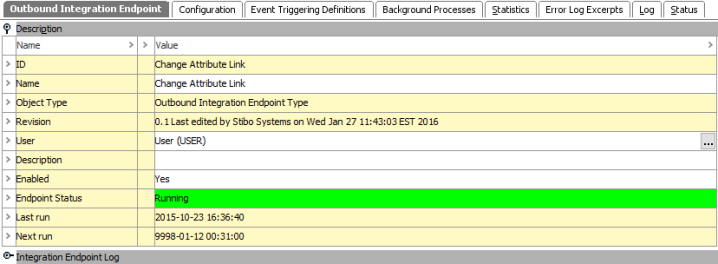
Description Section
The Description section includes basic information to identify the OIEP. The name, user, description, and enabled parameters can be edited.
For information on the Endpoint Status, refer to
Integration Endpoint Log Section
The Integration Endpoint Log section contains information about the endpoint background process. An entry is generated each time the endpoint is invoked, when background processes generated by the endpoint are started, and when processing errors occur.
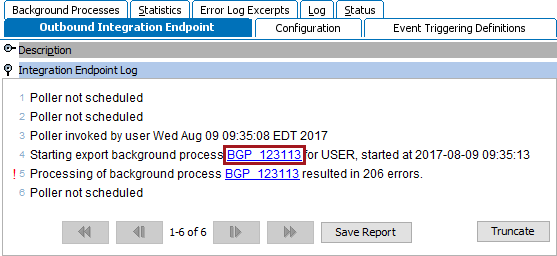
- BGP link - The background process opens the individual Importer Background Processes.
- Navigation - After the first entry, the Execution Report displays the following navigation buttons:

The navigation buttons are enabled when until the log reaches over 100 lines.
- Selecting the
 button will navigate back one page.
 - Selecting the
 button will navigate to the beginning of the log.
 - Selecting the
 button will navigate forward one page.
 - Selecting the
 button will navigate to the end of the log.
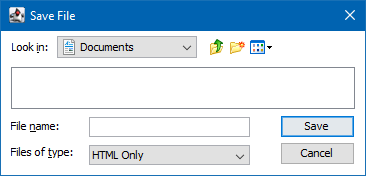
- Save - Click the Save button (
 ) to save the Execution Report as an 'HTML Only' file type, then enter a name for the log report and click Save.
Note: Changing the default format manually may result in an error.
- Truncate - When the Execution Report becomes cluttered or only specific information is needed, use the Truncate option to permanently eliminate selected rows. Click the Truncate button (
 ) to display the Truncate execution report dialog:
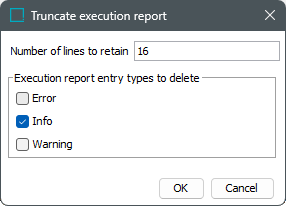
- In Number of lines to retain, the current number of log entries will display. Type the number of lines to keep starting from the end of the log, and permanently deleting the oldest rows, based on the selected entry types below.
- In Execution report entry types to delete, select the types that should be permanently removed.
Note: The Properties section includes a count of the Warnings and Errors included in the Execution Report.
- Click OK to permanently remove the selected number and types of execution report entries or click Cancel to leave the report unchanged.
Configuration Tab
This tab contains many parameters required to successfully run an outbound integration endpoint.
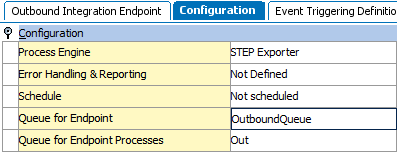
Configuration Section
For the STEP Exporter and Business Rule Based Message Processor process engines, most of the parameters on this section can be edited. The type of editing available varies based on the parameter as defined below.
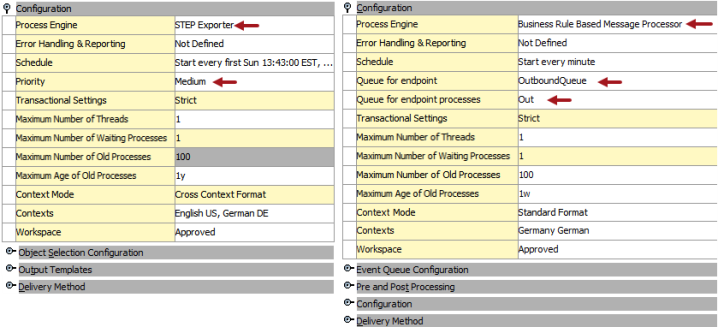
The Transactional Settings parameter cannot be edited and does not have the same significance as for IIEPs. For information, refer to OIEP - Event Based - Configure Endpoint or OIEP - Select Objects - Configure Endpoint.
Depending on the Process Engine selected, a second Configuration section can be displayed. For more information, refer to the Processing Engine parameter in OIEP - Event Based - Configure Endpoint or OIEP - Select Objects - Configure Endpoint.
The following parameters can be edited within the OIEP editor as defined:
- Click the Process Engine, Priority, or Workspace parameter to display a dropdown button. Selections displayed depend on your system setup.
For information on the Process Engine or Workspace, refer to OIEP - Event Based - Configure Endpoint or OIEP - Select Objects - Configure Endpoint.
For information on the 'Priority', refer to the 'Priority Mechanism' section of the BGP One Queue topic in the System Setup documentation.

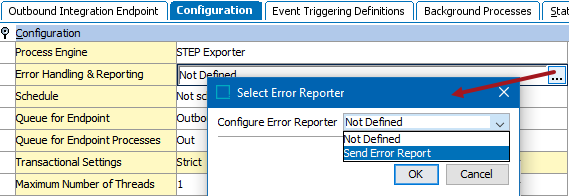
- Click the Error Handling & Reporting, Schedule, or Contexts parameter to display an ellipsis button (
 ). This opens a dialog for editing.
For information on the Error Handling & Reporting or Schedule, refer to the Error Handling & Reporting section of the OIEP - Configuration Section topic.
For information on Contexts, refer to OIEP - Event Based - Configure Endpoint or OIEP - Select Objects - Configure Endpoint.
- Click the Queue for endpoint (legacy), Queue for endpoint process (legacy), Maximum Number of Threads, Maximum Number of Old Processes, or Maximum Age of Old Processes parameter to edit the text with the field.
For information on the Transactional settings, Number of threads, Contexts, and Workspace, refer to OIEP - Event Based - Configure Endpoint or OIEP - Select Objects - Configure Endpoint or Event-Based OIEP Multithreading Support.
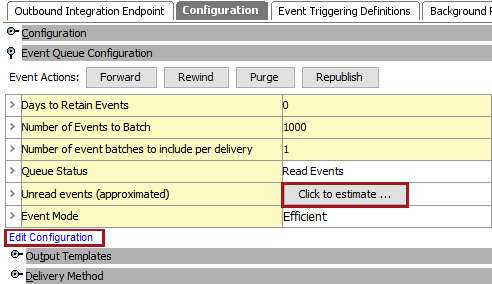
Event Queue Configuration Section
The additional configuration section displayed is determined by the type of OIEP being viewed. Event-based OIEPs include the Event Queue Configuration section.
- The Edit Configuration link allows modification to the parameters displayed.
- The Click to estimate button displays a list of unread events.
- For more information on the Event Action buttons, refer to Event-Based OIEP Event Actions.
Object Selection Configuration Section
the Object Selection Configuration section is only displayed when the selected OIEP uses the Select Objects data source, as defined on the Choose Data Source step of the wizard. For more information, refer to OIEP - Select Objects - Choose Data Source.
- The Edit Configuration link opens a dialog that allows modification to the objects selected for output. For details on the available options, refer to OIEP - Select Objects - Object Selection Configuration Section.

Output Templates Section
This section allows selection of object or event types, in addition to the format required for output. Pre-processors and post-processors can also be set and availability is based on the system configuration.
- Click into a field to display an ellipsis button (). Click the ellipsis button () to display the relevant editor.
- Click the Add configuration link to insert a new row in the table.
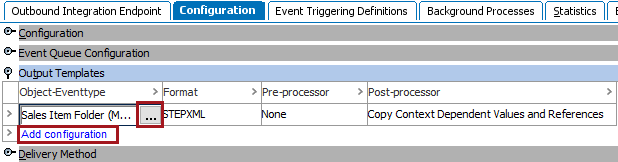
For details on the output templates, refer to OIEP - Event-Based - Output Templates Section or OIEP - Select Objects - Output Templates Section.
Delivery Method Section
Details about the delivery method selected are displayed.
- Click the Edit Delivery link to modify the parameters.
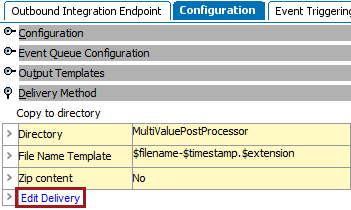
For details on the available options, refer to OIEP - Delivery Method Section.
Background Processes Tab
This tab holds information about any related processes. Click the Background Process ID link to open the individual exporter background process.
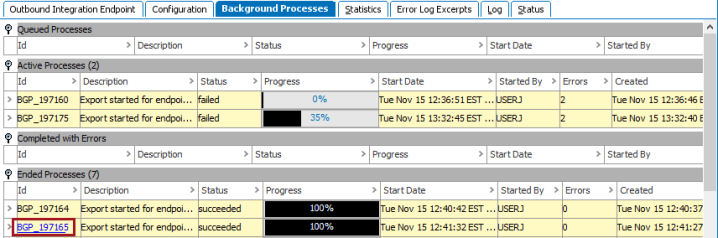
For details on the states of a background process, refer to the BGP States and Quarantine Status topic in the System Setup documentation.
For more information, refer to the Monitoring an OIEP via Background Process topic.
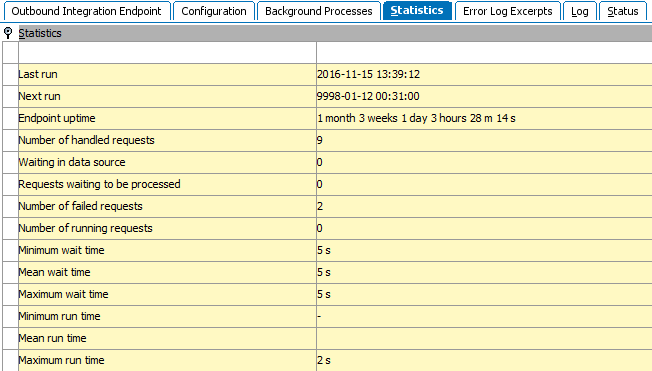
Statistics Tab
This tab provides statistics about the number of requests handled, run times, and wait times. The information cannot be edited nor exported.
Error Log Excerpts Tab
This tab shows data from the main Java log file related to failed background processes with Log Level greater than 'Info.' Click a hyperlink to a failed background process and correct the cause of the failed background process. For more information, refer to Handling Failed OIEP Background Processes.

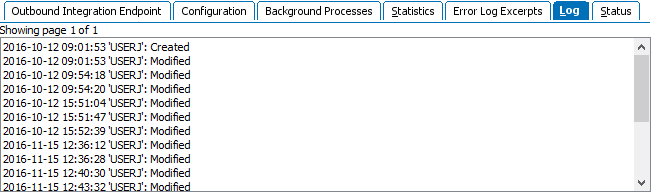
Log Tab
This tab provides information about changes to the OIEP configuration by a user, including the timestamp.
Status Tab
This tab provides information about revisions, hidden values, and diagnostics.
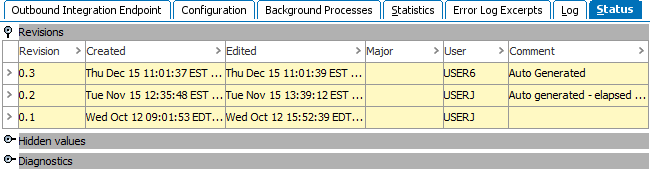
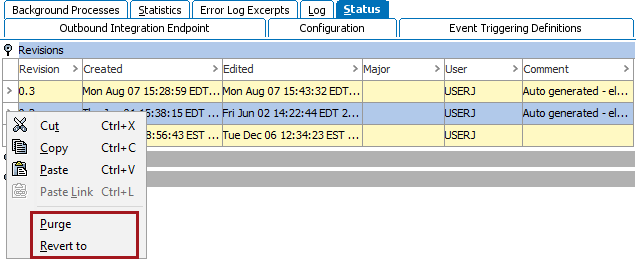
Right-click on the arrow (>) to the left of a revision row to display a menu that allows you to revert to the changes for the selected revision or delete (purge) the selected revision.
For more information on revisions, refer to the Revisions topic in the System Setup documentation.