Creating an event-based OIEP automatically creates an associated event queue. After configuring the OIEP with Event Triggering Definitions, the OIEP then listens for events that match the configuration and sends those to the related queue. The OIEP polls the queue per the schedule, handles the events, marks them 'read', and publishes the data based on output templates.
The 'Days to Retain Events' parameter determines how long events are retained in the queue (when they are removed from the queue) after being read. Common setup for this parameter is between 5 and 10 days. When the setting is > 0, read events stay in the queue for the specified number of days. Retaining events allows you to republish them again should the receiving system lose messages. To do so, rewind the event queue and reprocess already processed events from a specific point in time. For information on setting the 'Days to Retain Events' parameter, refer to the OIEP - Event-Based - Event Queue Configuration Section topic.
For example, if the queue is configured to retain events after they have been read, read events can be distinguished from unread events, as illustrated by the arrow in the following image.
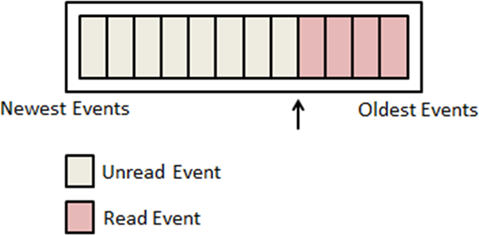
The Forward and Rewind actions essentially lets the user move this arrow:
- Forward action marks unread Events as read (moving the pointer left)
- Rewind action marks read Events as unread (moving the pointer right)
On the OIEP Configuration tab, open the Event Queue Configuration section and use the buttons to modify the queue's events.
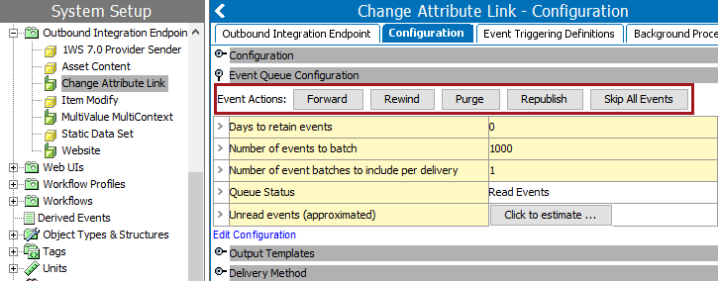
For information on the number and types of unread events, refer to the Event-Based OIEP Queued Events topic.
Generating Events from Main
By default, events are triggered on the Approved workspace. Derived event functionality is available for triggering events prior to approval, as defined in the Derived Events topic in the System Setup documentation.
Forward Events
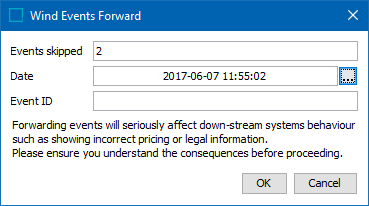
The Forward action requires that unread events exist in the queue. This option is typically used when the unread events in the queue should not be published to downstream systems. For example, consider that you performed a system refresh or data maintenance activity that generated events.
Important: Use caution when forwarding unread events as it may affect the downstream system's data, since the previous changes would be ignored by this activity.
- In the Wind Events Forward dialog, click the ellipsis button (
 ) in the Date field.
 - In the Date Picker, select the date and time from which you want to skip events.
When you have selected a date and time, the Events skipped field shows the number of events that will be skipped.
Note: Event IDs are not shown in the UI but are read from the database, making this a troubleshooting option.
Rewind Events
The Rewind action is only available when the parameter 'Days to Retain Events' is set to a number greater than zero during creation or configuration of the OIEP. This option is typically used when a downstream system did not receive updates from the OIEP, there was a problem with file delivery, or any failure of the OIEP.
-
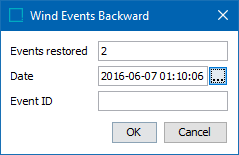
In Wind Events Backward dialog, click the ellipsis button (
) in the Date field. -
In the Date Picker, select the date and time from which you want to restore events.
When you have selected a date and time, the Events restored field shows the number of events that will be restored.
Note: Event IDs are not shown in the UI but are read from the database, making this a troubleshooting option.
Purge Events
The Purge action is only available when the parameter 'Days to Retain Events' is set to a number greater than zero during creation or configuration of the OIEP and there are events in the queue and read events are older than the 'Days to Retain Events' parameter setting. This option is typically used when the unread events are expired, or when the events queued by the OIEP should not be published downstream.
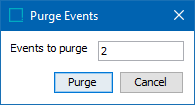
- In Event Actions, click Purge.
- The Purge Events dialog, the number of read events that you can delete from the system is displayed.
- Click Purge to display the events purged along with duration to purge those.
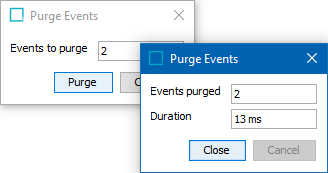
Note: When the number of read events in Purge Events shows 0, forward events to the current date and attempt to purge.
Republish Events
The Republish action generates events on products, classifications, or assets in one or more selected hierarchies. Common setup is to use this option for on-demand creation of republish events. For example, to generate events for all objects in a hierarchy that has never been published by an event queue, or events that were published but the downstream system did not accurately receive the data.
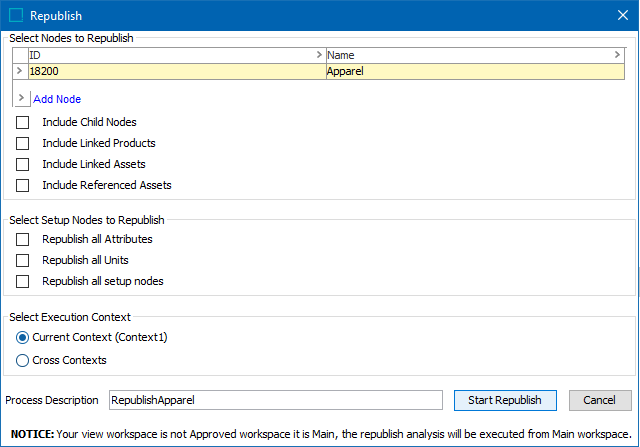
- In Event Actions, click Republish to display the Republish dialog.
-
Click Add node and then browse or search for the hierarchy you want to republish.
-
Select the objects you want to republish. You have the following options:
-
Include Child Nodes republishes all children of the selected object.
-
Include Linked Products republishes all products linked to the selected object.
-
Include Linked Assets republishes all assets linked to the selected object.
-
Include Referenced Assets republishes all assets referenced by the selected object.
-
-
Select the setup nodes you want to republish. You have the following options:
-
Republish All Attributes republishes all attributes linked to the selected object.
-
Republish all Units republishes all units linked to the selected object.
-
Republish all setup nodes republishes all system setup objects.
-
-
Select the Execution Context. You have the following options:
-
Select Current Context to republish in the current context. (shown in parenthesis)
-
Select Cross Contexts to republish child nodes in all contexts.
-
-
In Process Description enter a name for the process and activate the Start Republish button. This is a mandatory field.
- Click Start Republish. Events are triggered on objects that match the selection.
Republish Manually
Additionally, republish events can be generated manually in STEP Workbench as follows:
- From a collection using the Republish option. For more information, refer to the 'Republish' section of the Maintaining Collections topic in the Getting Started documentation.
- Via a business action using the Send Republish Event option, which is available from a business action operation. For more information, refer to the Business Action: Send Republish Event topic in the Business Rules documentation.
- Via Bulk Update using the Send Republish Event operation when the 'matching' add-on component is activated. For more information, refer to the Send Republish Event Operation topic in the Bulk Updates documentation.
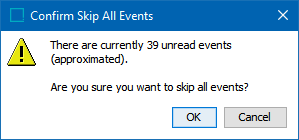
Skip All Events
The Skip All Events action passes over all events without processing and removes them from the event-based outbound integration endpoints.
Click OK to remove all events or click Cancel to leave the events unchanged.