Smartsheets offer suppliers a simple and efficient means for initiating new products into STEP. The guidelines laid out below cover the general process.
Prerequisites
Several setup steps are required before Smartsheets can be used to initiate new products into STEP:
- In Export Manager, create a Smartsheet data template configuration as described in the Smartsheet Data and Template Configurations topic. This export configuration should be configured on the Smartsheet Export Widget so that the end user can select it when exporting a Smartsheet template from the Supplier Web UI.
Important: When exporting Smartsheets, it is important to remember to select the 'SheetExporter' that was created, otherwise an error will occur.
- In Import Manager, create an import configuration as described in Smartsheet Import Configurations. This import configuration should be specified in the accompanying template configuration and/or a supplier item Web UI Smartsheet Import Action. Without a configuration, a Smartsheet cannot be imported into the Supplier Web UI.
- In the Supplier Web UI, configure the Smartsheet Import Action as described in the Smartsheet Import Action topic of the Web User Interfaces documentation. This action is used to import the new product data.
- In the Supplier Web UI, configure the Smartsheet Export Widget as described in the Smartsheet Export Widget topic of the Web User Interfaces documentation. This widget is used to export Smartsheet templates from the Supplier Web UI.
Product Initiation
New products can be initiated into STEP by: exporting a Smartsheet template from the Supplier Web UI, adding product data to the exported Excel file, and ultimately re-importing the edited Smartsheet back into the Supplier Web UI.
The Smartsheet Export widget allows export of a Smartsheet template, i.e., an empty Smartsheet that can be used to on-board new products. It allows you to start the download of the Multi-Level Smartsheet template, using an export configuration. Access is based on the user's supplier privileges, meaning that the component is only available if the user is a member of a supplier group.
Detailed steps for export are:
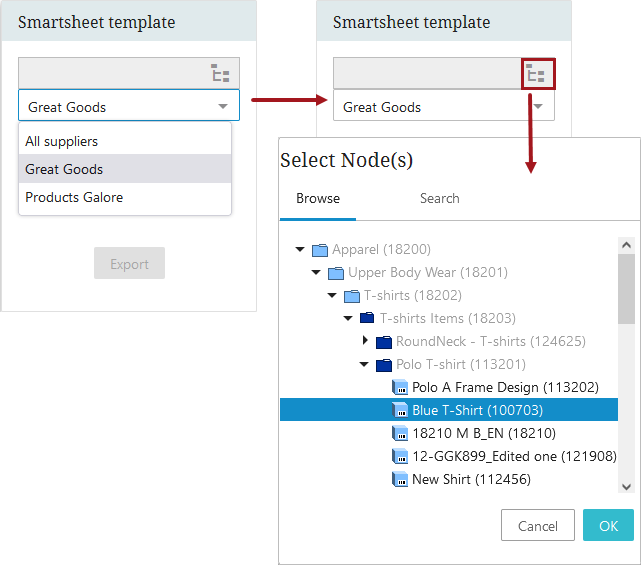
- In the Smartsheet Export widget, click the browse hierarchy button to display the Select Node(s) dialog.
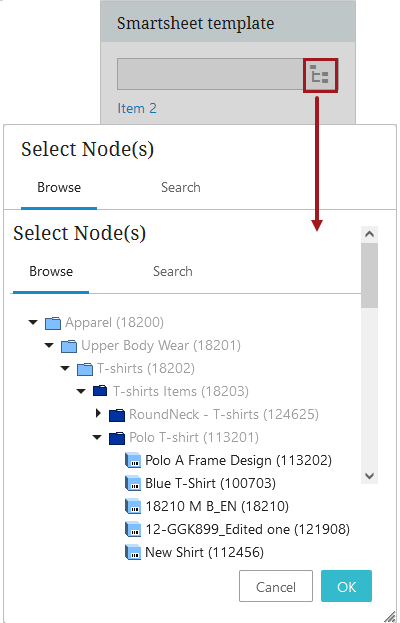
- Select a valid node based on the object type(s) specified in the Smartsheet template and enable the OK button. An 'Invalid Selection' error is displayed and the OK button is not enabled when an invalid node is selected.
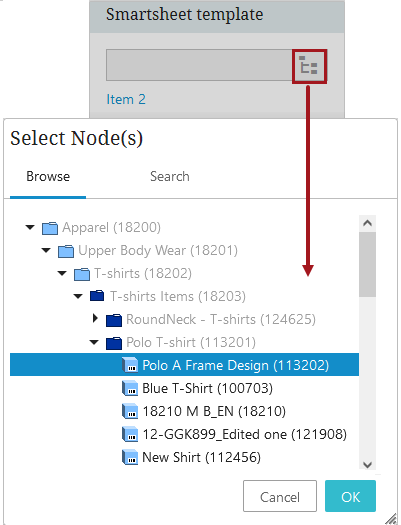
The category specific attributes that appear in the exported Smartsheet are dependent on the selected node and all applicable child nodes. No actual product data is exported.
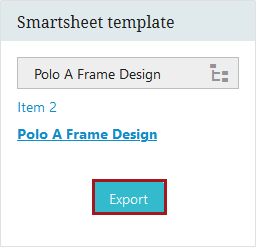
- Click the Export button to start the background process and export the template.
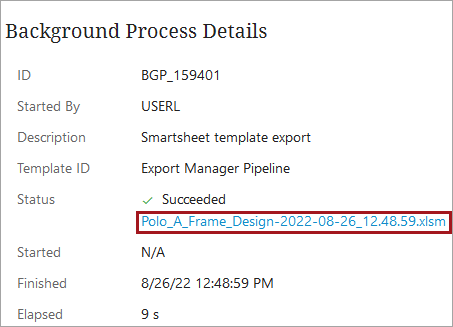
- On the status dialog, click the link to the background process.

The Background Process Details page displays.
- Upon completion of the background process, click the link (for the file extension .xlsm) and choose to open the template.
- Enter product data into the exported Smartsheet.
For more information on navigating and editing a Smartsheet, refer to the Using a Smartsheet topic.
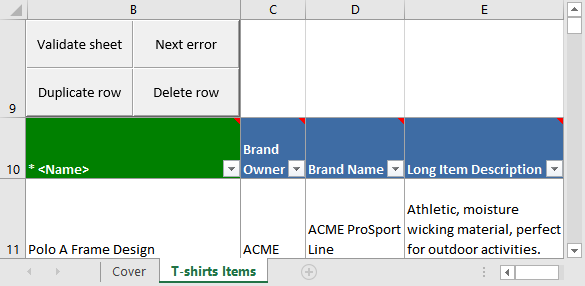
For information about the color coding of the cells, refer to the Cover tab, which is described in the Additional Information About Smartsheets topic.
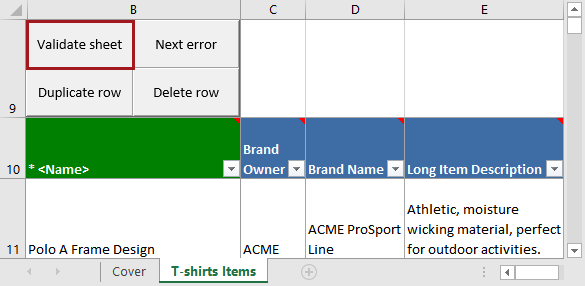
- If required, validate the sheet by clicking the Validate sheet button and following the sheet validation process.
For more information on validating a Smartsheet, refer to the Using a Smartsheet topic.
- Once the sheet has been validated, save the document.
- Navigate back to a supplier item Web UI and click on the Smartsheet Import Action link.

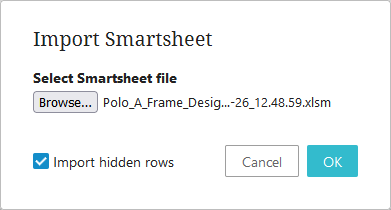
- In the Import Smartsheet dialog, click the Browse button to display a File Upload dialog. Navigate to the Smartsheet, select it, and then click Open.
Checking the 'Import hidden rows' checkbox will ensure that any hidden rows will be included in the import. If you opt not to import hidden rows, the background process will indicate how many hidden rows were skipped.
- Click the newly enabled OK button to import the data via a background process.
Note: If errors occur during import, a Smartsheet file with the products that failed can be downloaded from the import process page. The error messages are displayed as screen tips in the Smartsheet file when hovering over an error cell. Next Error can be used to troubleshoot a set of errors. When the errors have been corrected, the file can be imported again. However, there is limited support for this type of re-import. Some cells will be locked and consequently skipped during import.
Exporting a Template with a Supplier Selector
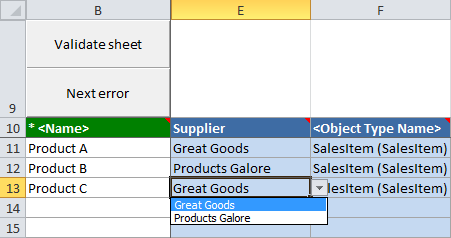
Users that belong to multiple supplier groups can, within a single Smartsheet, load data for all suppliers to which they have access. Once configured, a supplier selector column will appear on the Smartsheet template. Users can select suppliers on a row-by-row basis, with each object being linked to the selected supplier upon import.
For information on how to configure a Smartsheet template with a supplier selector column, refer to the Smartsheet Data and Template Configurations topic.
Important: Before a Smartsheet can be exported with a supplier selector column, ensure that the 'Enable all-view for users that are a member of multiple suppliers' field is set to 'Y' in system properties.
- In the Smartsheet template widget, click the browse hierarchy icon and select a valid node.
- If the user is a member of multiple supplier groups the supplier dropdown will appear underneath the node picker. If the user is only a member of a single supplier user group, the supplier dropdown will not be present.
Users can only make a selection from the supplier groups they belong to. Additionally, when selecting 'All suppliers', the supplier selector column will only include the supplier groups that the user belonged to at the time of the export.
If the user is not a member of multiple supplier groups or the user specifies a supplier using the dropdown, the supplier selector column will not appear in the exported sheet. If 'All suppliers' is selected, the column will appear in the export.
- Click Export and download the Smartsheet.
Users who do not belong to the same supplier group as a product they are working with will be unable to validate the product. Additionally, if the user does not belong to the applicable supplier groups when importing the data, the newly created products will fail to link to their designated supplier groups. To avoid this, set up a business condition to run on import, checking for the supplier link. If the condition fails, then the creation of the product in question is rolled back.
Important: When using a Multi-Level Smartsheet, the supplier selector column can only be included on a top level.