Any number of Multi Language Screens can be added to a Web UI. Once added, as with any screen, an admin user must configure how users access a Multi Language Screen. Other configuration options include configuring a default layout, language dimensions available to users, what headers can users view and edit, and how edits are saved.
This topic addresses design Prerequisites, Creating a New Multi Language Screen, and Configuring:
- Access to a Multi Language Screen
- Multi Language Screen Properties
- Multi Language Editor Properties
- Headers for the Multi Language Editor
- Specific Language Dimensions
Prerequisites
It is expected that anyone configuring the Multi Language Screen component is familiar with the Web UI Designer, as basic concepts for working with the designer are not covered in this section. In addition, users must have appropriate privileges to access the designer. Additional information can be found in the Designer Access topic.
Also, for configuration of the Multi Language Screen, it is expected to be familiar with the Dimension Dependent Data section of the Contexts topic, and know how to use attribute values / attribute value groups, which is explained in the Attribute Value Component topic, and the Attribute Value Group Component topic.
Creating a New Multi Language Screen
Steps for adding a new Multi Language Screen are below. Additional details for creating a new screen are outlined in the Creating a New Screen section of the Design Mode Basics topic.
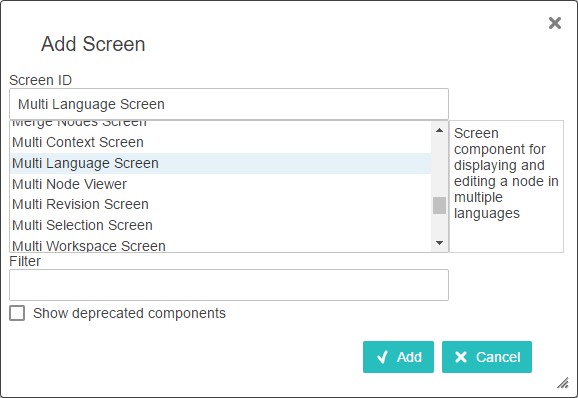
- With the Designer window open, click the New button to create a new screen.
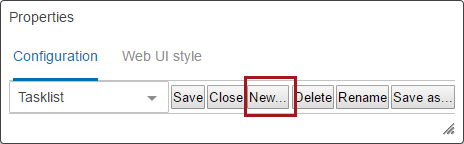
- Choose Multi Language Screen from the screen list.
- Type in a descriptive Screen ID.
- Click Add.
At this point, either close the designer and configure the screen at a later time, or continue on with the steps in the next section.
Configuring Access to a Multi Language Screen
An admin user must configure how a user will access a Multi Language Screen. The Multi Language Screen can be either mapped using Main Properties or added to a Sub Screen Tab Page on a Node Details Screen.
For more information about mapping, refer to Configuring the Parameters in the Main Properties topic, and for more information about Sub Screen Tab Pages, refer to the Tab Pages topic.
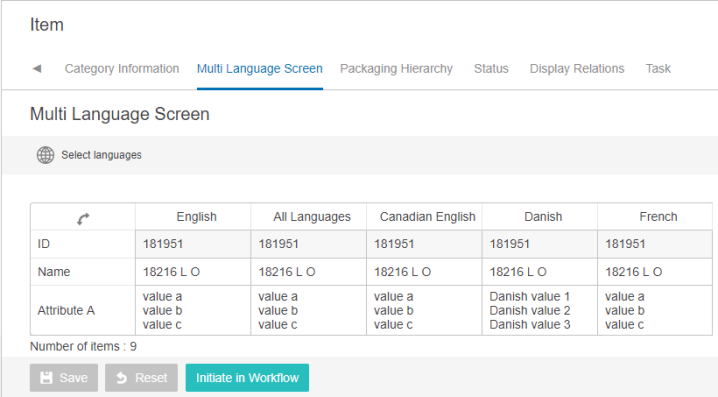
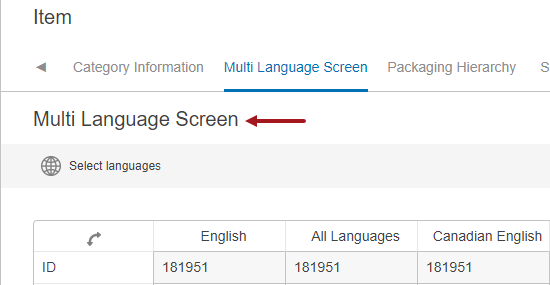
The example below shows the Multi Language Screen displayed as a sub screen tab page on a Node Details screen and is displayed when an object is selected.
Configuring Multi Language Screen Properties
Steps for configuring the Multi Language Screen Properties are below.
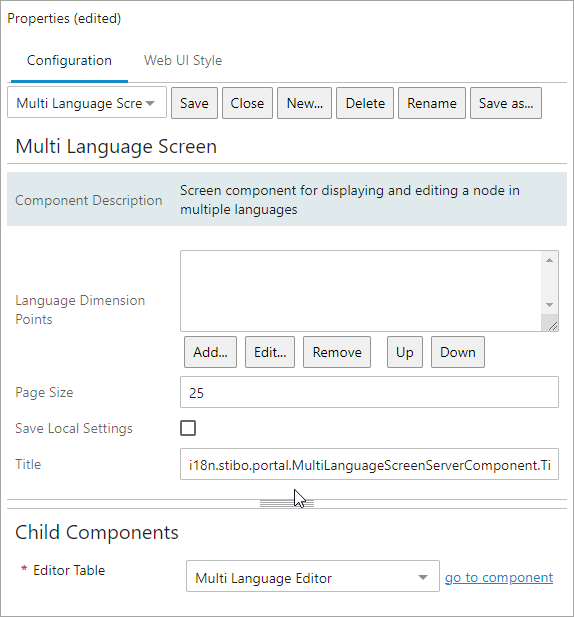
- With the designer window open, select the screen ID for the Multi Language Screen using the screen dropdown list. (If continuing on after creating a new Multi Language Screen, Multi Language Screen Properties should already be displayed.)
- Optionally, add Language Dimension Points to restrict the languages available to the user. When left blank, all languages available within STEP Workbench are displayed to the Web UI user. Steps for adding Language Dimension Points are found in the Adding Language Dimension Points section in the Configuring a Multi Workspace Screen topic.
- The Page Size determines the number of items to show on each page. It defaults to 25. You can increase the page size if you encounter any lazy loading issues.
- Determine if you want to enable the Save Local Settings parameter. If enabled, when a user makes changes to the languages shown on the screen, those changes are saved and the screen will display with the users preferred settings instead of the default. If disabled, the default languages will display each time a user accesses the Multi Language screen.
- Type in a title for the screen, if desired, and the title will display on the screen in the top left corner. When blank, no title appears.
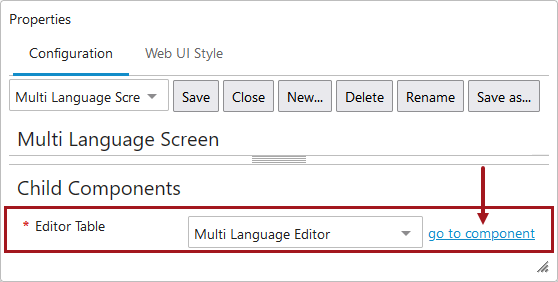
- The Child Components > Editor Table parameter is pre-populated with the Multi Language Editor value dropdown, since it is mandatory to configure the editor before the Multi Language Screen will render correctly.
Configuring Multi Language Editor Properties
Steps for configuring the Multi Language Editor Properties are below.
- Go to the Multi Language Screen Properties > Child Components > Editor Table > Multi Language Editor > Click go to component (as found in the above picture).
The Multi Language Editor Properties will display.
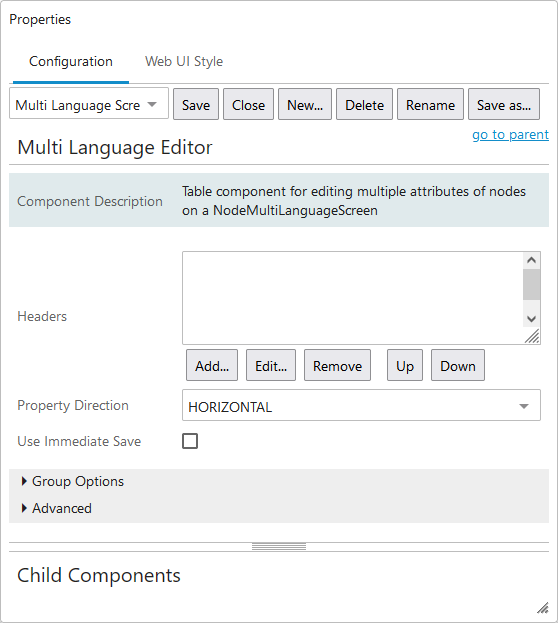
- Adding components to the Headers parameter determines the information that will display on the Multi Language Screen. If left blank then the ID and Title (Language) headers will display. Add, edit, remove, and reorganize table headers, as desired, in the Headers value field. Relevant headers to consider including, as needed, are: ID Header, Name Header, Attribute Value Header and Attribute Value Group Header. Steps for adding Headers can be found in the Adding Headers section below.
- Determine the direction of the table using the Property Direction parameter. If no selection is made, then HORIZONTAL is the default selection and displays after the properties are saved the first time.
- VERTICAL will display the added Headers as rows.
- HORIZONTAL will display the added headers as columns.
- Enable Use Immediate Save if edits made by a user should be auto-saved as soon as the cursor leaves the cell. If the user should be required to manually Click the save button after editing, then leave this parameter disabled. For details, refer to the Auto-Save in the Web UI topic.
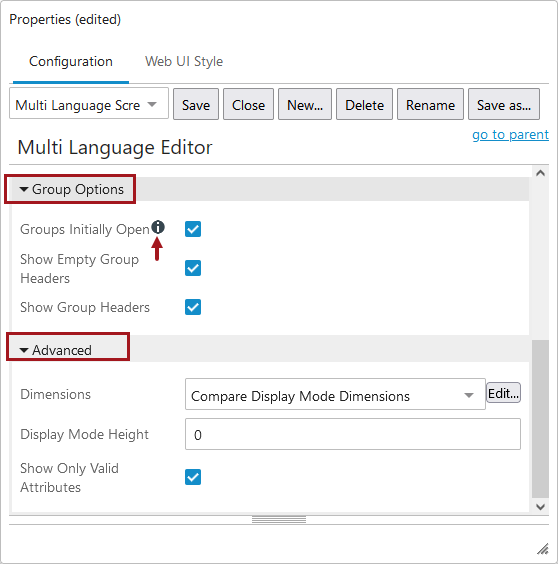
- Display additional optional parameter settings by clicking the Group Options heading and/or the Advanced heading. Make selections as desired. Each parameter features help text, accessible by clicking the information icon to the right of each parameter name.
Group Options Section
- Groups Initially Open: This option works in combination with the option Show Group Headers. If enabled, the attribute groups header will always be displayed open, showing all the attributes underneath the section, unless manually being closed by the user. If disabled, which is the default setting, the attribute groups header will remain closed, and a user has to open the attribute header to access those attributes manually.
Note: If Show Group Headers option is disabled, then the attributes underneath the Attribute Group section will always be opened without group headers displayed.
-
Show Empty Group Headers: If enabled, which is the default setting, it displays the attribute group header even if the attribute group is empty. This occurs even if the 'Show Only Valid Attributes' option is enabled and there are no valid attributes in the group. If disabled, the attribute group headers having no attributes in it is also displayed.
- Show Group Headers: If enabled, which is the default setting, it shows the header for attribute groups. If disabled, all attributes are expanded and displayed without an option to expand or collapse the attribute group header.
- Display Mode Height:This is the height of the top half of the screen in px where the items are displayed.
Note: This is only applicable when ShowDetails is 'true.'
- Show only Valid Attributes: Located under the Advanced section, if enabled, it displays only the attributes which are valid to the selected product. If disabled, which is the default setting, it displays all the attributes, irrespective of the validity to the selected product, which is defined / added in the Headers option.
- Click Save.
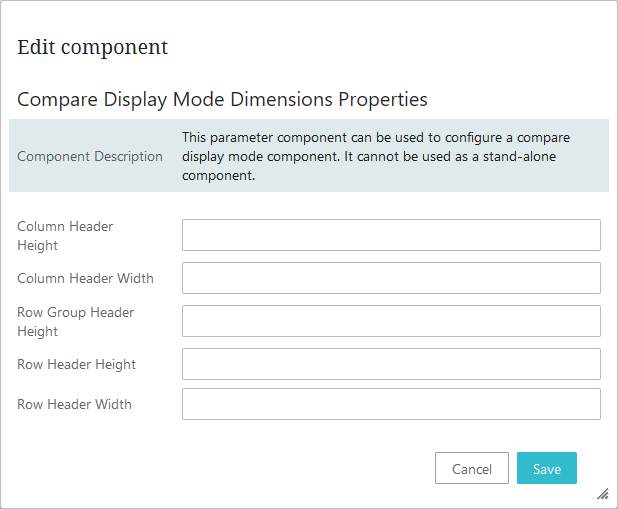
Configuring Compare Display Mode Dimensions
Below are the steps to configure the dimensional properties of ‘Compare Display Mode Component’ in pixels. The dimensional values of the Column header height, Column Header width, Row group Header Height, Row Header height, Row Header width can be configured. This can only be used to configure a compare display mode component and it cannot be used as a standalone component.
- Open the Advanced section > Dimensions
- Select the option Compare Display Mode Dimensions from the dropdown > Select Edit
In the Compare Display Mode Dimensions Properties the following properties are to be filled out:
- Column Header Height: Alters the height of the column header in pixels.
- Column Header Width: Alters the width of the column header in pixels.
- Row Group Header Height: Alters the height of the grouping row headers in pixels.
- Row Header Height: Alters the height of the row header in pixels.
- Row Header Width: Alters the width of the row header in pixels
Configuring Headers for the Multi Language Editor
To display specific attribute values within the Multi language Screen, an admin user must add and configure Headers within the Multi Language Editor Properties. If left blank then ID and Title (Language) headers will display.
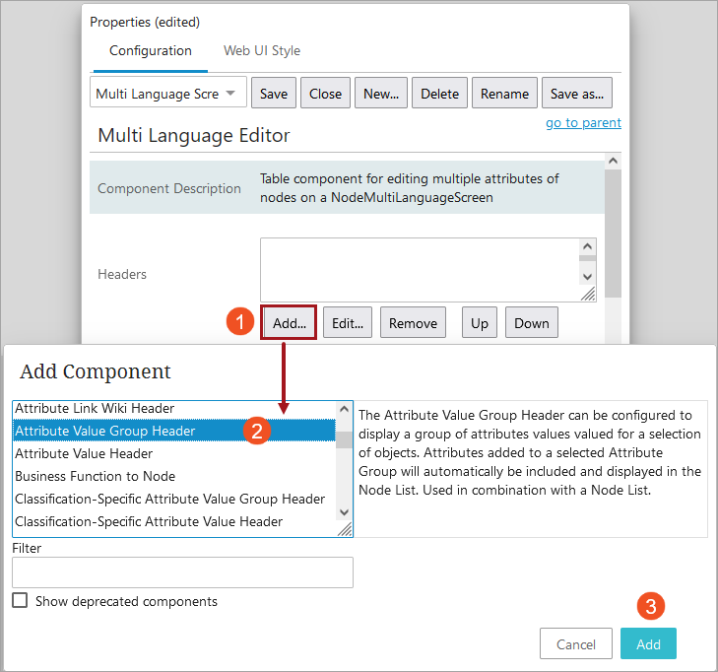
- Go to the Multi Language Editor Properties > Headers > Click Add.
- The 'Add Component' for the Multi Language Editor Properties will display. Attribute Value Header and Attribute Value Group Header can be used to display the attribute values.
- After the selection is made, click Add to close the dialog. Fill out any required properties that may display after a selection is made, clicking Add again to return to the Multi Language Editor Properties. Add, edit and organize any additional headers.
- Click Save.
- Click Close.
Configuring Specific Language Dimensions
If only specific languages need to display to the Web UI user, then the following steps can be used to display specific language dimension points. When left blank, users will view all languages within STEP.
- Go to Multi Language Screen Properties > Language Dimension Points. Click Add.
- The Language Dimension Point Parameter Properties dialog will display. Click the ellipsis button (
 ) for the Dimension Point parameter.
 - The 'Select Node(s)' dialog will display. Select one language.
- Click OK.
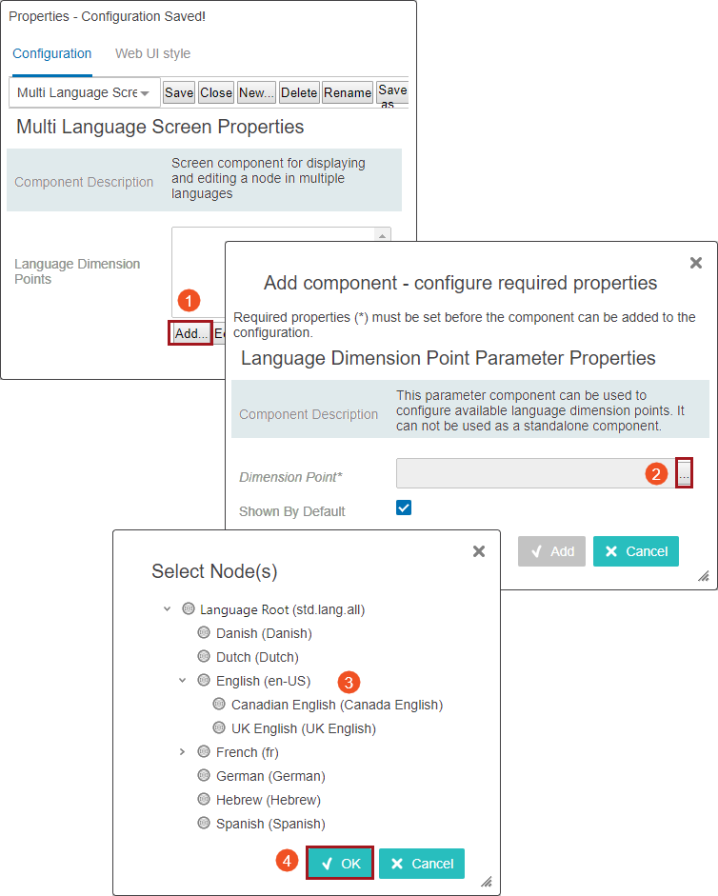
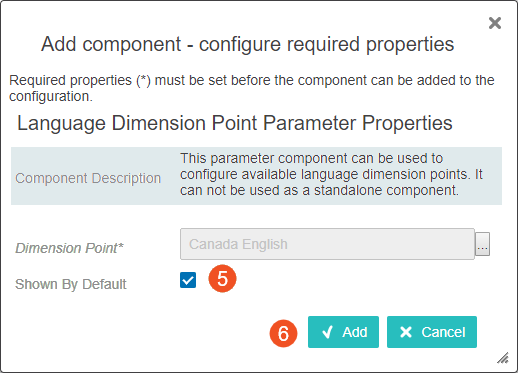
- You are returned to the Language Dimension Point Parameter Properties dialog. The checkbox for Shown By Default is enabled by default. Selecting this ensures the selected language dimension will display when a user navigates to the Multi Language Screen, unless Save Local Settings is enabled.
- Click Add.
- The Multi Language Screen properties will display. Add additional language dimension points by repeating the 'Adding Language Dimension Points' steps.
- If a user will need the ability to select other language dimension points, after the selected languages display by default, repeat the steps above and disable the Shown By Default option. This will allow a user to select the language from the 'Select languages' icon, but not show those languages by default.
- Click Save.
For an example regarding how to use the screen once configured, refer to the Multi Language Screen topic.