On a ‘Node Details’ screen in the Web UI, 'Find Similar in Workflows' enables users to use Find Similar as a governance feature to prevent the creation of duplicates.
When creating a new object, governance is enforced by using a workflow to ensure that users cannot create objects without having to mark potential duplicates as 'Confirmed Non Duplicates'. Only after completing that step is the user allowed to continue with the creation of a new node. The task of verifying that the new node is not a duplicate can also be assigned to a second user with privileges to approve the new node.
This topic includes the following sections:
-
Using 'Find Similar in Workflows' on a Node Details screen
-
Creating a Workflow for Find Similar on a Node Details Screen
-
Configuring 'Find Similar in Workflows' in the Web UI
Using 'Find Similar in Workflows' on a Node Details Screen
The following example shows how to use 'Find Similar in Workflow'. When the user initiates new items, the system guides the user to ensure that the user explicitly confirms that potential duplicates are 'Confirmed Non Duplicates' before the user is able to continue.
-
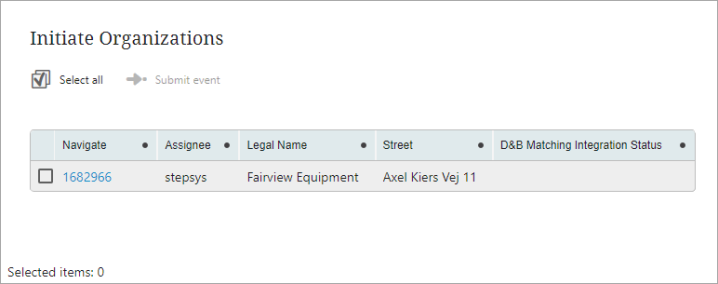
Create a new object by clicking the 'Initiate' link on the 'Status Selector Homepage Widget' in the Web UI.

-
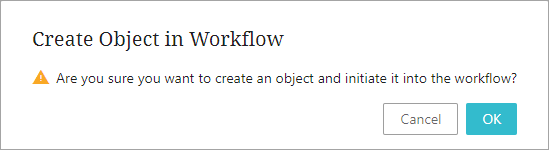
In the pop-up dialog that opens, the user clicks OK to create an object and initiate it into the workflow.
-
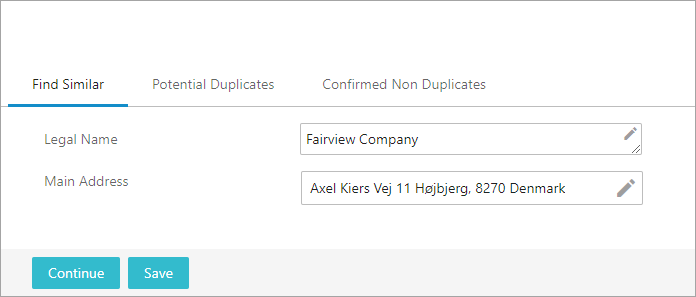
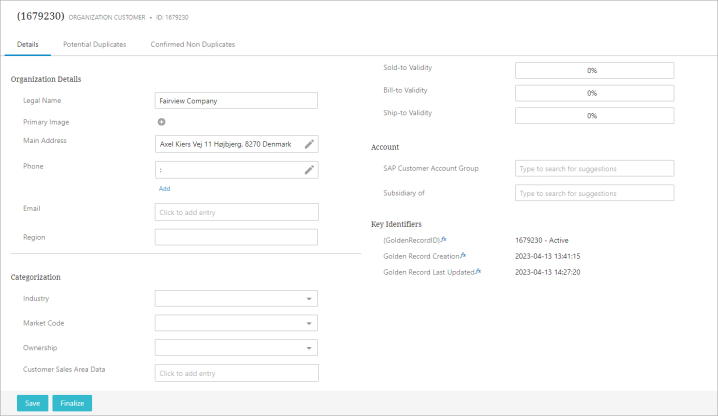
On the 'Node Details' screen that opens, the user enters data in the search fields, and then clicks Continue to submit the object.
-
Upon submission, the new node is saved, and new match codes and rank scores are calculated. If there are no potential duplicates, a message displays that the new node has no potential duplicates, and the user can now continue to the next screen and enter more data.
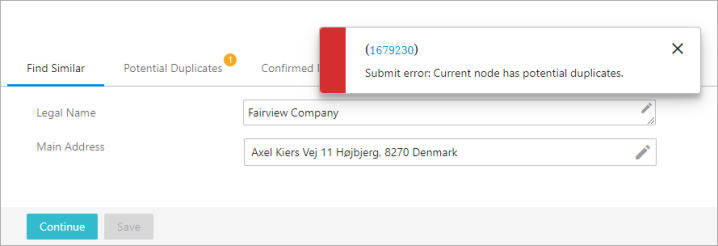
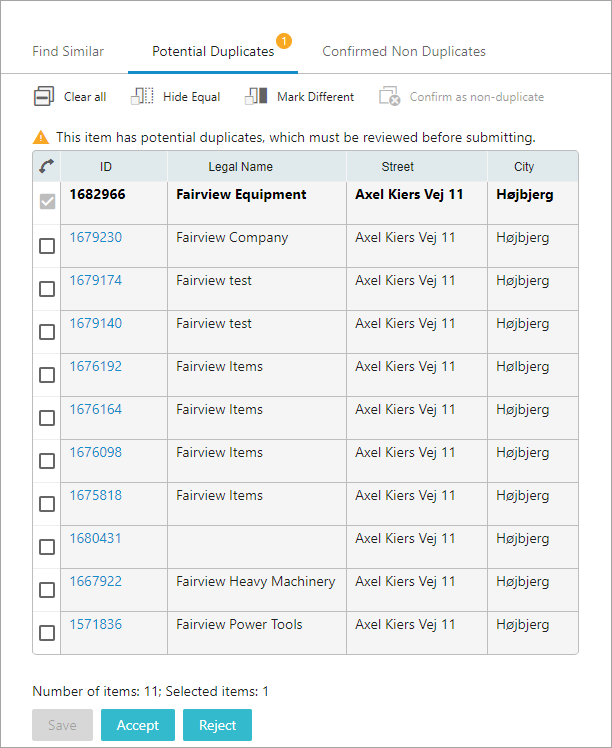
However, if the system finds potential duplicates, a yellow warning icon appears on the 'Potential Duplicates' tab, and an error dialog displays informing the user that the object has potential duplicates that must be resolved before the user is able to continue.
The potential duplicates are displayed in a table on the 'Potential Duplicates' tab, where the user can review them and, if they are not duplicates, mark them as 'Confirmed Non Duplicates' and select 'Confirm as non-duplicate'.
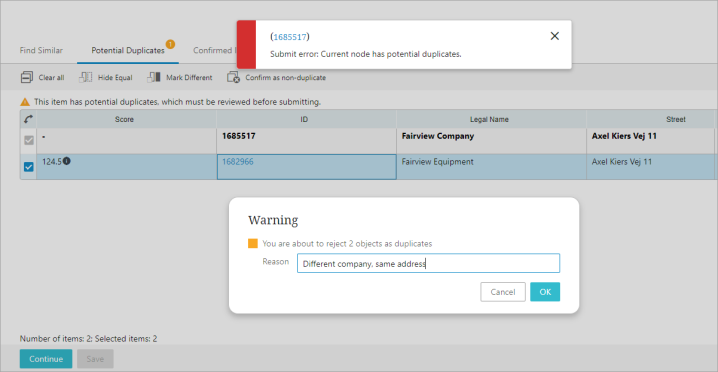
Again, a warning message displays to warn the user of the risk of rejecting the objects as duplicates, and the user has the option to write a message with the reason for the rejection.
-
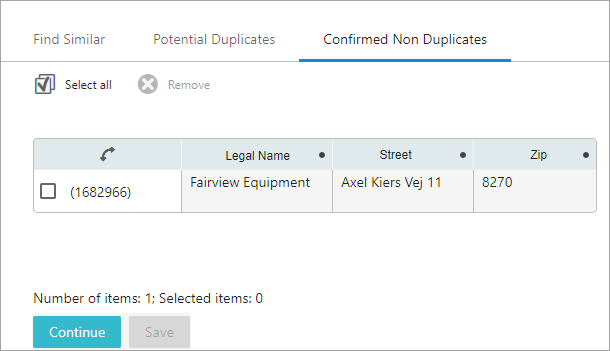
If the user confirms the new objects as non-duplicates, they are moved to the result list on the 'Confirmed Non Duplicates' tab.
-
When there are no longer any potential duplicates listed on the 'Potential Duplicates tab', the user is allowed to click Continue and enter more data.
The task of reviewing potential duplicates can also be assigned to another user with privileges to either approve or reject the new objects. In this case, the user who initiates the new item, User 1, does not have permission to confirm any potential duplicates as non duplicates.
User 1 creates a new object:
-
Clicks on the 'Initiate' link.
-
Clicks OK to create an object and initiate it into the workflow.
-
Enters data in the search fields and clicks the Continue button.
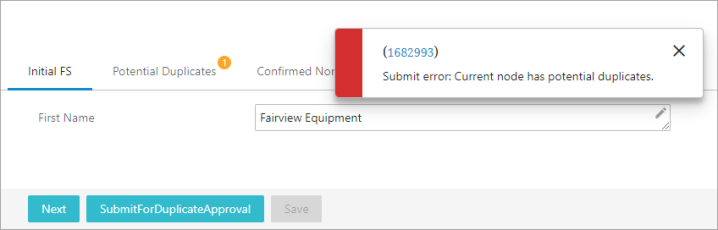
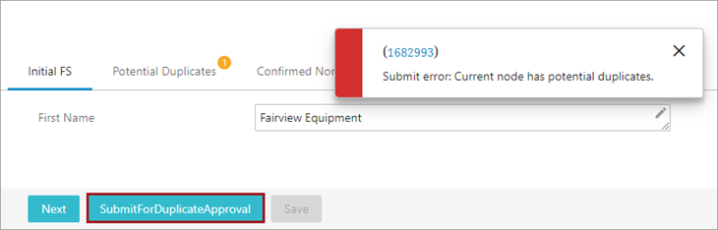
If there are no potential duplicates, the user is allowed to continue to the next screen and enter more data. In the opposite case, if the new node has potential duplicates, when clicking Continue, the user receives an error message and an error symbol appears on the 'Potential Duplicates' tab. In this case, the user now has the option to select SubmitfForDuplicateApproval, which submits the potential duplicate for duplicate approval by another user, User 2, who has privileges to decide whether the new objects are duplicates.
To review the new item, User 2:
-
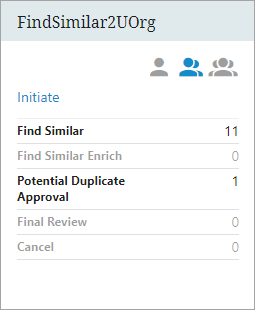
Clicks on the ‘Potential Duplicate Approval’ link on the Status Selector Homepage Widget in the Web UI.
-
On a screen similar to the one that User 1 used when creating the new object, on the 'Potential Duplicates' tab, User 2 can inspect the potential duplicates by clicking on the nodes to view details.
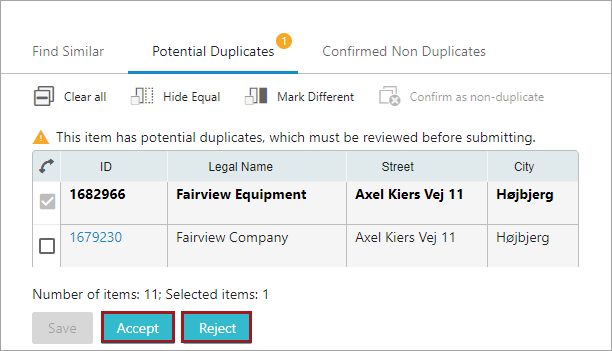
If the object is not a duplicate, User 2 marks it and selects Confirm as non-duplicate. This moves the object to the 'Confirmed Non Duplicates' tab, and when User 2 clicks the Accept button, the task is assigned back to User 1 who can continue in the workflow and enter more data.
If, however, User 2 decides that the new node is a duplicate, User 2 clicks the Reject button to return the object to User 1, and a message might be supplied with the reason for the rejection. In this case, User 1 has the option to either edit the node or delete it.
Creating a Workflow for Find Similar on a Node Details Screen
Find Similar on a 'Node Details' screen is governed by a workflow with business conditions on the transitions that prevent the user from proceeding to the next step before any potential duplicates have been resolved.
The following elements are available to configure a 'Find Similar in Workflows' solution:
-
Workflow - Create a workflow as described in details below. Configuration requires that the user is familiar with the creation of workflows. For more information, refer to Creating a Workflow topic in the Workflows documentation.
-
'No Potential Duplicates' business condition - The ‘No Potential Duplicates’ business condition is used in Find Similar workflows to only allow transition when there are no potential duplicates. For more information, refer to the Business Condition: No Potential Duplicates topic in the Business Rules documentation.
-
Matching algorithm - The configuration of the business condition should contain a matching algorithm that is configured and available in the global configuration ‘Matching on Save Configuration’ (mandatory). Only identifying matching algorithms are valid. When the matching algorithm is configured, all save actions in the Web UI will result in the calculation of match codes and rank scores to verify if there are any potential duplicates within the configured threshold. For more information, refer to the Configuring Matching Algorithms topic in the Matching, Linking, and Merging documentation.
-
Business condition type 'NOT' - The 'NOT' business condition is used in the two-user case to invert the result of the No Potential Duplicates business condition. When the 'NOT' condition is added to the No Potential Duplicates business condition, this allows transition when duplicates are found so that the user can assign them for duplicate review by another user. For more information, refer to the Business Condition: NOT Condition topic in the Business Rules documentation.
-
Matching on Save Configuration must be configured for the solution to work. For more information, refer to the Update Match Scores on Save in Web UI topic in the Matching, Linking, and Merging documentation.
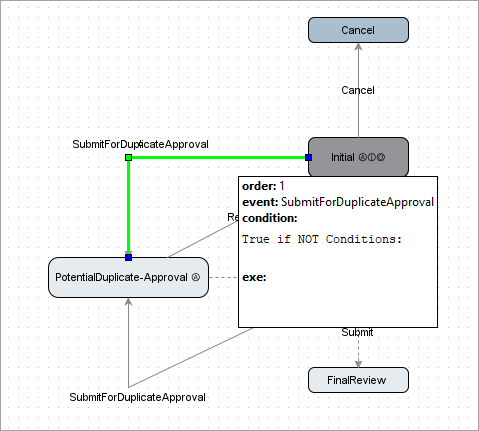
The image shows a workflow configured for a single user:
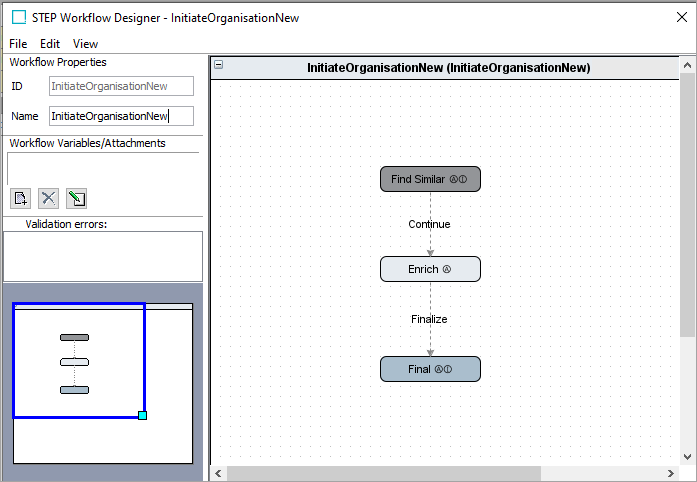
The workflow starts in an Initial state, where the user enters data required for the matching algorithm to identify potential duplicates. On saving the new node, match codes and rank scores are calculated and stored, and if no potential duplicates are found, the user can submit and transition to the Initial-Enrich state to enter more data.
To prevent the user from transitioning to the enrichment state if there are any potential duplicates to the node, the 'No Potential Duplicates' business condition is added to the transition that is executed on submit. If there are any objects with a rank score within the configured threshold in the matching algorithm, the business condition will return 'false' and prevent transition. If it identifies potential duplicates, the user must resolve them before continuing in the workflow.
If you wish to set up a two-user scenario, as in the example below with the second user added to the left, the business condition type 'NOT' can be used to invert the result of the No Potential Duplicates business condition, so that 'true' is converted to 'false' and 'false' is converted to 'true'.
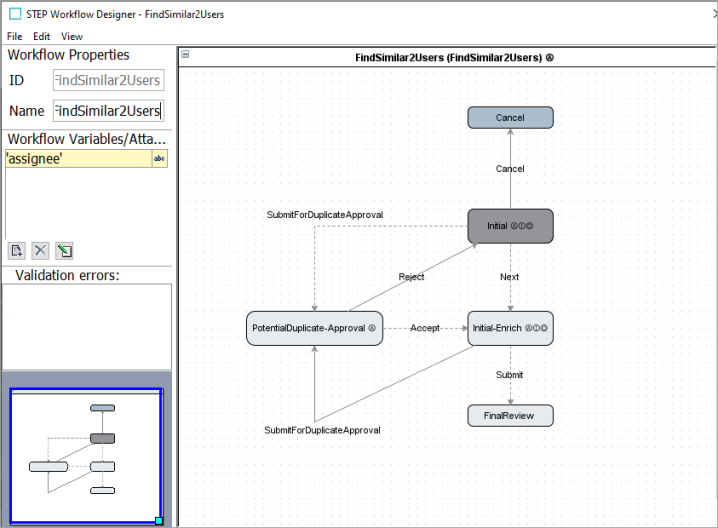
Using the 'NOT' condition allows the user to only submit for duplicate approval when there are potential duplicates.
Configuration of Find Similar Workflow
To configure a Find Similar Workflow in the workbench, follow these steps:
Workflow configuration for a single user
-
Workflow start state 'initial attributes for find similar'.
-
Transition with business condition to check for potential duplicates.
-
Workflow enrichment state.
Workflow configuration for a two-user scenario
For User 1:
-
Workflow start state 'initial attributes for find similar'.
-
Transition with business condition to check for potential duplicates.
-
If there are no potential duplicates, continue to point 3.
-
If there are potential duplicates, move task to ‘Potential Duplicate Review’ and assign to user group. Continue to User 2.
-
-
Workflow enrichment state. This will create the object, and the user has finished the task.
For User 2:
-
Workflow start state ‘Show all details for this object’.
-
Reject task if it is a duplicate and move task to User 1.
-
Accept task if it is not a duplicate and move task to User 1. By accepting, all potential duplicates are marked as ‘Non Duplicates’.
Configuring 'Find Similar in Workflows' in the Web UI
Steps for configuring 'Find Similar in Workflows' in the Web UI are outlined below. For more information on configuring workflows in the Web UI, refer to the Workflows in Web UI topic of the Web User Interfaces documentation.
Log in to the Web UI and select Design Mode.
-
Create a new Web UI page 'Create Object in Workflow':
-
Set the 'Object Type ID' (in the example 'OrganizationCustomer').
-
Select the 'Root' for the new objects.
-
Check the 'Show Create Warning' checkbox if a dialog should display to inform the user that a new object is about to be created.

-
-
Create a new Web UI page 'Forwarding Switch Screen':
-
On the 'Forwarding Switch Screen', click Add to add mappings.
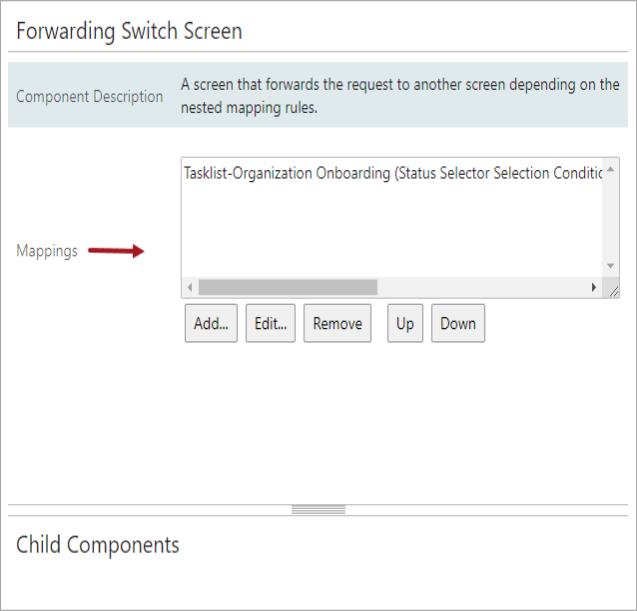
Note: To configure the workflow, it is required to create a task list. For more information, refer to the Task List topic.
-
-
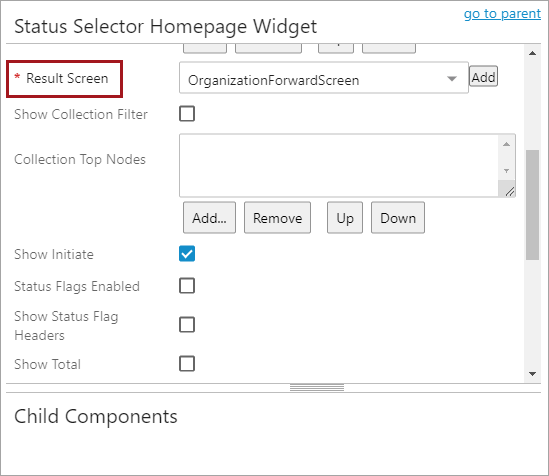
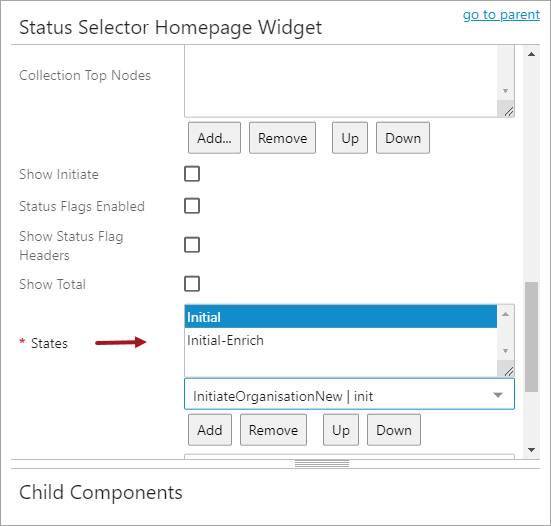
On the 'HOMEPAGE' screen, in the 'Status Selector Homepage Widget':
-
Set the 'Initiate Screens' parameter to 'OrganizationCreateObjInWF' to use the 'Create Object in Workflow' screen created above.

-
Set the 'Result Screen' parameter to 'OrganizationForwardScreen', which will navigate to the task list of the workflow.
-
Add 'States' into the workflow by clicking the Add button under the field. To change the order of the created states, select the relevant state and click the Up and Down buttons.
-
Select the 'Workflow' (in the example above 'InitiateOrganisationNew').
-
-
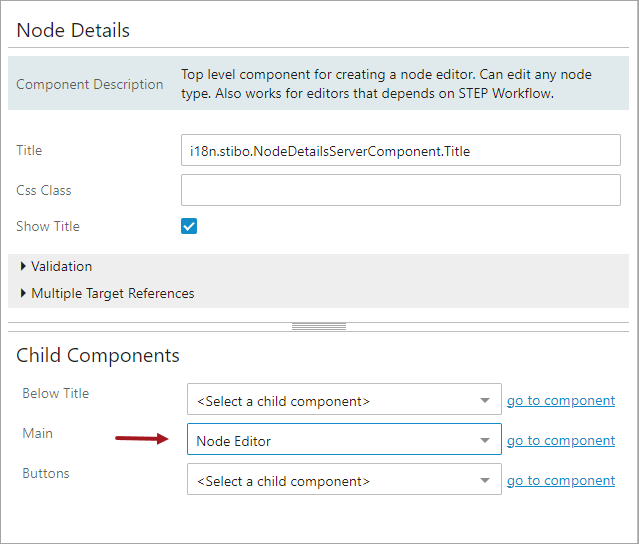
On a 'Node Details' screen, configure the screens:
-
To add attributes, select the relevant screen type from the dropdown, and in the 'Child Components' area, from the 'Main' dropdown, select the 'Node Editor' and click the 'go to component' link.
In the ‘Node Editor’, click the Add button under the ‘Rows’ field to add ‘Attribute Value Components’.
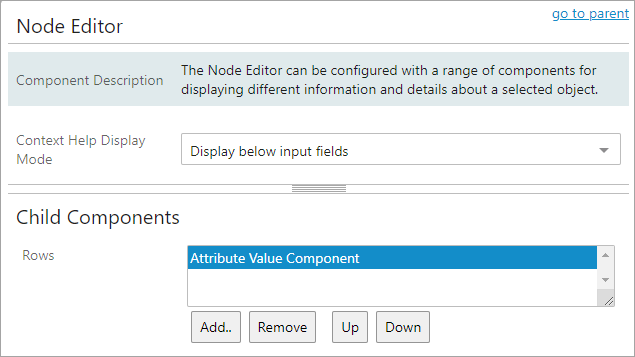
In this example, for the ‘FSInitial’ screen, only a single attribute has been added (for the first name). This will contain the sufficient amount of data for the matching algorithm to create match codes and rank scores. Continue with the creation of attributes for the ’FSInitial-Enrich’ screen, where the user can enter the remaining data to complete the object creation.
-
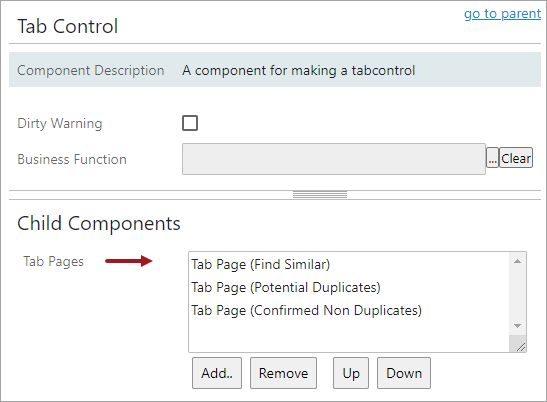
Use 'Tab Pages' to configure the tabs 'Find Similar', 'Potential Duplicates', and 'Confirmed Non Duplicates'. While the two first are mandatory, the latter is not, but it can be useful to have for review purposes. To add the tab pages, in the 'Child Components' area, select 'Tab Control' in the 'Main' dropdown and click the 'go to component' link. In the 'Tab Control' screen, click the Add button under the 'Tab Pages' field.
-
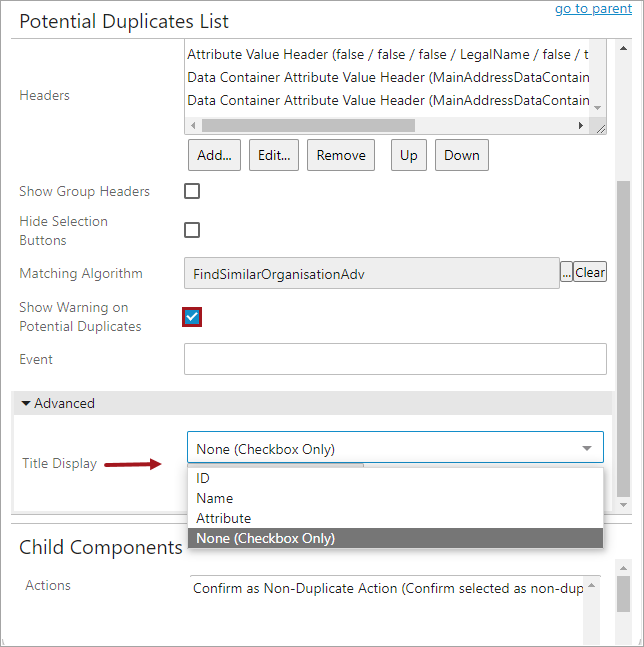
On the ‘Tab Page’, in the ‘Child Components’ area, select the ‘Potential Duplicates List’ in the ‘Tab Content’ dropdown, and click the ‘go to component’ link to configure the list. For instance, it is possible to enable or disable the option to 'Show Warnings on Potential Duplicates' and to select 'Title Display' on the checkmark. For more information, refer to the Potential Duplicates List topic in the Matching, Linking, and Merging documentation.
-
Select 'Buttons' in the ‘Child Components’ area on the 'Node Details' screen, and click the ‘go to component’ link to configure the 'Submit Action' button and add the parameters to the workflow. For instance, if the 'Button Label' parameter is set to 'Submit', a button named 'Submit' will be created for each transition in the workflow. For more information, refer to the Submit Action topic.
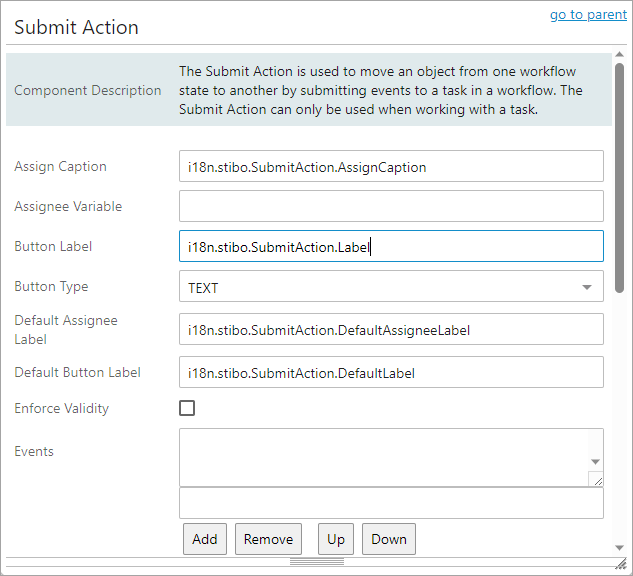
Note: If the 'Run Business Action' button is configured, 'Save before Execute' must be enabled for it to work.
-
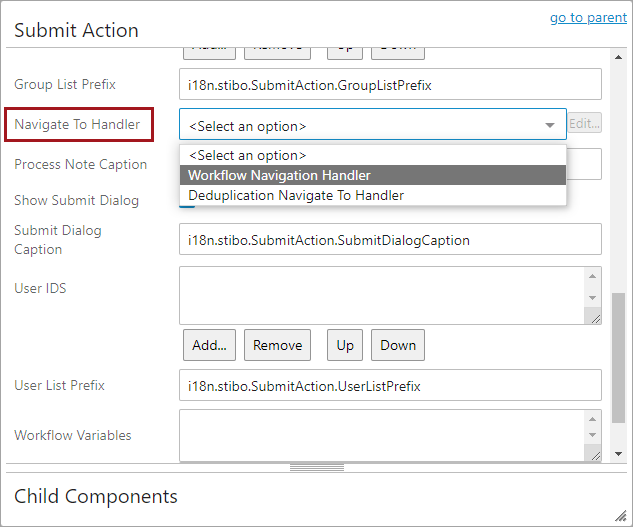
Set the 'Navigate to Handler' parameter to 'Workflow Navigation Handler'. Once it has been enabled, it follows the task through the workflow, navigating the user to the next screen for that task. For more information, refer to the Workflow Navigation Handler topic.
-
-
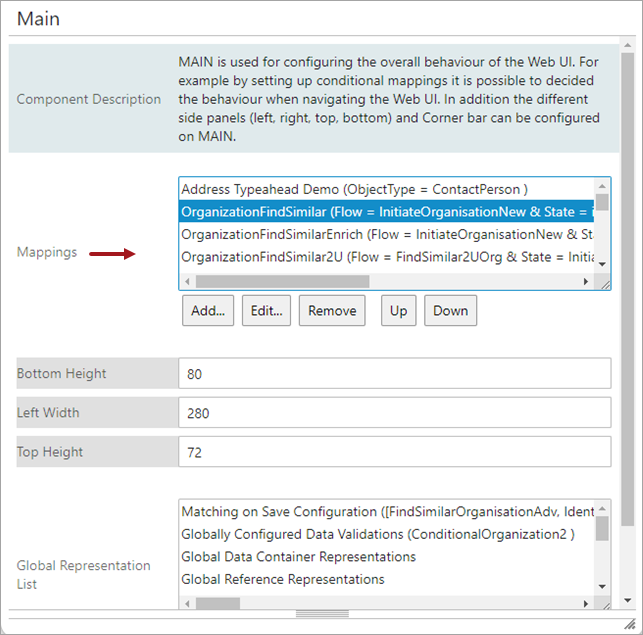
On the 'Main' screen, configure a mapping for the workflow:
-
In the 'Mappings' field', select a workflow state and click the Add button.
-
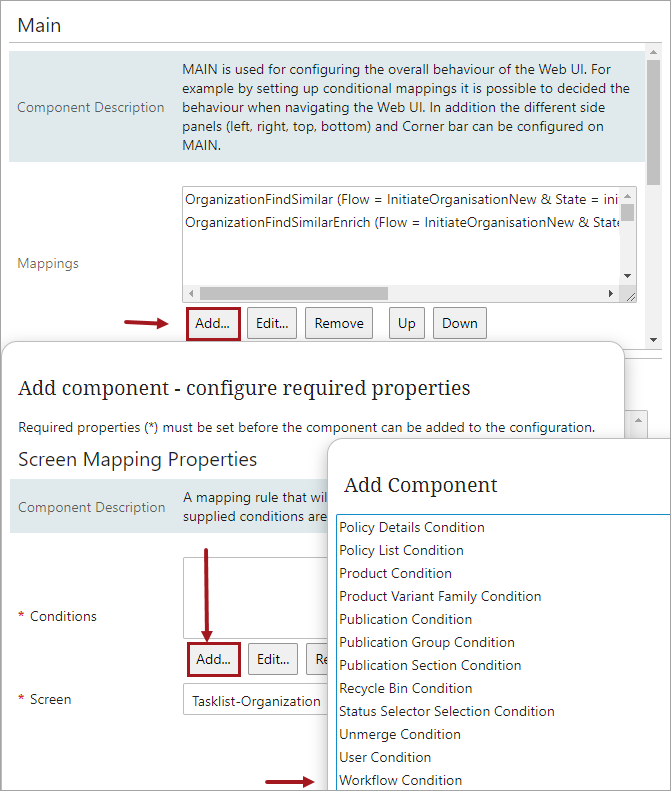
In the 'Screen Mapping Properties' screen that displays:
-
Set the 'Conditions' parameter to 'Workflow' by clicking the Add button under the field and selecting from the dropdown list.
-
Set the 'Screen' parameter: Click Add to select the screen that should display when the condition has been met, type a 'Screen ID' for the selected screen, and click Add. In the below example, the 'Tasklist-Organization' screen has been selected for the 'FS-Initial' workflow state.
-
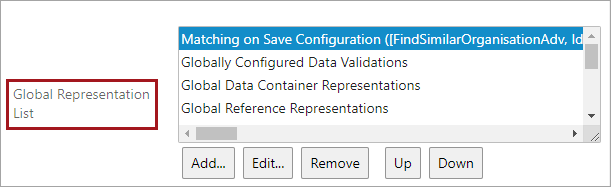
On the 'Main' screen, set the 'Global Representation List' parameter to 'Matching on Save Configuration', which holds the identifying matching algorithms that will be used to calculate match codes and rank scores. For more information, refer to the Update Match Scores on Save in Web UI topic in the Matching, Linking, and Merging documentation.
-
-
Configuring a two-user scenario in the Web UI
When configuring a two-user scenario of 'Find Similar in Workflows' in the Web UI, create the screens so that User 1 and User 2 each have the relevant action buttons on the screen.
In this scenario, on the 'Potential Duplicates' tab, User 1 does not have access to the action to 'Confirm as non-duplicate', but instead needs to have an additional SubmitForDuplicateApproval action button to assign the approval task to User 2.
User 2, on the other hand, has access to the action to 'Confirm as non-duplicate', and the Accept and Reject buttons are available for accepting or rejecting the relation.
If User 2 rejects the potential duplicate, the task is assigned back to User 1, who initially created the object.
Rejecting a task back to a previous state to the user who initially worked on it can be done by using a business rule. For more information, refer to the Assigning Tasks Using Business Rules topic in the Workflows documentation.