Using 'Scene7 Adapter' requires the following one-time setup steps, including creating required elements and configuring the component model.
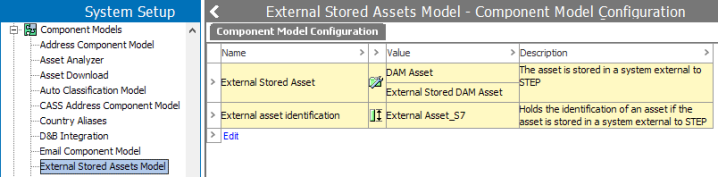
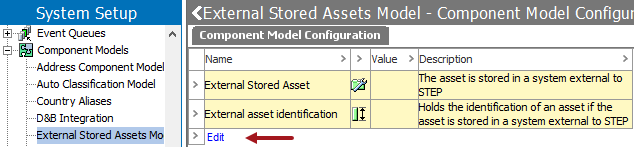
Review your System Setup tab to determine if the component model setup has already been completed. The selections in the Value column on your system are not required to match the ones in the image below.
This topic covers each of the items required to fully set up an external DAM:
-
Prerequisite - enable the 'Scene7 Adapter' license
Prerequisite
Although the 'Scene7 Adapter' functionality is part of baseline, you must activate the functionality via the X.Adapter.Scene7 license. Contact Stibo Systems to begin the process of enabling a license or licenses for your system. When activated, the 'External Stored Assets Model' is displayed within the Component Models node in System Setup.
Create the Required Elements
Create one or more object types, a description attribute, and a classification for the externally stored assets.
-
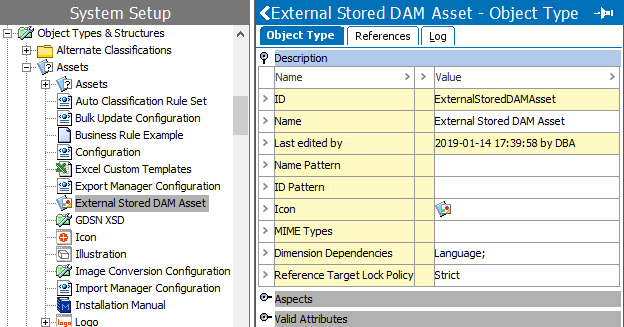
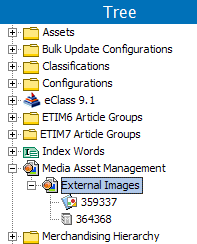
In System Setup, create one or more asset object types to identify assets stored externally, as defined in the Creating an Object Type topic in the System Setup documentation.
-
In System Setup, create a description attribute to hold the location of the externally stored asset, as defined in the Creating Attributes topic of System Setup documentation.
-
On the Attribute tab, set the Externally Maintained parameter to No.

-
-
On the Validity tab, under the Valid for Asset Types, check the external asset object type(s) created above.
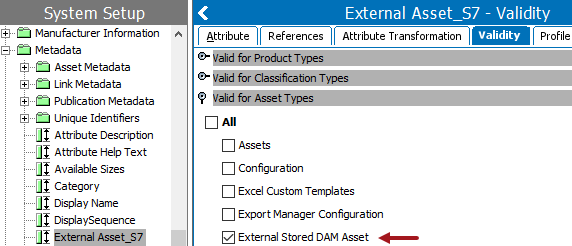
The attribute is displayed under the Description flipper on the defined object types.
-
On the Tree tab, create a classification hierarchy to store metadata of the external assets in STEP, as defined in the Classifications topic in the Getting Started documentation.
Configure the External Stored Assets Component Model
Set the newly created external asset object type and attribute in the component model.
-
In System Setup, open the Component Models node, select the External Stored Assets Model node, and click the Edit link to open the editor.
-
Double click the plus button (
 ) to display a dialog to assign the required objects to the model.
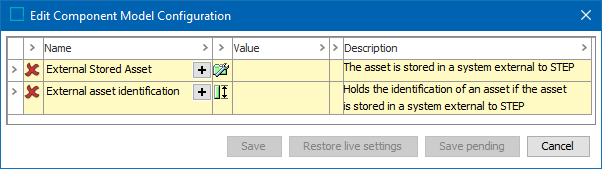
-
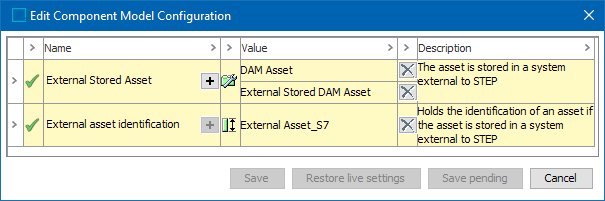
External Stored Asset: Choose the asset object type(s) that represent assets outside of STEP.
-
External asset identification: Choose the attribute that holds the ID for the external assets.
-
-
Make any required corrections:
-
The plus button (
) remains active for parameters that allow multiple selections, such as the External Stored Asset parameter above. Select another object if required. -
Double-click the delete button (
 ) to remove a selection.
 -
The first column shows the status of the parameter. A green check (
 ) means the configuration has no errors; a red X (
 ) means additional setup is required.
 -
Click the 'Save pending' button to save your work while error(s) exists.
-
Click the 'Save' button to save a configuration once it has no errors.
-
Click the 'Restore live settings' button to undo the changes made to a previously error-free, saved configuration.
-
Click the 'Cancel' button to undo all changes made in this dialog.
-
Set the Configuration Properties
The sharedconfig.properties file must be configured with templates that define how the assets can be accessed. For example, consider the value in the sample 'External Stored Attribute' shown below:

The attribute value matches the following property:
Scene7DownloadContentPlugin.CanHandle0 = handleID://([A-Z0-9_-]*).*?lang=([a-zG][a-zL])
And uses the following property to extract the thumbnail used in the workbench:
Scene7DownloadContentPlugin.CanHandle0.DownloadURL.thumbnail = https://asset.accord.com/media10/isa/160267/c1/-/$2/$1/PIM?x=100&y=100
The result is the following final URL:
https://asset.accord.com/media10/isa/160267/c1/-/de/1302970_F/PIM?x=100&y=100
Prerequisites
-
Before updating the sharedconfig.properties file on the STEP application server, determine the template type(s) required. The template type is included in several of the properties created below. The '[TEMPLATE_TYPE]' portion of the properties must be replaced with the appropriate template type option: DownloadURL, ExternalURL, or ExternalLocation.
-
DownloadURL is used for image download from the STEP application server, where the external identification attribute value is used to create cache files.
Important: When asset content is updated in the DAM system, the external identification attribute value should also be updated.
Images are cached on an application server, and the 'Disable auto-cleanup of thumbnail cache' option is set to 'No' for best performance. For details, refer to the Image and Document Settings topic within the System Setup documentation.
-
ExternalURL is used for image download directly from the client (no-caching). If an ExternalURL is not defined, images are downloaded from an application server instead of from the client.
-
ExternalLocation is used for DTD and must return a relative path to an image file.
-
-
Determine the required image sizes. The recommended sizes for the following are:
-
smallthumbnail - 50x50
-
thumbnail - 100x100
-
lowres-png - 72dpi
-
web-proof-small - 150x150
-
web-proof-medium - 200x200
-
web-proof-large - 400x400
-
web-proof-xlarge - 1000x1000
-
thumbnail-noframe - 100x100
-
thumbnail-plain-noframe - 100x100
-
thumbnail-plain - 100x100
-
thumbnail-64 - 64x64
-
thumbnail-250 - 250x250
-
thumbnail-512 - 512x512
-
-
Determine the file type. To ensure proper display of image thumbnails in the workbench, Web UI, and Instrument, .jpg and .png file types are required.
-
Review the External Identification Template topic for details on creating a template.
-
Optionally, if multiple pattern matches are needed for the 'CanHandle' properties, add a digit (0 to 9) as necessary. Multiple pattern matches can be implemented when more than one DAM system is used or when different URL structures are used based on MIME types, among other scenarios.
For example, the following shows two entries for the regular expressions that should be used to locate assets:
Scene7DownloadContentPlugin.CanHandle0 = ^sc7:///(.*?)$
Scene7DownloadContentPlugin.CanHandle1 = sc7://(.*)
If only one regular expression is required, no digit is necessary, as shown below:
Scene7DownloadContentPlugin.CanHandle = ^sc7:///(.*?)$
-
Verify that the STEP Application Server can connect to the DAM server.
Create Template Properties
The sharedconfig.properties file requires several case-sensitive entries to successfully integrate with an external DAM.
-
On the STEP application server, edit the sharedconfig.properties file.
-
Create a new section within the file to hold the following required case-sensitive properties and add the following properties.
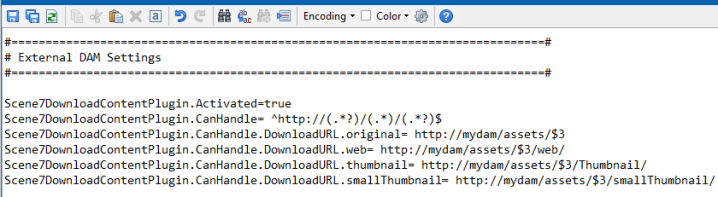
Use the following example entries but replace all 'placeholder' text including the brackets ([PLACEHOLDER]) with your own template types and regular expression. Refer to the image below for an example set of properties.
Important: Verify the BASE_URL_FOR_DAM correctly uses HTTP or HTTPS, based on the DAM system.
-
Scene7DownloadContentPlugin.Activated
When 'true,' this property completes activation of the 'Scene7 Adapter' component, as shown in the following entry and the image below:
Scene7DownloadContentPlugin.Activated=[true or false]
-
Scene7DownloadContentPlugin.CanHandle
When set, this property defines the location of the external assets, as shown in the following entry and the image below:
Scene7DownloadContentPlugin.CanHandle= [REG_EXP]
Note: If more than one 'CanHandle' is required, use an integer to ensure the 'CanHandle' entries are unique, and verify that the external definitions also use the appropriate 'CanHandle' value. For example, two separate 'CanHandle' entries (CanHandle0 and CanHandle1) are shown in the following entry (but are not used in the image below):
Scene7DownloadContentPlugin.CanHandle0.[TEMPLATE_TYPE].original = [BASE_URL_FOR_DAM]/[REG_EXP_GROUP_FOR_ASSETID]]
Scene7DownloadContentPlugin.CanHandle1.[TEMPLATE_TYPE].original = [BASE_URL_FOR_DAM]/[REG_EXP_GROUP_FOR_ASSETID]]
-
Scene7DownloadContentPlugin.CanHandle.[TEMPLATE_TYPE].original
When set, this property defines the location of the original external assets that will be used by the defined template type, as shown in the following entry and the image below:
Scene7DownloadContentPlugin.CanHandle.[TEMPLATE_TYPE].original = [BASE_URL_FOR_DAM]/[REG_EXP_GROUP_FOR_ASSETID] -
Additional Scene7DownloadContentPlugin.CanHandle.[TEMPLATE_TYPE].*
For each property added to the sharedconfig.properties file, add an equals sign (=) and include the path to the images as follows: [BASE_URL_FOR_DAM]/[REG_EXP_GROUP_FOR_ASSETID]/[IMAGE_SIZE]/.
This example is for the thumbnail image size:
Scene7DownloadContentPlugin.CanHandle.DownloadURL.thumbnail = https://www.mycompany.eu/content/dam/MDM/$1/bgr:content/images/mc5dam.thumbnail.140.100.png
The following properties are required based on the image sizes available for use in Web UI. When set, each property defines the location of the specified external assets and for the template type.
-
Scene7DownloadContentPlugin.CanHandle.[TEMPLATE_TYPE].thumbnail
-
Scene7DownloadContentPlugin.CanHandle.[TEMPLATE_TYPE].thumbnailfull
-
Scene7DownloadContentPlugin.CanHandle.[TEMPLATE_TYPE].thumbnailnoframe
-
Scene7DownloadContentPlugin.CanHandle.[TEMPLATE_TYPE].thumbnail64
-
Scene7DownloadContentPlugin.CanHandle.[TEMPLATE_TYPE].thumbnail250
-
Scene7DownloadContentPlugin.CanHandle.[TEMPLATE_TYPE].thumbnail512
-
Scene7DownloadContentPlugin.CanHandle.[TEMPLATE_TYPE].web
-
Scene7DownloadContentPlugin.CanHandle.[TEMPLATE_TYPE].webprooflarge
-
Scene7DownloadContentPlugin.CanHandle.[TEMPLATE_TYPE].webproofxlarge
-
Scene7DownloadContentPlugin.CanHandle.[TEMPLATE_TYPE].webproofsmall
-
Scene7DownloadContentPlugin.CanHandle.[TEMPLATE_TYPE].lowrespng
-
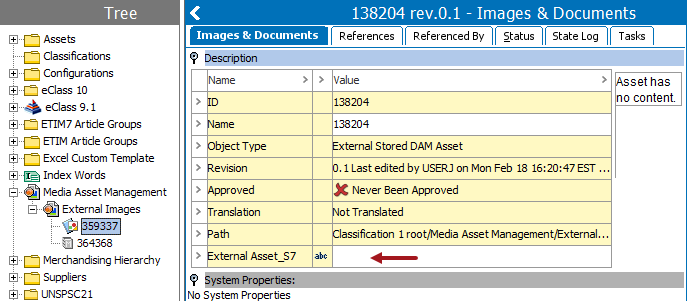
In the example below, STEP assumes that the External Identification value defined on each DAM asset is a fully qualified URL and attempts to extract the External Asset ID from the URL component.
Important: To review additional properties that can be used with proxy servers, from the Start Page, log in to the Administration Portal and on the Configuration tab, search for 'Scene7'. For more information, refer to the Configuration topic in the Administration Portal documentation.
-
-
Restart the STEP server to apply the sharedconfig.properties file changes.
Setting Up the DAM Asset Creation Method
External DAM placeholder assets (those with the object type defined in the component model) can be created in a variety of ways, and the most likely are listed below. Additional configuration may be required, as defined in the documentation outside of this section.
Note: Methods used to create assets with binary content are not applicable for creating a DAM asset because DAM assets are only placeholders in STEP and the binary content is held outside of STEP.
-
Manually - refer to the Maintaining Assets topic in the Getting Started documentation.
-
Import Manager - refer to the Creating a Data Import topic of the Data Exchange documentation.
-
IIEP using the REST Receiver - refer to the Creating an Inbound Integration Endpoint topic and the REST Receiver topic of the Data Exchange documentation.
-
Web UI - refer to the Asset Importer in Web UI topic.
-
SOAP API - Technical Documentation accessible at [system]/sdk or from the Resources section of the system's Start Page.