The option to map attribute details is available when the object super type selected for the export is Attribute. The option is also included within the System Setup data source group, which is available for use with the Generic XML format, as defined in the System Setup - Data Source Outbound topic. This option can be used to output attribute details like ID, name, and parameter settings from System Setup.
Additionally, the export file can be modified and then imported to create new attributes in STEP. For information about using this option to create new attributes, refer to the Managing Attribute Parameters with Excel topic.
The user interface for the mapping step of the Export Manager tool and the outbound integration endpoint tool are not exactly the same. For Export Manager, mapping is described in the Export Manager - Map Data topic. For OIEPs, mapping is handled in the Output Templates section under the Format parameter as described in the OIEP - Event-Based - Output Templates Section topic or the OIEP - Select Objects - Output Templates Section topic.
For more information about the additional wizard steps, refer to the Creating a Data Export topic or the Creating an Outbound Integration Endpoint topic.
After mapping, most output options can be altered using transformations. For more information, refer to the Outbound Map Data - Transform topic.
Mapping Attribute Details
- Select the data to be exported for the output tool. For more information, refer to the Data Exchange topic.
- Select the attribute super object type based on your output tool. For more information, refer to the Export Manager - Select Objects, the Configure the Format section of the OIEP - Event-Based - Output Templates Section, or the Configure the Format section of the OIEP - Select Objects - Output Templates Section.
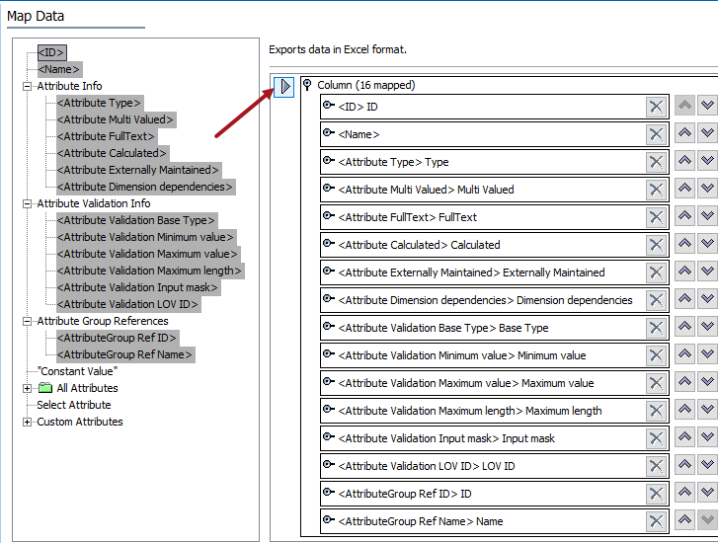
- On the Map Data step, in the left panel, select one or more attribute details node(s) to export and click the right arrow button (
 ). In the image below, all possible attribute detail options were selected and mapped.
- Apply any transformations, which can change the output without changing the original data. Refer to the Outbound Map Data - Transform topic.
- Complete any additional mappings and initiate the export.
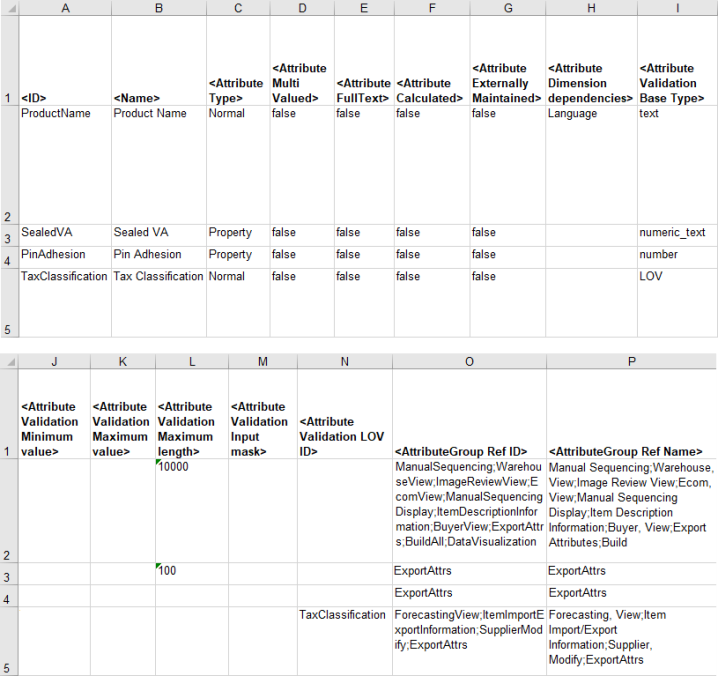
Results
The output includes headers that can be auto-mapped upon import, and the values for each attribute exported. For display purposes, the image below is shown in two sections. This export actually created a single Excel file.