Each time a change to a Web UI configuration is saved, a revision is created and listed in the STEP Workbench. This allows users to better manage the Web UI. There may be a need to revert to a previous revision if a configuration error is made. And if a particular revision contains an error, it can be removed (purged) so that it cannot be used again.
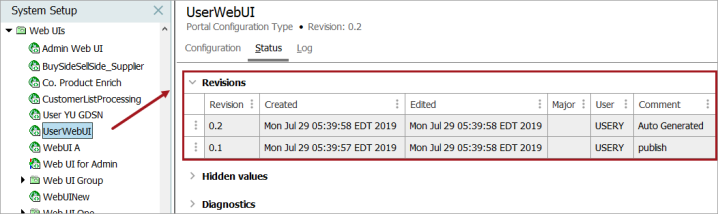
Revisions can be viewed from the System Setup tab in the workbench. Click on the Web UI name and then on the Status tab to view the revisions for that particular Web UI configuration.
Revisions are shown under the Revisions flipper, and display with the latest (newest) one at the top of the list. Each revision is shown with the date it was created and edited, whether revision includes a major change or not, the user who made the changes, and system revision comments.
The Hidden values flipper displays hidden inherited values on the object, and are those that are inherited from another dimension point rather than from a parental object. More information on this is available in the Contexts topic in the System Setup documentation.
The Diagnostics flipper displays issues found by system diagnostics with the object. If a problem has been found, the information can be copied by clicking the file link.
Note: A Web UI definition can be exported as comments and submitted to an external source control system for comparison purposes. For details, refer to the Configuration Management topic.
Reverting to an Older Revision
Revert a Web UI configuration to an earlier revision by following these steps in the workbench:
- In System Setup, select the relevant Web UI configuration.
- Click the Status tab.
- Click the arrow to the left of the row that contains the revision that you would like to revert to, then select Revert to.
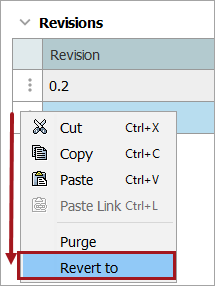
The Web UI configuration is now reverted to the selected revision and a new revision is created.
Purging Web UI Configuration Revisions
As users create and save new Web UI configuration revisions, the STEP Workbench stores them for a limited time. Each time a user saves a change made in the Web UI designer, the automatic purging mechanism executes in the background for that Web UI. The automatic purge prevents potential memory issues that may arise from storing a large number of old Web UI configurations.
Not all Web UI revision types will automatically be purged. The automatic purging logic retains the following types of Web UI revisions:
-
First revisions
-
All major revisions
-
Last ten revisions
-
All revisions from the last seven days
-
Latest revision from each day for an entire month
-
Latest revision from each month going back to the first revision
Automatic purging executes in the background with no user actions needed. However, if the number of stored Web UI revisions exceeds the configured maximum following a purge, user intervention is required. In this event, the system notifies the user that the maximum number of allowed revisions has been exceeded and states how many revisions must be removed before further updates to the Web UI configuration can be made. Users may then do a manual purge or contact Stibo Systems for further assistance.
To remove a Web UI configuration revision from the revision history:
- In System Setup, select the relevant Web UI configuration.
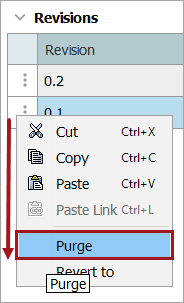
- On the Status tab, click the arrow to the left of the row that contains the revision to purge, and then click Purge.
Note: If you purge a Web UI configuration revision and then later revert a workflow to a version that is dependent on the purged configuration revision, it may result in the workflow and/or Web UI configuration not working as expected.
Creating a New Web UI Brand
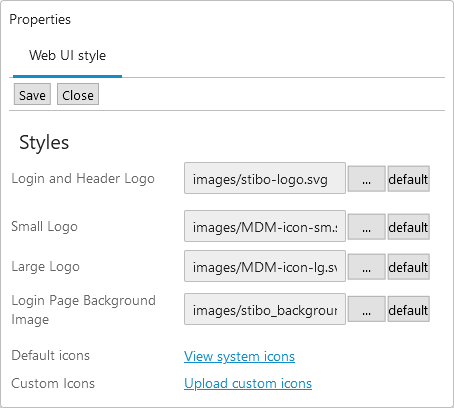
Clicking this option allows for differing styles of the selected Web UI. This is helpful if different users need the same Web UI but with a different look and feel.
By clicking this option, the main Web UI is the only one that needs to be fully configured. Duplicates of the initial Web UI are configurable only for styling, i.e., logos, pictures, and icons. No other modifications can be made within the designer.
- In System Setup, expand the Setup Group that contains Web UI configurations.
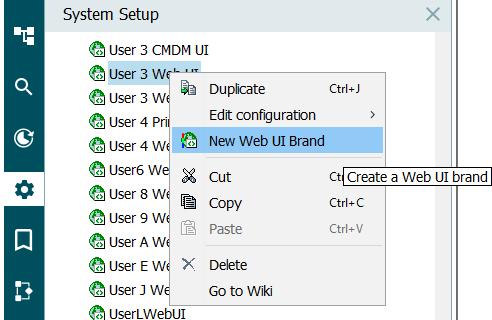
- Right-click the Web UI configuration to create as a New Web UI Brand.
- Select New Web UI Brand from the menu.
- Within the popup dialog, provide an ID and Name for the New Web UI Brand.
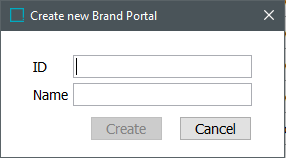
- Click 'Create.' The dialog closes and a New Web UI Brand has been created.
More than one New Brand Web UI can be created, and all New Brand Web UIs are linked to the original Web UI that the Brand New Web UIs were based on. With these Web UIs all being linked, anything done to assets, classifications, entities, and objects is reflected across all linked Web UIs; however, any Web UI configuration changes made to the original Web UI do not reflect in any created New Brand Web UI.
Delete a Web UI Configuration
- In System Setup, expand the Setup Group that contains Web UI configurations.
- Right-click the Web UI configuration to delete.
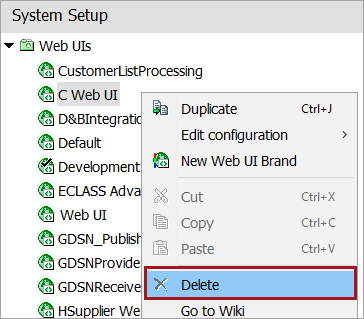
- Select Delete from the menu.
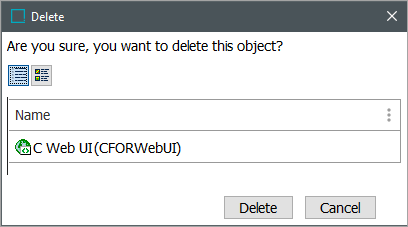
- Click Delete again once the 'Delete' dialog appears. (If you decide you do not want to delete the Web UI, click Cancel to exit without deleting.)
- Observe on the 'Delete report' dialog that the Web UI was deleted successfully.
If there is anything stopping the Web UI configuration from being deleted, warning messages will be shown in the 'Delete report' dialog. You should review these messages carefully and make any changes, if applicable. Choosing 'Force Delete' is only an option when the button is active and should be used with caution.
Edit a Web UI Configuration
While it is recommended that Web UI configurations are done through Web UI designer so that you are notified when making invalid design choices, a Web UI configuration is actually an XML file that contains all the information about the content of the Web UI. The XML for a Web UI configuration can be edited and can be used for building custom screens. Editing the Web UI XML should be done with caution, as an error in the XML syntax or content can potentially break the Web UI.
Important: The following characters: '/', '\n', '\r', '\t', '\0', '\f', '`', '?', '*', '\\', '<', '>', '|', '\"', ':', '\u2192' are not allowed in a Web UI:
-
Screen ID
-
Context ID
-
Workspace ID
If these characters do exist in an older version of STEP and you update to a newer version, they will be replaced with the underscore (_) character.
To edit the Web UI XML:
- Go to System Setup and expand the Setup Group that contains Web UI configurations.
- Right-click the Web UI configuration to edit.
- Select the menu item Edit configuration.
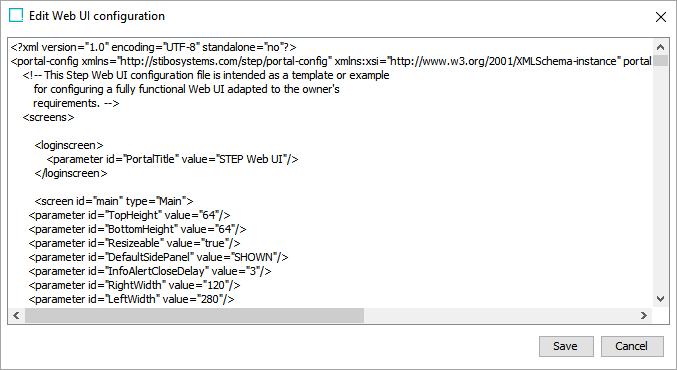
- Select Internal editor (shown below) or External editor (if you have a software program that allows for editing of XML files).
- Edit the XML for the Web UI once the editor appears.
- Click the Save button to save the changes.
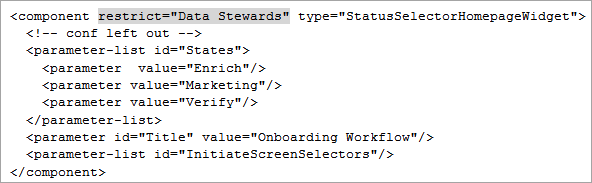
By editing the XML, It is possible to apply restrictions to specific components or parameters so that they can only be found by specific user groups. In the example below, the Status Selector Homepage Widget will only be visible to users in the 'Data Stewards' user group due to the presence of the 'restrict="Data Stewards"' attribute.
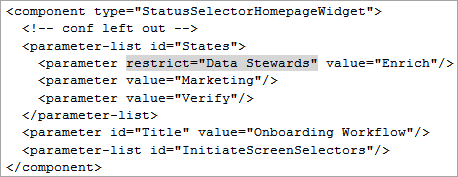
In a similar way, a single state could be restricted:
For information on how to use the Web UI Designer, refer to the following topics in the Web User Interfaces documentation:
- Designer Access
- Design Mode Basics
- Selecting Components
- Configuring Components
- 'Web UI component configuration reference' available at [system]/webui/docs.
For more information, refer to the Accessing a Web UI topic.