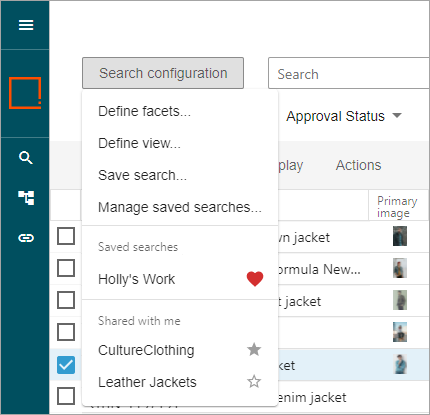
The 'Search configuration' button allows you to:
-
Define your displayed static facets with the 'Define facets' option.
-
Define the data presented for your search results with the 'Define view' option.
-
Work with saved searches with the 'Save search,' 'Manage saved searches' (which also allows you to share a search), the 'Saved searches,' and 'Shared with me' options.
Define Facets
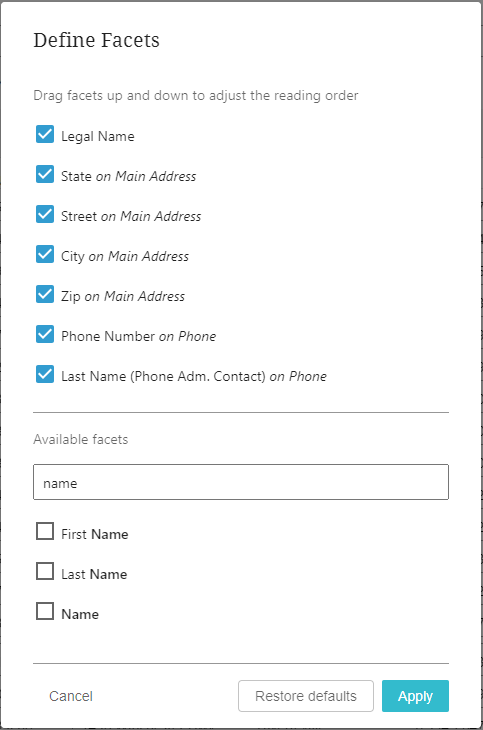
The 'Define facets...' option includes additional static facets from the Elasticsearch configuration but that may not be selected for the current user's display. Clicking 'Define facets' displays the Select Static Facets dialog.
Use the following options on the 'Select Static Facets' dialog to modify your static facets:
-
Drag facets up and down to adjust the reading order - This section lists the facets to be displayed and allows you to rearrange the sequence, either left-to-right or top-to-bottom. You must click the Apply button to update the Search Screen.
-
Available facets - The attributes listed in this section are configured as 'Displayed Data' or a 'Default Facet' in the Elasticsearch configuration but are not displayed as a facet for the current user. Check a facet to move it to the 'Drag facets up and down...' section above. When applied, the selected facets are shown in order. For example, clicking Apply with the selected facets shown in the image above ('Object Type,' 'Path,' 'Approval Status,' and 'Asset Quality') results in the static facets displayed in the inset image.
-
Find facets ... - Type the configured attribute you want to display as a filter for the search results. The 'Available facets' list (defined below) is updated to show matches as you type. Click the checkbox for the desired facet. Clicking the Apply button (defined below) displays the checked attributes as static facets for filtering; unchecked attributes are not available on the Search Screen for filtering. You can also find attributes you are looking for by searching on the data container they belong to.
-
Restore Defaults... - Click the Restore Defaults button to remove changes made by the user to static facets. You must click the Apply button to update the Search Screen. The defaults are determined by the 'Default Facet' data specifications, as defined in the Creating and Maintaining an Elasticsearch Configuration topic in the System Setup documentation.
-
Apply - Click the Apply button to update the static facets based on the current selections.
Note: Data container names appear in italics beside the associated attributes and data container reference attributes.
Important: Facets will not display on the search screen if the character limit of their attribute value exceeds 256 characters.
Define View
Views allow individual users to display the attributes that are important for their work. Creating a view involves selecting the attributes to be visible on the faceted Search Screen. The 'Define View' dialog displays the attributes selected as a data specification in the Elasticsearch configuration, as defined in the Creating and Maintaining an Elasticsearch Configuration topic in the System Setup documentation.
Use the following options on the 'Define View' dialog to modify your search result data:
-
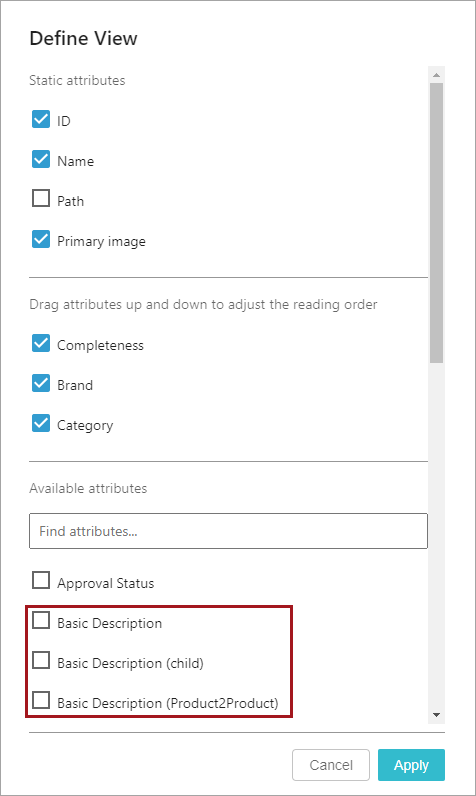
Static attributes - By default, the first set of attributes (ID, Name, and Path, and Primary image) are checked and display in the view. The display order for these attributes cannot be changed. Uncheck an option to hide it from the view.
When 'Primary image' is selected but an image is not available, 'No image' displays instead. When 'Show as' is set to the Card layout, the Primary Image is always displayed first.
-
Drag attributes up and down to adjust the reading order - When attributes available for display (based on the Elasticsearch Configuration) have been selected, they display in this section. These attributes can be rearranged to the desired order. Uncheck an attribute to remove it from this section and also uncheck it in the 'Available attributes' section below.
Attributes belonging to the same data container will be automatically grouped together and can only be reordered within that group. The data container as a whole can be dragged around as well.
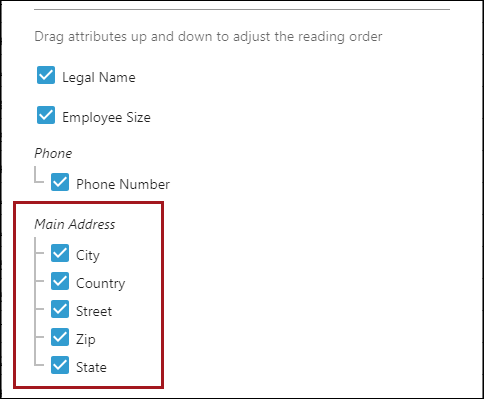
In the table view, a vertical dividing line will visually group these attributes together.
-
Available attributes - Attributes available for display (based on the Elasticsearch Configuration) are listed in this section. Use 'Find attributes...' to search for configured attributes and update their display status on the view. This field uses typeahead and will display attributes that match the text in the 'Available attributes' section.
Attributes can have the same name while being relevant for different scenarios, as illustrated by the name 'Basic Description' in the previous image. The 'Basic Description' option is the attribute found directly on the objects being searched. When an attribute with that same name is a reference for a searched object, the name of the reference is displayed in parentheses (like 'Basic Description (Product2Product)'). When an attribute with the same name has a value found on children of the searched objects, the word 'child' is displayed (like 'Basic Description (child)').
-
Check an attribute to include it in the 'Drag attributes up and down...' section above.
-
Uncheck an attribute to remove it from the 'Drag attributes up and down...' section above.
Note: The number of attributes selected can affect column sizing as explained in the Table section of the Search Screen Display topic.
You can also find attributes you are looking for by searching on the data container they belong to.
-
-
Cancel - Returns to the search results page without making any changes.
-
Apply - Display the view for objects included in the search results.
Save Search
Saving a search allows you to save a set of search criteria (not a set of data) as a named search. This means, for example, that you can repeatedly run searches for assets only displayed as cards, based on the object type facet setting. Searches are saved per user, can be run on demand, and can be updated and marked as favorite. The results produced by a saved search vary based on the data when the search is run.
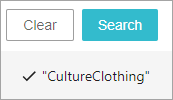
When a saved search is used to generate the results, the name of the search is displayed below the Clear and Search buttons, along with a check mark ( ) to indicate the saved search was not modified.
Saving a search stores the current following search result settings for future use:
-
search bar text
-
static facet selections
-
attributes displayed and their order (set in the 'Define view')
-
table or cards format (set in the 'Display' tab)
-
sorting (set in the 'Sorting' tab and/or on table columns)
To save a search:
-
On the Search Screen, generate the desired layout of the result set.
-
Choose a save option:
-
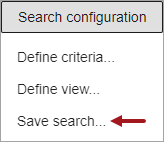
Click the 'Search configuration' button and click the Save Search... option.
-
Click the disk button for an edited saved search.

-
-
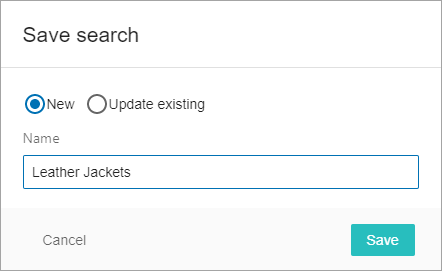
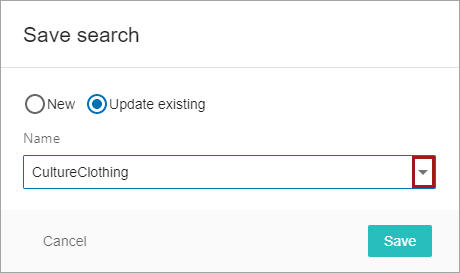
On the 'Save search' dialog:
-
Click the New radio button, type a name for the search, and click the Save button. A confirmation message is displayed, and the new saved search name is added to the 'Saved searches' menu and it is also displayed below the Clear and Search buttons.
-
Click the Update existing radio button, select a named search from the dropdown, and click the Save button. An update confirmation message is displayed, and the current search criteria overwrites the saved search previously created.
-
Click Cancel to exit the dialog without saving.
-
Manage Saved Searches
Use the 'Manage Saved Searches' option to delete a saved search, share a saved search, edit a search name, or set your own favorite.
To view information on saved searches:
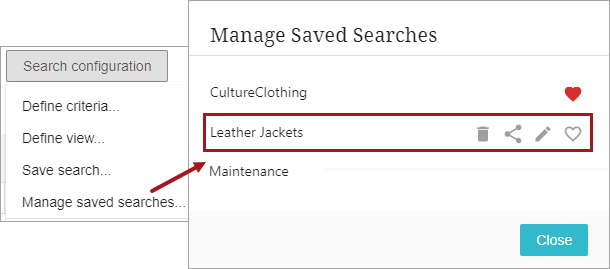
- From the 'Search configuration' button, click the Manage Saved Searches....
- Identify the saved search with favorite status, for example, on the 'CultureClothing' search shown above. A user can only have one favorite saved search. The user's favorite search is automatically loaded and run when the Search Screen is opened.
-
 - click to remove the favorite status.
- Hover over a search name (as shown above for the 'Leather Jackets' search) to display the following options:
-
 - click to delete the saved search.
 -
 - click to share the saved search or modify the sharing status. Sharing saved searches requires configuration in the workbench as defined in the Configure search sharing section below.
 -
 - click to edit the name of the saved search. If the search has been shared, the name is also updated for the users who received the saved search.
Note: To update the criteria for a saved search, set the criteria and use the 'Update existing' option from the Save Search section above.
-
 - click to set the saved search as the user's favorite (as shown above for the 'Leather Jackets' search) or to remove the favorite setting (as shown above for the 'CultureClothing' search).
Configure search sharing
The following the workbench configuration is required to allow sharing Web UI Search Screen searches. (This setup is similar to the requirements for sharing Web UI Advanced Searches used for data outside of the Search Screen, as defined in the Restricting and Sharing Advanced Searches topic.)
-
Log into the workbench as a user with privileges to update Users and Groups on the System Setup tab.
-
On System Setup, expand the 'Action Sets' node and create or verify a User Actions node for the 'Share search with group' action. The name of this action set can vary by system. For more information, refer to the Web UI section of the User Actions and Error Descriptions topic in the System Setup documentation.
-
Expand the 'Users & Groups' node and select a group that will share searches from the Web UI Search Screen.
-
On the Privilege Rules tab, open the User Privileges flipper and click the Add Privilege link.
-
On the Add Privilege Rule dialog, set the group that will share searches:
-
For the 'Apply to' section, click the User group radio button and select the group that will share searches.
-
For the 'Action Set' parameter, select the action set that holds the 'Share search with group' action.
-
For the 'Apply to Group' parameter, the group that will share searches is displayed.
-
-
On the Add Privilege Rule dialog, add the group(s) that will receive shared searches:
-
For the 'Apply to' section, click the User group radio button and select a group that will receive share searches.
-
For the 'Action Set' parameter, select the action set that holds the 'Share search with group' action.
-
For the 'Apply to Group' parameter, the group that will share searches is displayed.
-
Repeat for all groups that will receive shared searches.
-
-
Continue with Web UI as shown in the Sharing searches and modifying share settings section below.
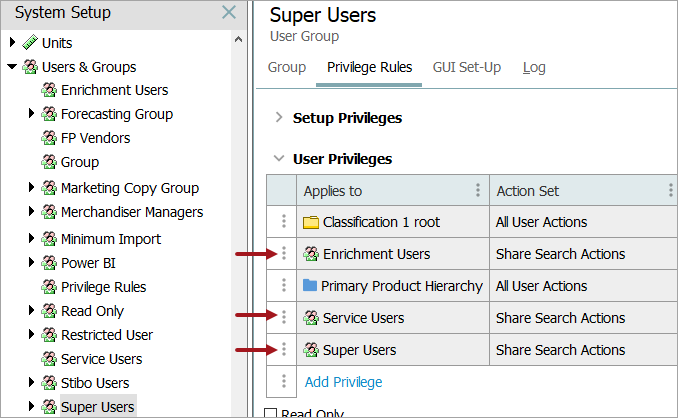
In the following image, 'Share Search Actions' is the name of the action set that contains the 'Share search with group' user action. The Super Users group can share searches with users in their own group, as well as users in the Enrichment Users group and the Service Users groups. Since the Enrichment Users and Service Users do not have the action set applied to their own group, they cannot share searches from the Web UI,
Sharing searches and modifying share settings
The share searches option () is only available for users in a group that has been configured to share searches. Shared searches are displayed within the 'Search configuration' button menu. Shared searches can be recommended as a default by the user who shared the saved search for the user receiving the saved search. The latest default suggestion is indicated by a filled star ( ) and previously shared default suggestions are shown with an open star (
 ).
).
Note: The data displayed for the user running a shared search is based on that user's access privileges, therefore, results may not match for all users.
To modify the sharing status of a saved search:
-
Log into Web UI as a user in the group privileged to share searches.
-
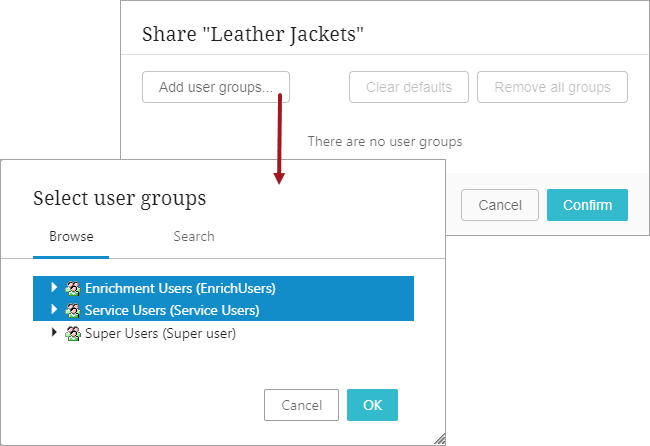
Open the Search Screen, click the 'Search configuration' button, click the 'Manage saved searches' option, hover over the search to be modified, and click the share button.

-
To add groups to receive saved search, click the Add user groups button, select one or more group(s) to receive the saved search, and click the OK button.
-
To add a default search suggestion, hover over the group and click the open star (
) button for an individual group or click the Default for all button. A receiving user's favorite search overrides any default search suggestions as the default search, but the star is displayed to alert the user of the suggestion. 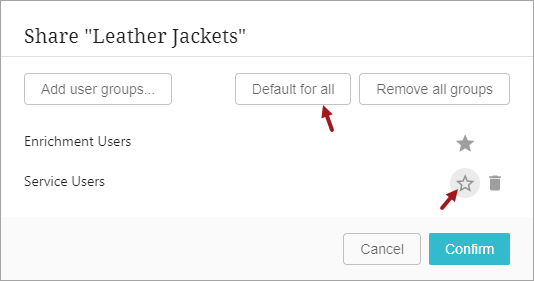
-
To remove a default search suggestion, hover over the group and click the filled star (
) button for an individual group or click the Clear defaults button.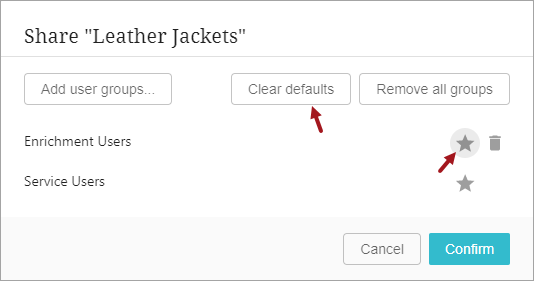
-
To discontinue sharing a search with a group, hover over the group and click the delete (
) button or click the Remove all groups button. The saved search is not deleted, but it is no longer shared, and it is removed from the 'Shared with me' section for users who previously received it. 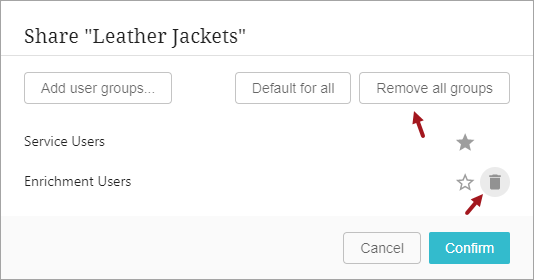
-
Click Confirm to save all changes or click Cancel to close without saving.
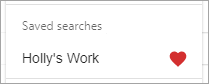
Saved Searches
To run a saved search from the 'Search configuration' button, click a search displayed in the 'Saved searches' section. The Search Screen is updated with results based on the saved search bar text, the facet settings, and the view settings.
You can also run a saved search from the Search Screen Search Bar topic.
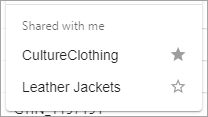
Shared With Me
To run a saved search that was shared from another user, click a search in the 'Shared with me' section. The Search Screen is updated with results based on the shared saved search.
Suggested default searches are shown with filled star for the most recently shared default suggestion. If a favorite search is set, all suggested defaults are displayed with open stars.