The Attribute and Meta Data Attribute content definitions inserts an attribute for the selected object in the table. The Name and ID of an object is also considered an attribute. Both of these content definitions are configured identically, except Attribute pulls the value of a Specification attribute and Meta Data Attribute pulls the value of a Description attribute.
Note: Only individual attributes can be chosen when using the Attribute or Meta Data Attribute content definition; entire attribute groups cannot. To select attribute groups, the Attribute Group Attributes definition must be chosen. Refer to the Attribute Group Attributes Content Definition section of this guide here for more information.
- Follow the steps in the Adding, Editing, and Overriding Content Definitions topic here to open the Row/Column Type & Content Definition dialog for your row or column.
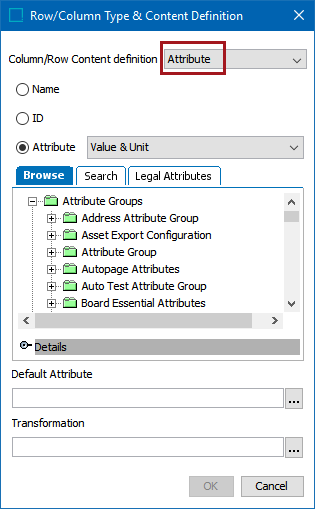
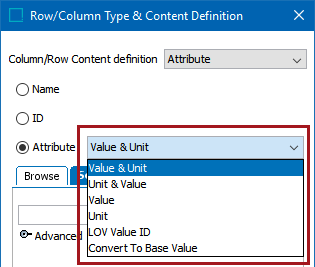
- In the Column/Row Content definition dropdown list, select Attribute or Meta Data Attribute. The steps in this topic show the Attribute definition.
- Select Name to insert the object names in the table. If Name is inserted in a column, and the row extracts a product, then the name of the product is inserted in the table.
- Select ID to insert the object IDs in the table. If ID is applied to a column, and the row extracts a product, then the ID of the product is inserted in the table.
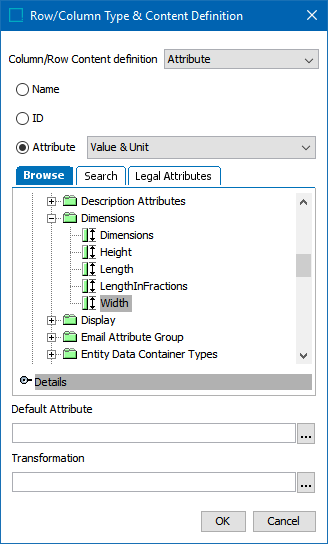
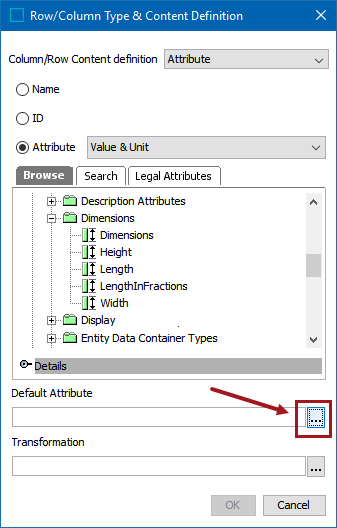
- Select Attribute to insert a specific attribute in the table. Three tabs are available for locating the attribute: Browse, Search, and Legal Attributes.The screenshot below shows the dialog with the Browse tab selected.
Note: In any of these methods, multiple attributes can be selected by pressing Ctrl or Shift while making selections. A new row or column will be created for each attribute selected.
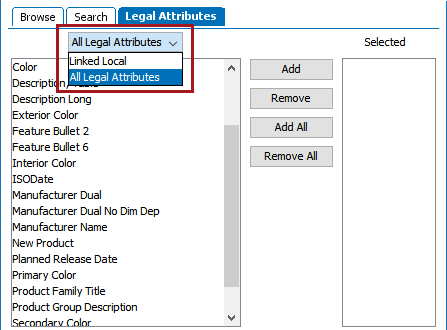
- When Legal Attributes is selected, two options are available from the dropdown:
- Linked Local: Select this to view all specification attributes that are linked locally to the selected products. In this option you will not view any attributes inherited from a higher level. For more information on locally linked attributes, refer to the Attribute Links section of the System Setup documentation here.
- All Legal Attributes: - Select this to view all specification attributes that are valid for the selected product. This includes both inherited attributes and attributes that are linked locally. For more information on attribute validity, refer to the Validity on Specification Attributes section of the System Setup documentation here.
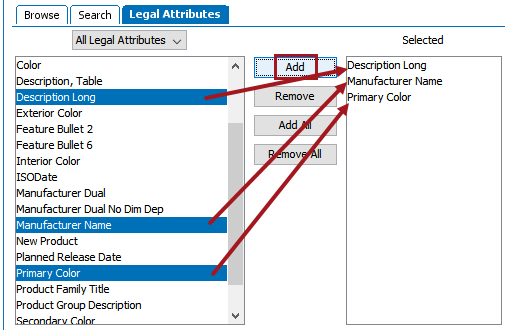
- For the Linked Local and All Legal Attributes options, select the desired specification attributes in the left window of the dialog and choose Add to add them to the Selected window. Attributes may be multi-selected by holding the Ctrl or Shift key while making selections. To add all of the attributes to Selected, click Add All. To remove a selection of attributes from Selected, choose the relevant attributes, then click Remove. To remove all attributes from Selected, click Remove All.
Resolving Attributes
Several options are available in the Attribute dropdown list that determine how the attribute values will resolve in the table. Refer to the Resolving Attributes topic in this guide here for information on these selections.
Default Attribute
By using the inheritance feature of STEP, you can link an attribute higher up in the Tree to make it valid at the appropriate points in the hierarchy, on particular object types. Insert the 'Default Value' at the top level and let it inherit down. Then, if you need to change this value on some of the children, you can change the value. If later you remove the overridden value, the default value will again populate.
To add a default attribute:
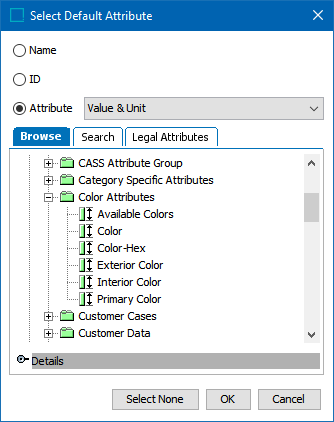
- Click the ellipsis button (
 ) to launch the Select Default Attribute dialog.
- Locate the default attribute using either the Browse, Search, or Legal Attributes tab, then click OK. If an attribute has previously been chosen and you want to remove it, click Select None.
Transformation
There are numerous reasons to apply a transformation to an attribute in a table. One example would be if the attribute is multivalued. You can then apply a transformation that specifies how to separate the values.
- To apply an attribute transformation to the selected attribute, click the ellipsis button () under Transformation.
- Select the relevant transformation in from the Select Transformation dialog, then click OK.
![]()
For more information about applying attribute transformations to table content, including initial setup, refer to the Applying Attribute Transformations to Table Content section of this guide