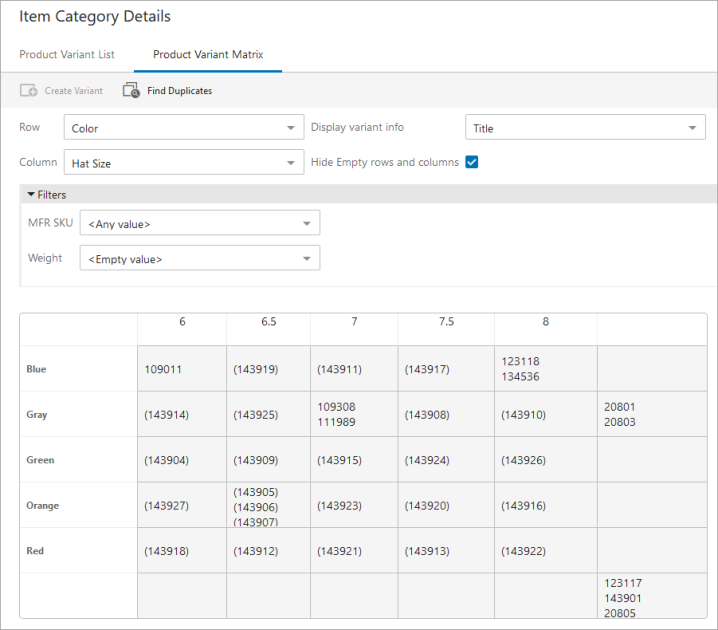
The Matrix view focuses on the product IDs and is organized using two variant attributes. In the matrix view, product variant IDs are placed in a cell with attributes that match the selected row and column attributes. After validating the data, potential duplicate products are displayed with a red background and show all product variant IDs that match the selected attributes.
For a simpler view, use the list view as defined in the Product Variants List in Web UI topic here.
To view variant information in the workbench, refer to the Product Variants Matrix in STEP Workbench topic (here) or the Products Variants List in STEP Workbench topic (here).
The configured Product Variants Matrix tab page is shown in the following image:
Prerequisite
Before using the product variant view, you must complete the steps in the Setting Up Product Variants topic here.
Configure Product Variants Matrix
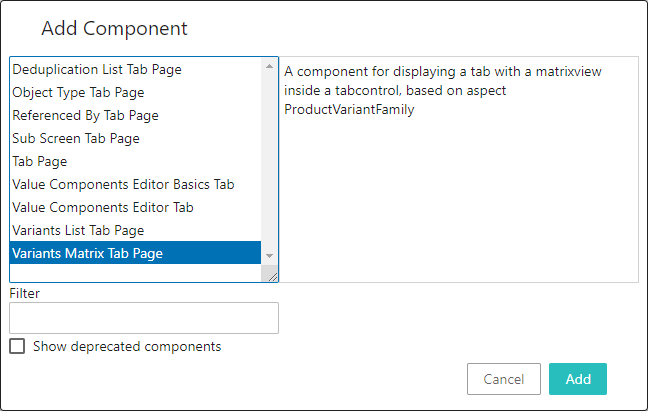
- In the Web UI, product variants can be displayed using Variants Matrix Tab Page. You can insert it into a Tab Control on a Node Details screen using the Child Components 'Main' parameter. For more information, refer to the Design Mode Basics topic (here) and the Node Details Screen topic (here) in the Web User Interfaces documentation.
- Once added to the Node Details screen, double-click the Variants Matrix Tab Page to set the configuration parameters.
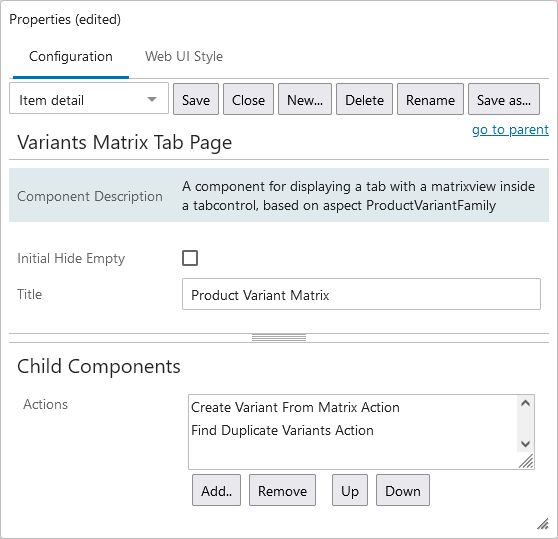
Initial Hide Empty
When checked, the 'Hide Empty rows and columns' checkbox is checked by default and only rows and columns with values are displayed initially. The user can uncheck the 'Hide Empty rows and columns' checkbox to display empty variant attribute values.
Title
This is the title of the configured component.
Actions
Add the 'Create Variant From Matrix Action' and 'Find Duplicate Variants Action' buttons if desired. This child component allows for actions to be added for the user to interact with the data. For more information, refer to the Action Buttons topic in the Web User Interfaces documentation here.
If added, configure the 'Create Variants Action.'
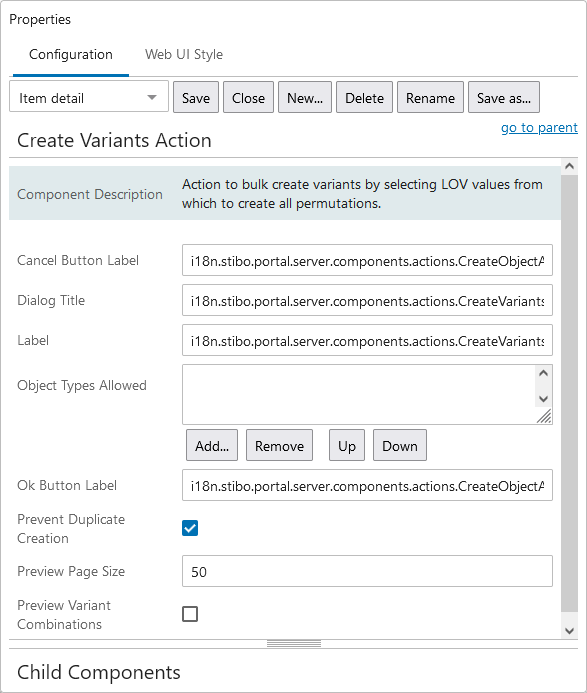
Prevent Duplicate Creation
When checked, clicking the 'Create Variants Action' button and selecting duplicate variant values displays an error and duplicates are not allowed.
Preview Variant Combinations
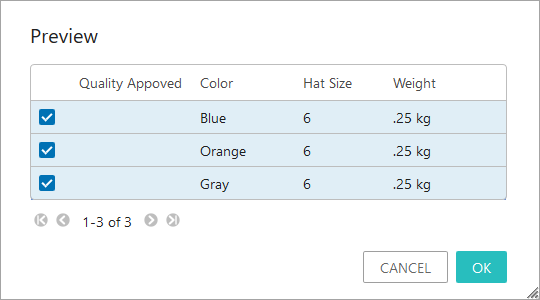
When checked, clicking the 'Create Variants Action' button, selecting variant values, and clicking OK opens a Preview dialog with all new variants to be created. The user can click OK to create the items being previewed, or Cancel to return to the create variants dialog.
Note: As with any screen, the Node Details screen with Variants Matrix Tab Page must be mapped appropriately in Main Properties > Mappings for end users to be able to access it.
Use the Matrix View
- In the Tree, expand the Primary Product Hierarchy, and select the relevant product parent node that is configured for variants to display the matrix.
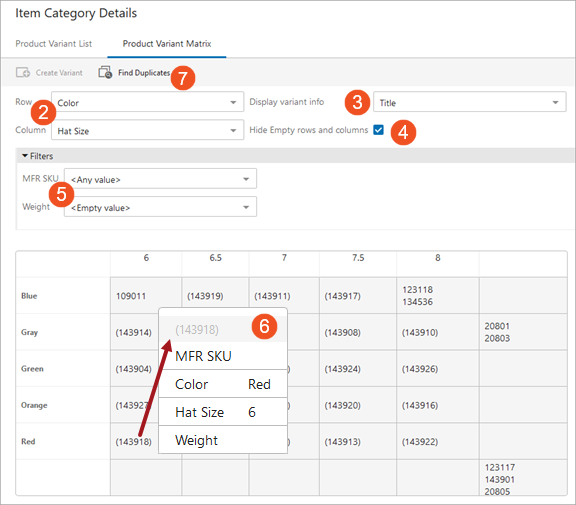
- Set the Row and Column parameters to the variant attribute to be displayed the row and the column of the matrix. All variant attributes are available.
- Set the Display variant info parameter to determine how the variant's details within the matrix are displayed. In addition to the variant attribute values, 'Title' and 'Primary Image and Title' are also available for selection.
- Check the Hide Empty rows and columns parameter to exclude empty valued options from the matrix.
- In the Filters section, matrix data can be displayed based on the variant attributes not selected as Row or Column. The filter options are existing values, <Any value>, and <Empty value>. In the image above, the variant attributes are MFR SKU, Color, Hat Size, and Weight. Since Color and Hat Size were selected for Row and Column, MFR SKU and Weight are available as filters.
- On the Variants Matrix, hover over a variant ID to display details about the variant attributes.
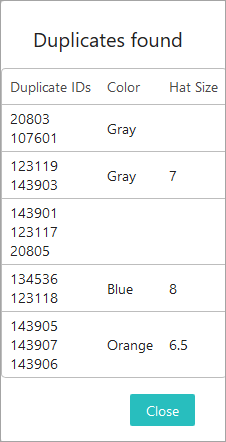
- Click the 'Find Duplicates' button (if configured in the Configure Product Variants Matrix section above) to display the 'Duplicates found' dialog. Values that are used for more than one variant are displayed as potential duplicates. In the following example, two variant IDs have a value of 'Gray' for the 'Color' attribute and no value for 'Hat Size' attribute.
Create a Variant
When creating a variant manually (rather than using an import file), note that only variant attributes values are added. Additional values can be added on a product editor screen.
- Verify an ID pattern for the variant object type is defined. This 'Create variants' button is disabled if no ID pattern is included. For more information, refer to the Autogenerate using Name Pattern and ID Pattern topic in this guide here.
- Verify the 'Create Variant' button was configured in the Configure Product Variants Matrix section above.
- Click the 'Create Variant' button to display the 'Create Variant' dialog. Variant attributes and the existing values are displayed and for the selected object type.

- For each variant attributes:
- Click one or more of the existing values in the Source column and click the > button to move it to the Result column. You can also double-click existing values to move them, or multi-select values before using the > button.
- The number of new variants to be created is displayed as the count above the OK button.
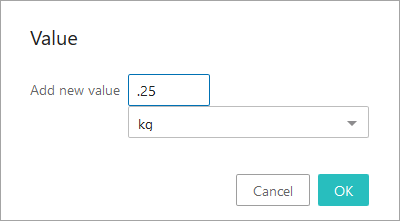
- Click the 'Add value' link when available to supply a new value. Click OK to close the Value dialog.
- Click OK.
- If the parameter Preview Variants Combinations is configured in the Configure Product Variants Matrix section above, the preview dialog shows the chosen combinations to be created. Click OK to proceed with the process or click Cancel to return to the create variant dialog.
Note: If the Prevent Duplicate Creation parameter is checked (configured in the Configure Product Variants Matrix section above), the combinations that match an existing variant are not created when the action is applied.