To set up product variants, complete the following steps as defined in the sections below:
- Add the object types to the component model.
- Create product variant priority attribute.
- Specify variant and non-variant attributes.
Add the Object Types to the Component Model
The object type of the parent folder must be added to the component model to enable the product variant capabilities and display the Product Variants tab in the product editor on Tree.
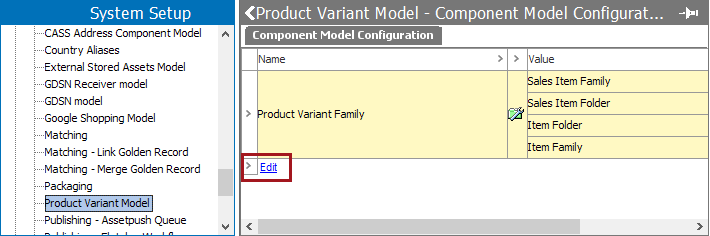
- In System Setup, expand the Component Models node, and select Product Variant Model.
- On the 'Component Model Configuration' tab, click the Edit link.
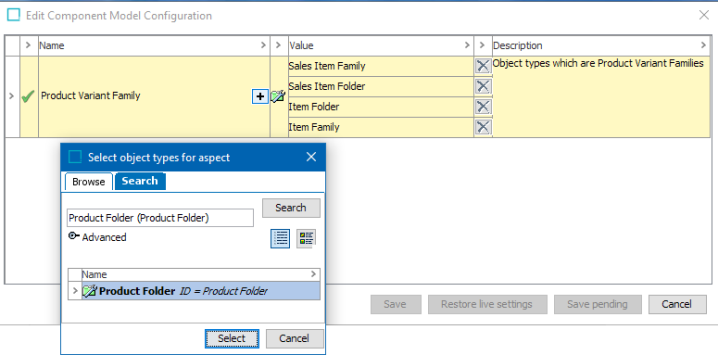
- In the 'Edit Component Model Configuration' dialog, double-click the plus sign (
 ), choose the object type(s) of the parent folder(s) and click the Select button. The parent object types selected are the levels that will house individual items and be used to display the actual item object types.
When all object types have been added, click Save to create a 'Product Variants' tab on all products of the selected object types.
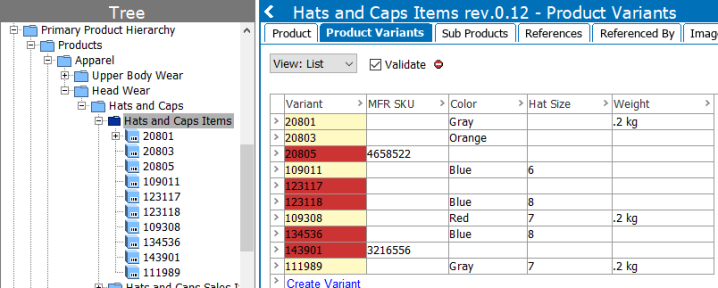
On Tree, select an object that has been added within the Product Variant Model component model and click the 'Product Variants' tab. As shown below, the List view and the Matrix view are available, but no attributes are displayed until a variant priority attribute is created as defined in the next section.

Create a Product Variant Priority Attribute
The priority metadata attribute lives on the link from the parent to the variant and non-variant attributes and allows you to define the order of the attributes.
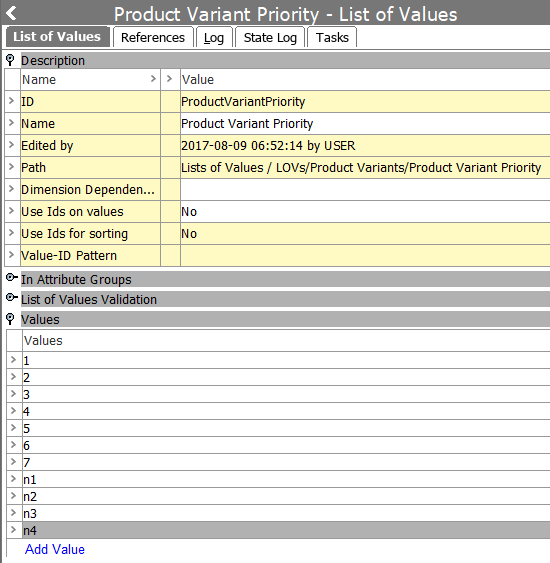
- Create an LOV with numbers and 'n'-prefixed number values.
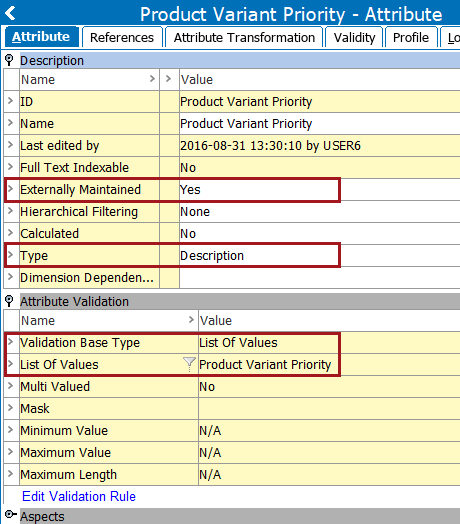
- Create an externally maintained description attribute, choose List Of Values as the validation base type, and assign the LOV created above.
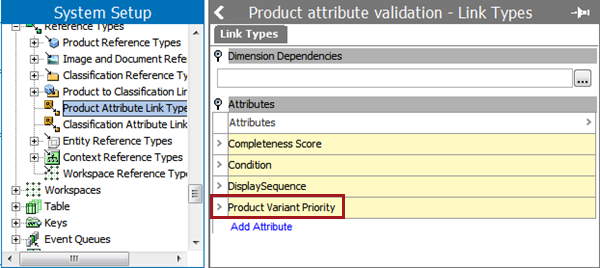
- In System Setup, expand the Reference Types node, select Product Attribute Link Type, and then add the attribute created above. This makes the priority attribute available on the valid objects within the References tab under the Linked Attributes from Product Hierarchy flipper.
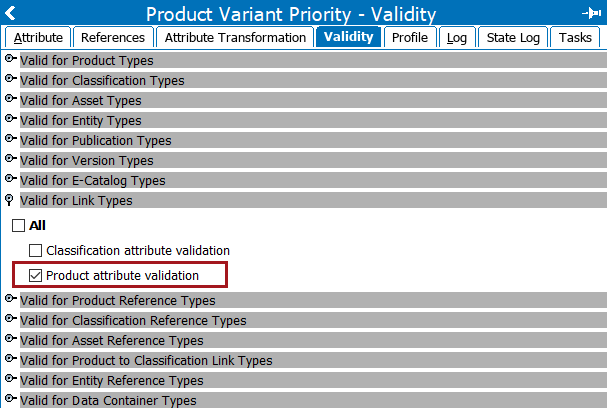
This can also be achieved from the attribute Validity tab under the 'Valid for Link Types' flipper by selecting the 'Product attribute validation' checkbox.
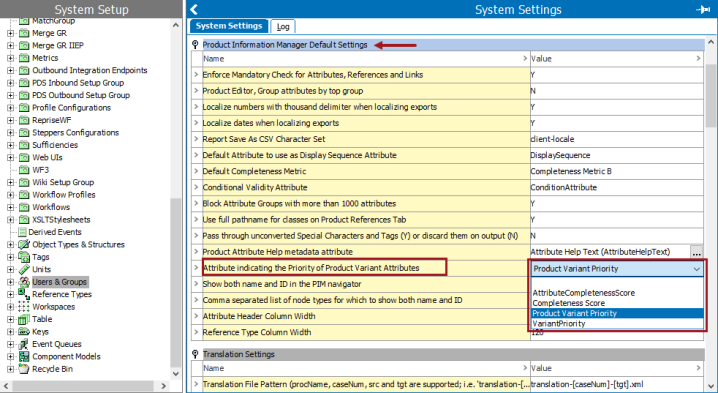
- In System Setup, select the Users & Groups node, open the 'Product Information Manager Default Settings' flipper, and select the new attribute from the Attribute indicating the Priority of Product Variant Attributes dropdown.
Specify Variant and Non-variant Attributes
To specify which values are considered to determine variants, you use the variant priority metadata attribute created above. The metadata attribute must be valid on the link from the parent folder to the variant attributes. This way, each linked attribute can be attached with a number indicating that the attribute is a variant attribute and specifying where in the related views the attribute is shown.
Attributes linked from a product variant family are categorized into three groups:
- Variant attributes: A variant priority attribute value is a number: 1, 2, 3, ...
- Non-variant attributes: The variant priority attribute value is a number prefixed with the text "n": n1, n2, n3, ...
- Regular attributes: The variant priority attribute is empty.
Important: Product variant attributes cannot be multivalued.
In the example below, the variant priority attribute on the link from 'Hats and Caps Items' to Color is 1, from 'Hats and Caps Items' to Hat Size is 2, and from 'Hats and Caps Items' to Weight is 3. This indicates that Color, Hat Size, and Weight are variant attributes and that they will display in that order.

As created in the previous step, the variant priority attribute value on a linked attribute can also be a number prefixed with an 'n' (e.g., 'n1' or 'n2'). This specifies that the linked attribute is a non-variant attribute and is visible in the views related to variant attributes. However, for validation, deduplication, and variant creation, it is not considered a variant attribute. In the example above (which is also continued below), the link from 'Hats and Caps Items' to MFR SKU is 'n1', which indicates that the SKU is shown in the views, but it is not used to distinguish variants.
The regular attribute Country of Origin is linked from 'Hats and Caps Items' but has no value for the variant priority attribute, which indicates that is not used for variants.
Note: Set the variant priority as high in the hierarchy as possible to reduce the setup and maintenance effort.
Choose a method to identify the variant and non-variant attributes.
To display the priorities for all attributes that impact variants on the family (as shown in the image above):
- In the Tree, expand the 'Primary Product Hierarchy' and select the relevant product folder configured for variants.
- Click the References tab.
- In the 'Linked Attributes from Product Hierarchy' flipper, specify the display priority of the linked attributes using the attribute created previously.
Or
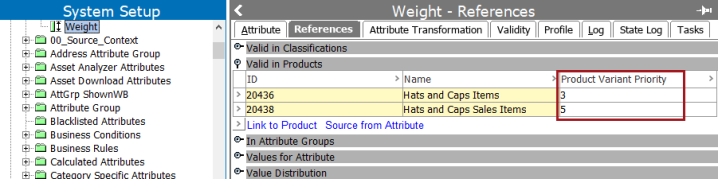
To display the priorities based on attribute, which may include multiple variant families (as shown in the image below):
- In System Setup, select an variant attribute.
- Click the References tab and open the 'Valid in Products' flipper.
- Assign the priority for each product family using the Product Variant Priority attribute.
In the following image, the results of the Product Variant Priority settings above are displayed on the Product Variant tab using the list view.
Refer to the following topics for information on viewing variants as a list or a matrix: