The STEP Template Content panel is used primarily when creating product templates in InDesign. The STEP Template Content panel is where elements from STEP—including attributes, asset references, and tables—are linked to frames on InDesign pages in order to build mounted pages in conjunction with publication templates. The STEP Template Content panel can also be used to link these same elements to page templates and publication templates, though this is less common.
The options on the STEP Template Content panel are used to assign the contents that go inside of frames on InDesign templates, as opposed to the STEP Template Frame panel, which contains the options that control the behavior of the frames themselves.
The STEP Template Content panel can also be used to apply asset references to entire image frames, though the majority of the settings that control the behavior of the images are applied on the STEP Template Frame panel.
Sections of the STEP Template Content Panel
The STEP Template Content panel is composed of three panel divisions.
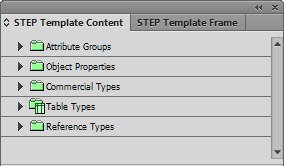
- The top panel contains an attribute tree that mirrors many of the contents of the System Setup tab in the workbench. It allows desktop publishing (DTP) users to access contents of the workbench from within InDesign without having to log in to the workbench. The available options vary by template type. The below screenshot shows all available folders for product templates. When working with publication templates, only the Attribute Groups and Object Properties folders are available. For page templates, the Attribute Groups, Object Properties, and Reference Types sections are available. (Refer to the 'STEP Template Content Tree' section of this topic below for more information on these folders.)
- The bottom panel contains the parameters that can be applied to content within the frames on the page. These options are the same regardless of what template type is being worked with.
- The bottom bar contains the search icon and an indicator to explain what template type is currently being worked with.

Accessing the STEP Template Content Panel
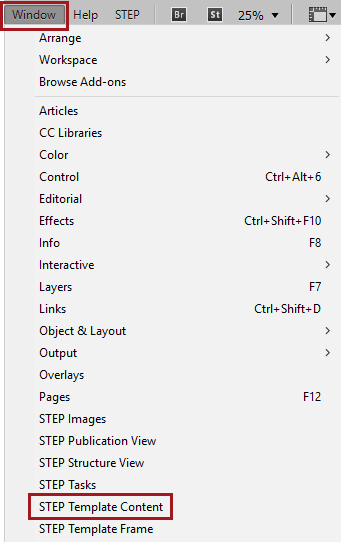
The STEP Template Content Panel is accessed by navigating to Window > STEP Template Content.
Navigation and Search in the STEP Template Content Panel
The STEP Template Content panel can be navigated by browsing or searching. To browse, hierarchies may be expanded and collapsed by clicking on the arrow signs to the left of the hierarchy levels. To search, click on the magnifying glass search icon in the lower left corner of the panel to display the Search dialog.
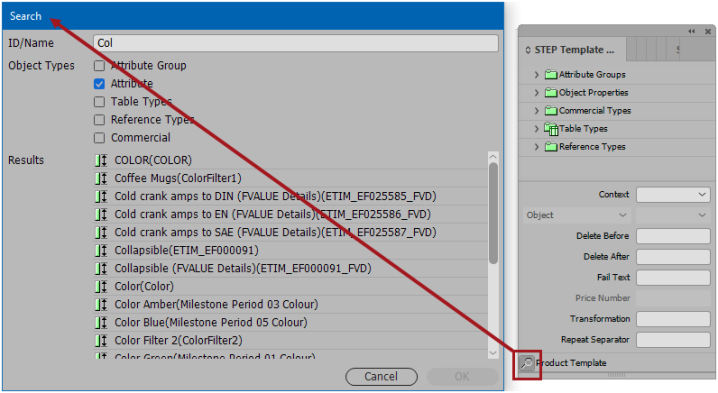
The Search dialog enables typeahead and filtered searches. Searches are performed by Name or ID. Searches may be filtered by one or more of the following object types: Attribute Group, Attribute, Table Types, Reference Types, and Commercial data lists. Search is not enabled unless at least one Object Types checkbox is selected in the Search dialog.
Note: A maximum of 20 results can be shown in the Search panel. It is recommended to enter more specific search criteria if looking for an object whose Name or ID begins with commonly used characters.
Configuring Character Minimums for Search
By default, typeahead searches begin when the first character is typed into the search field. To change this setting, the following configuration can be added to the inSTEPLogOptions.xml file:
<dtpDynamicConfig name="typeaheadSearchLimit" value="2" />
This configuration sets the number of characters that must be entered before search results display. For more information on the inSTEPLogOptions.xml file, refer to the IDS Logging topic in the Administration Portal documentation here.
STEP Template Content Panel Tree
The tree in the top panel of the STEP Template Content panel mirrors many of the contents of the System Setup tab in the workbench, but also has additional entries that are specifically for template creation.
Descriptions of each folder and its contents are as follows:
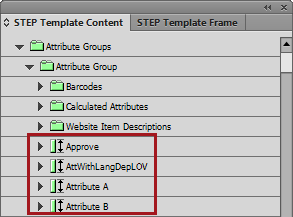
- Attribute Groups: Expand the top-level Attribute Groups folder to view all attribute groups in STEP.
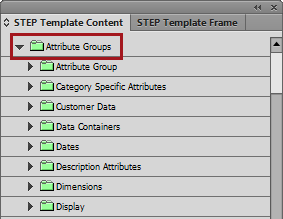
- Expand the attribute folders to access individual attributes.
- Object Properties: This folder contains non-attribute elements that can be mounted on InDesign pages. Each option is described in the bullet list below.
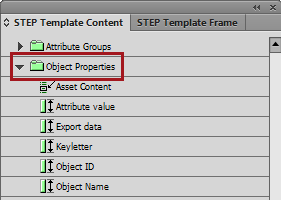
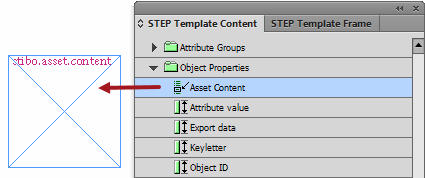
- Asset Content: Typically used in conjunction with the 'Data Source' setting (on the STEP Template Frame panel) to mount referenced image assets. Some examples of when this tag (stibo.asset.content) is used include: an image frame that will display multiple images from a multi-valued asset reference; an image frame that is intended to tile across the page when displaying multiple images; or for image frames that are grouped with text frames to mount image metadata captions. For more information, refer to the Sequencing Images in InDesign topic
- Attribute value: Used when mounting attribute groups. Refer to the Mounting Multi-Valued Attributes and Attribute Groups topic
- Export data: Used on product templates in AutoPage publications to include index mounting as part of the autopagination process.
- Keyletter: Used to create Galley page templates. Refer to the Galley Templates section of the Print Flatplanner documentation
- Object ID: Used to display the STEP ID of the object being mounted.
- Object Name: Used to display the STEP Name of the object being mounted.
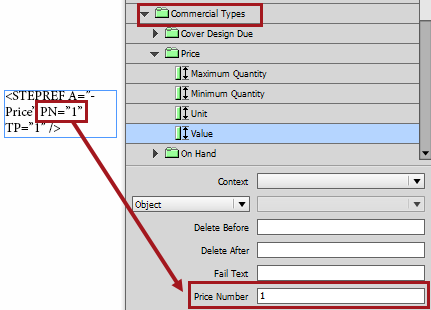
- Commercial Types: Used to mount the following information from a selected commercial terms list: Maximum Quantity, Minimum Quantity, Unit, and Value. Note that a Price Number must also be designated in the tag when mounting commercial data. For more information, refer to the Mounting Commercial Data topic here.
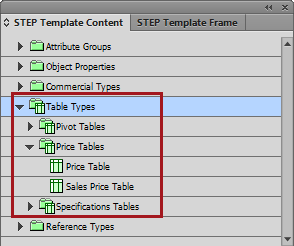
- Table Types: Used to add tags to text frames on product templates that will mount tables of the selected table type.
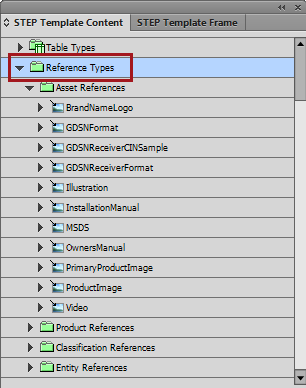
- Reference Types: Most commonly used with image frames to mount asset references, though tags for other reference types can also be placed onto templates from product references, classification references, and entity references.
STEP Template Content Panel Parameters
The parameters available on the lower half of the STEP Template Content panel are as follows:
- Context: Use this option to mount textual content from a specific context in STEP. If left empty (which is the default, and most common setting), the system will mount data from the selected publication version onto the page instead. One example for the use of this setting would be if your publication version is English but there are one-off instances in your document where you need to mount the same attribute twice on the page but in a different language, e.g., a product name should appear on the same page in both English and French, even though the version for the entire publication pulls from an English context.
- Object: This dropdown contains three options—'Asset Reference,' 'Product Reference,' and 'Template section object'. The default selection is Object. When Asset Reference or Product Reference is selected, the dropdown field to the right is activated, enabling you to select the relevant asset reference or product reference from the list.
- Delete Before + Delete After: If a mounted attribute is empty, Print Publisher can be configured to remove a number of characters either before or after the location where the attribute should have been placed. This is especially useful if there are characters that should not be on the page when the mounted attribute is empty.
For example: You want your page to display 'Special Offer: [PromoPrice] this week only'. If your database does not contain a value in the 'PromoPrice' attribute for the product you are mounting, you do not want these text strings before or after the attribute.
By using the Delete Before and Delete After functions, you can eradicate them.
For this example, setting a Delete Before value of 14 will delete the 14 characters of the 'Special Offer:' string. Setting a Delete After value of 15 will delete the 15 characters of the 'this week only' string.
Note: In most cases you do not need to count the exact number of characters to delete, as delete before / after will not delete another attribute reference. In addition, these delete options only take effect if there is no value for the attribute.
These options should also be used even if there is no free text before or after a value but you need the frame to disappear if there is no content. Using a value of DB = 1 or DA = 1 will remove any 'stray' XML tagging that appears on the page if there is no content in STEP and ensures that the text frame itself will disappear when Delete No Content is applied to the entire frame.
- Fail Text: If an attribute does not contain a value for the product you are mounting, you can use this field to insert text that should appear on the page instead of a blank space or frame. This field is typically used for text replacement strings such as 'Not Applicable', 'N/A', 'Call for details', 'None', etc. A Fail Text value can also be a blank space or an invisible character. If an attribute is empty and does not have a Fail Text configured, the attribute will appear on the page as a STEPXML tag (unless DB or DA values also have been configured; refer to the information above).
- Price Number: Used to designate which price break (price number) should be mounted from the values of a commercial terms list.
- Transformation: Used to apply an attribute transformation to an attribute when being mounted onto the InDesign page. The STEP Name (not ID) of the transformation must be typed into this field for it to take effect. The name of the transformation is case sensitive. The most common types of attribute transformations used are those that transform text values into images (for example, multiple image tags can be embedded in a text-based attribute and rendered in InDesign; refer to an example in the Attribute Transformations in Print Publisher documentation here).
- Repeat Separator:This option is used in conjunction with the repeat area (STEPREPEAT) function as well as multi-value attributes. If not set for a multi-value, then the multisep tag (Character Tags under System Setup > Tags) from the database is used.
The Repeat Separator value is a string, which is set in by Print Publisher every time a 'Repeat Selection' operation is performed. Often, the repeat separator is used to put in a new line character between the individual attribute rows. In that case, the Repeat Separator is the InDesign character for new line \n.
Available Right-Click Options Inside Text Frames
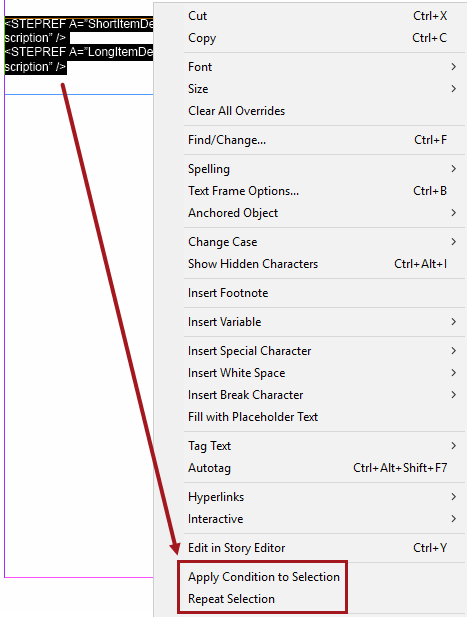
Two right-click options are available for highlighted text inside of a text frame—Apply Condition to Selection and Repeat Selection.
Though the STEP Template Content is not used to access these options, they are detailed in this topic because they involve the setting of parameters on content inside of frames.
Apply Condition to Selection
This option becomes available when at least one STEPXML tag is highlighted inside a text frame by using the InDesign Text tool. Once highlighted, you can apply parameters such as Delete Before / Delete After and Fail Text to the group of attributes at one time. Once the attribute tags are selected and the parameters chosen, click Apply Condition to Selection to apply the selections to all the attributes at once.
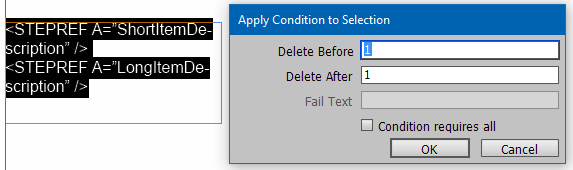
When the tags are selected, right-click to display the Apply Condition to Selection dialog.
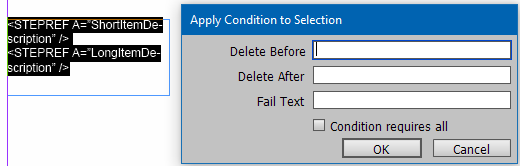
In the following screenshot, several tags have been selected and ‘1’ has been entered for Delete Before and Delete After. If a value is entered for Delete Before or Delete After, the Fail Text field will be deactivated, as the two options are mutually exclusive. Likewise, if content is provided for the Fail Text field, then Delete Before and Delete After will be deactivated. If fail text appears when an attribute value is empty, there is nothing to delete.
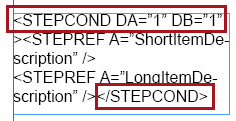
Click OK to view that as STEPCOND tag is now added to surround the grouping of attributes to which a DA and DB setting of 1 should be applied:
Delete Before, Delete After, and Fail Text
Configuring these options is identical to configuring them on the STEP Template Content panel for text. Refer to the STEP Template Content Panel Parameters section of this topic above for more information.
Condition requires all
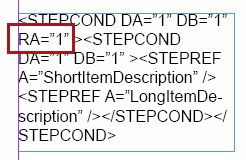
Check this box if you need everything in the frame to mount. This essentially means that the mounting of content inside the frame is 'all or nothing.' If the value of one of the attributes is empty, then nothing will mount, and the entire frame will be removed. Ticking this box will add the 'RA' (Requires All) abbreviation inside the STEPCOND tag.
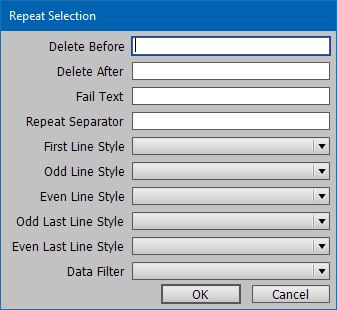
Repeat Selection
If attributes, asset references, tables, or any other values from child objects of a parent must be mounted, the repeat function STEPREPEAT is used.
When a product is mounted in Print Publisher, only attributes from the mounted object itself appear on the page. In instances of product families, for example, STEPREPEAT is used to call out information that lives on child products of the family.
The repeat function takes effect in the cases where you are mounting a product family with one or more child products. Using the repeat function, you can make Print Publisher place specific attributes of the child products into the page in repeat mode, which means that if you have children within the product family, you can have the values for all children mounted as you mount the product family level. Effectively, this function can enable you to display data for multiple products in a tabular way, without having to create a table in STEP.
As an alternative to creating a table in STEP, you can make a range of attributes repeat for any sub-products to the product being mounted. This will enable you to create a simple, table-like structure on your InDesign page where every sub-product has its own row.
Note: A more complex presentation is to build a STEP table, as this provides more complex formatting options.
For more information about the repeat selection option, refer to the Using the Repeat Function for Subproducts topic here.