In Print Publisher, assets can be mounted in a specified sequence on InDesign pages by using an Asset Order Meta-attribute that is valid on the link between products and image reference types. This attribute is used for asset reference types that allow for multiple references.
If there are multiple references from a product to various images using the same reference type (for example, 'Product Images'), and the product template calls out the Product Images, then all of the images will mount to the page. However, without configuring an asset order meta-attribute to control their sequence, they will mount in the alphabetically / numerically sorted order that they appear in the workbench.
This topic explains how to create and configure an asset order meta-attribute, how to configure image frames on product templates to mount multiple images at one time, how to tile these images, and how to sequence them.
Creating and Configuring the Asset Order Meta-attribute
If your system does not already have an attribute that is dedicated for use as the asset order meta-attribute, you can create this attribute with the following steps.
- Create a description attribute following the steps outlined in the Creating Attributes topic in the System Setup documentation here. A suggested location for the attribute is within a 'Metadata' folder.
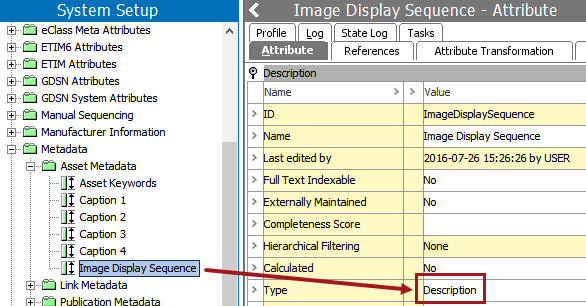
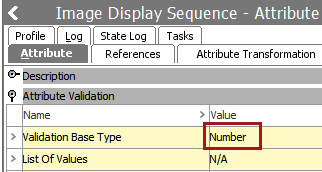
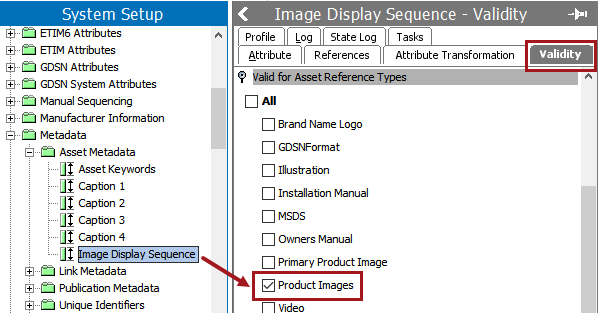
- The following screenshot shows an attribute with a STEP ID of ImageDisplaySequence and a name of Image Display Sequence. It is recommended to give the attribute an easily identifiable ID and name so it will not be confused with other sequencing attributes, such as an attribute display sequence attribute. The same attribute cannot be used for both image display and attribute display.The attribute must have a Type of Description and a Validation Base Type of Number.
- On the Validity tab for the attribute, make the attribute valid on the asset reference types that you will be using it for. In this example, the Image Display Attribute is valid on the Product Images reference type.
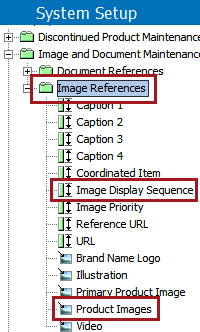
- The attribute must also be placed into an attribute group that contains the relevant asset reference type(s) for which the attribute is valid.
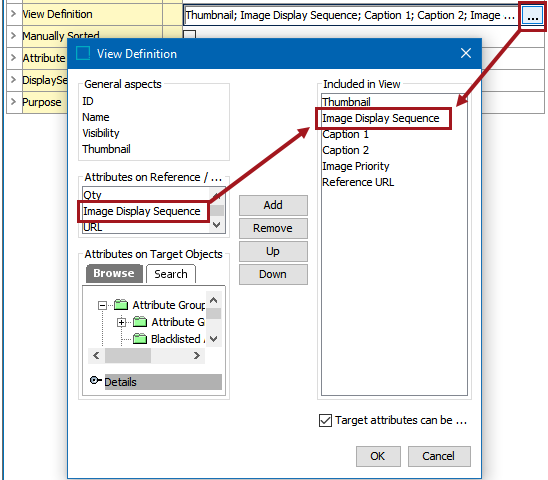
- The View Definition for the attribute group that contains the asset order meta-attribute and associated asset reference type must be configured to display the asset order meta-attribute on the links between the assets and the product on the References tab in the workbench. For details on how to configure a view definition for an attribute group, refer to the Attribute Groups topic in the System Setup documentation here.
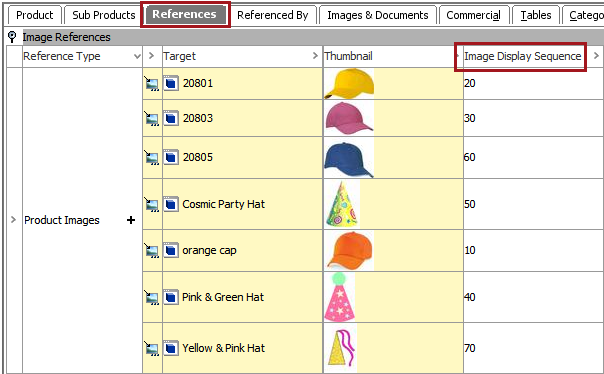
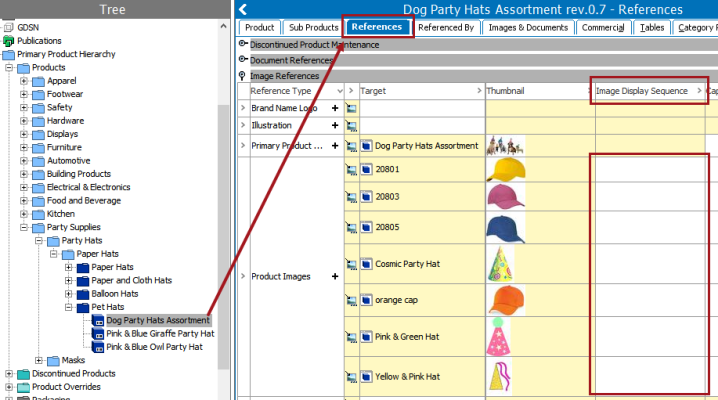
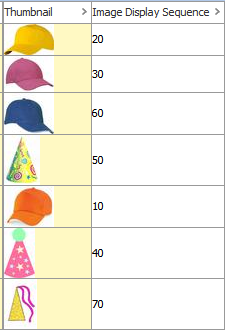
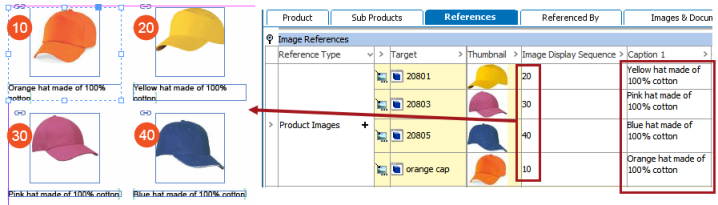
- After the View Definition is configured, the Image Display Sequence attribute will be visible on the References tab of your product on the link between the product object and the assets. The below screenshot shows seven images linked to the product using the Product Images reference type and a column containing the Image Display Sequence attribute.
- In order for the sequencing attribute to take effect on InDesign pages, the attribute must be designated as the Asset Order Meta-attribute in System Settings.
- Navigate to System Setup > Users & Groups, System Settings, then expand the DTP Settings flipper.
- Click the ellipsis button (
 ) in the Asset Order Meta-attribute field.
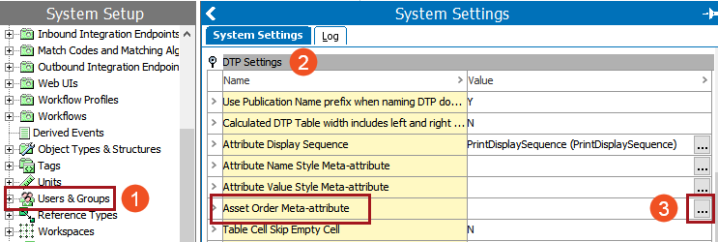
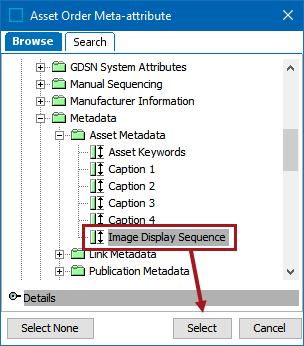
- In the Asset Order Meta-attribute dialog that displays, browse to or search for the asset ordering attribute, then click Select.
- The attribute is now set as the system-wide asset order meta-attribute.

Setting the Sequence of Images in STEP
Once the Image Display Sequence attribute is available on the References tab and has been set as the asset order meta-attribute, the next step is to designate the order in which you would like the images to mount.
- Navigate to your product object in the Tree, then click on the References tab.
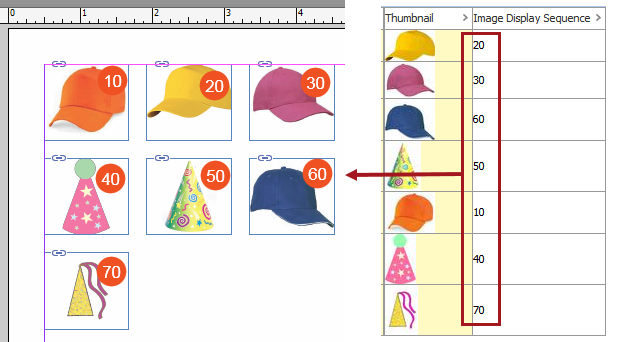
- Enter numbers in the asset order meta-attribute fields (in this example, Image Display Sequence) to designate the order in which you would like the images to mount.
In this example, seven product images are ordered in increments of 10. This method of numbering is recommended practice in case the images need to be rearranged later or if a new image needs to be added to the group. For example, if an image is added later but needs to mount in the third position, it can be numbered 21 and the numbering on the other images can be left as-is.
Tiling Images in Individual Frames on InDesign pages
Once the asset order meta-attribute has been created and configured, the next step is to configure the image frame on your product template to tile multiple assets across the page. These configurations are applied using the STEP Template Frame panel.
Configuring the Product Template to Tile Image Frames
The following steps assume that you have already created a product template with an image frame, the template is open in InDesign, and the STEP Template Frame panel is also open. For more detailed information on all available options on STEP Template Frame panel for image frames, refer to the Image Frame Parameters topic here.
- Select the image frame on your product template, then click on the Asset Content dropdown list and select 'Asset Content.' If adornments are visible on your template, the frame will display stibo.asset.content.
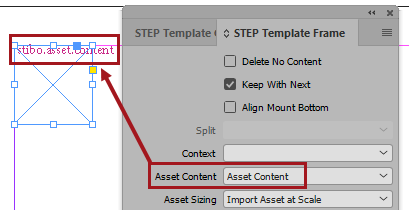
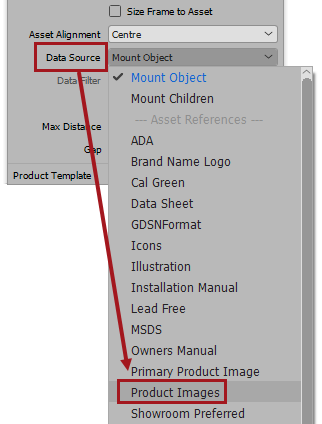
- Next, click on the Data Source dropdown list and select the desired asset reference type, for example, Product Images.
- The following STEP Template Frame parameters must also be applied to the image frame. The numbers in the following screenshot correspond to the numbers in the list below the screenshot.
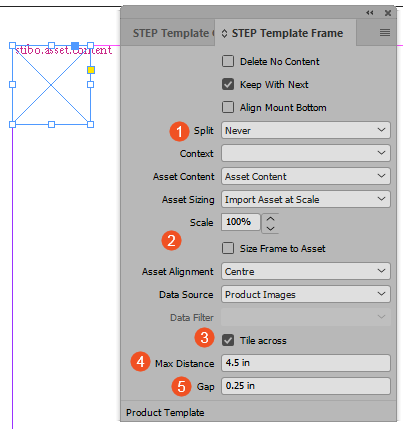
- (1) Select a Split setting to determine what should happen if there are so many images that they tile off of the page when mounted. In this example, the split setting of 'Anywhere' means that a new page will be created if the images cannot fit on one page.
- (2) The selections chosen for Asset Sizing, Scale, Size Frame to Asset, and Asset Alignment are up to the user. In this example, the settings ensure that the assets will be scaled to the size of their frames and centered within the frames.
- (3) The Tile across checkbox must be selected in order for the images to tile horizontally across the page. If left unchecked, the images will mount vertically.
- (4) A Max Distance must be entered to tell the system how far across the page the images should tile before wrapping around to a second row. If no distance is set, the images will tile off of the edge of the page if there are too many to fit in a single row. Max distance starts at the left edge of the image frame and ends at the point where you would like the tiling to start over on a second row.
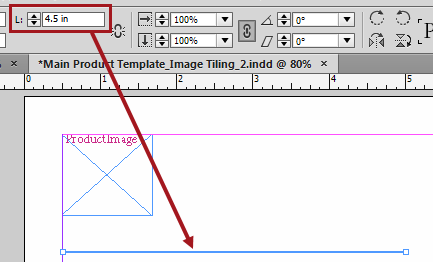
One method of determining max distance is to draw a line on the product template that aligns with the left edge of the image, then enter the length of that line into the Max Distance field. Delete the line once you have determined its length.
- (5) A Gap distance must be set if you would like space to appear between the image frames when mounted.
Note: The Gap distance should be factored in when setting Max Distance.
- When the product is mounted, the images appear in the location on the page designated by the template and in the order specified in STEP. Refer to the Mounting Products topic here for more information on how to mount objects to InDesign pages.
Sequencing Grouped Image Frames
Image frames that are part of tiled grouped frames, which are commonly used to mount images with metadata captions, can also be sequenced using the steps outlined in this topic. For information on images in grouped frames, refer to the Mounting Images With Metadata Captions topic here.
Tiling Multiple Images Within a Single Frame
Note: Image sequencing works the same whether images are tiled within a single frame or in individual frames.
Multiple images can be tiled within a single frame using the Multi Asset Across function. In order for images to be tiled, all images must be of the same asset reference type and the asset reference type must allow multiple references.
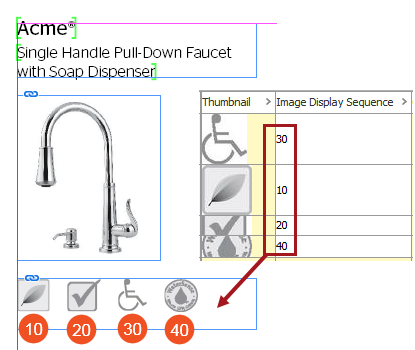
Typically, image sequencing for multiple images in a single frame is used for small icons that need to be sequenced in a certain order. This example uses a kitchen sink product that appears on the page along with icons indicating that the faucet meets the following compliance standards: ADA, Cal Green, NSF Lead-Free, and EPA WaterSense. An asset reference type named Icons is used.
![]()
Configuring the Product Template Image Frame
- Select the image frame on your product template, then click on the Asset Content dropdown list and select the desired asset reference type, for example, Icons.
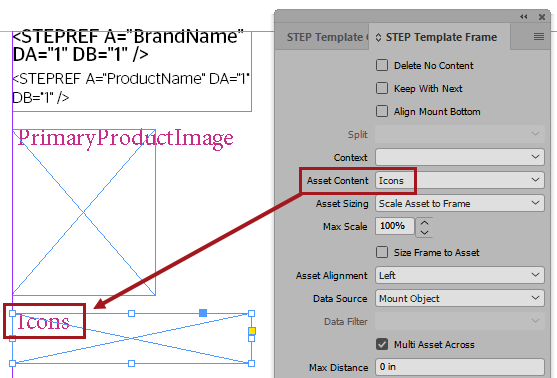
- If not automatically selected when you chose the asset reference type, click on the Data Source dropdown list and choose Mount Object.

- The following STEP Template Frame parameters must also be applied to the image frame. The numbers in the following screenshot correspond to the numbers in the list below the screenshot.
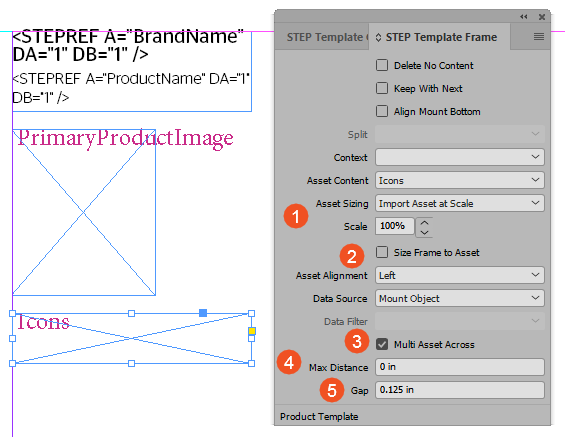
- (1) The selections chosen for Asset Sizing and Max Scale are up to the user. In this example, the settings ensure that the assets will be imported at actual size (100%). Recommended practice when using small images such as icons is to load them into STEP at the actual size they will appear on the page. However, if they are not actual size, they can be scaled to be either smaller or larger by changing the Scale value. (Note that this will apply equally to all images in the frame.) For more information on asset sizing parameters, refer to the Image Frame Parameters topic here.
- (2) The selections chosen for Size Frame to Asset and Asset Alignment are also up to the user. In this example, the settings ensure that the frame remains its original size and that the icons are aligned to the left.
- (3) The Multi Asset Across checkbox must be selected in order for the images to tile horizontally across the frame. If left unchecked, the images will mount vertically.
- (4) A Max Distance can be entered to tell the system how far across the frame the images should tile before wrapping around to a second row. 0 is the default. If no distance is set, the images will tile to the edge of the frame, then wrap around to a second row automatically. Max distance starts at the left edge of the image frame and ends at the point where you would like the tiling to start over on a second row.
- (5) A Gap distance must be set if you would like space to appear between the tiled images.
- When the product is mounted, the images appear in the frame in the order specified in STEP.