This topic describes how to configure a product template to mount multi-valued attributes and attribute groups. The setup for both is similar, as multiple values are placed onto the page at once, and repeat separators can be configured to separate the values. Additionally, when mounting attributes from an attribute group, a sequencing attribute can be configured to control the order that the values mount on the page.
Mounting Multi-Valued Attributes
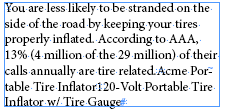
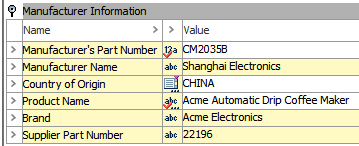
The following screenshot shows an example of a multi-valued attribute in STEP.
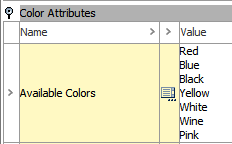
An attribute with multiple values is placed onto a product template by the same method used to place any other attribute onto the template. The difference in configuration between a single-valued and a multi-valued attribute is that a repeat separator can be applied to the attribute to control the separation of the values on the page.
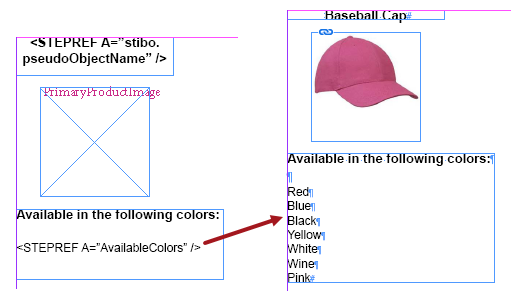
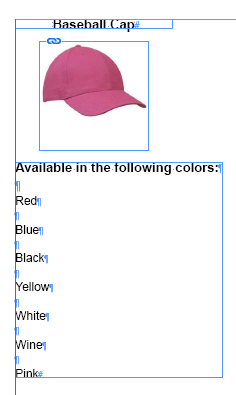
By default, the values of multi-valued attributes appear on the mounted page separated by hard returns. Pictured below on the left is a sample product template with a tag for a multi-valued attribute without a repeat separator applied to the tag. On the right is a mounted product with the values of the attribute separated by hard returns.
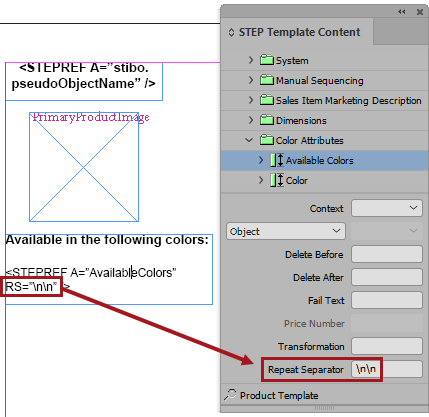
If more space should be placed between the values, or if a different separator should be used, then a repeat separator must be set. Common repeat separators are \n (hard return), \r (soft return), or \t (tab), though a separator can be as simple as a comma. In the following example, two instances of the hard return (\n) have been added to insert another paragraph break between each value. The first screenshot shows the repeat separators added to the tag. The second screenshot shows the same product mounted, but with the additional hard returns between the values.
Adding a Repeat Separator
To add a repeat separator to the tag:
- Using the InDesign text tool, place your cursor inside of the relevant tag on the product template.
- On the STEP Template Content panel, enter a repeat separator character into the Repeat Separator field.
- Press Enter to apply the separator to the tag.
If additional styling is desired, such as bullets, then these can be configured with an InDesign paragraph style.
Mounting Attribute Groups
If multiple attributes are needed on a page, and all attributes are within the same group, then an easier and more dynamic setup for the product presentation is to mount the entire attribute group. This reduces the setup involved in adding separate tags for each attribute. Additionally, as attributes are added to or removed from the group in STEP, the mounted data can be updated to ensure that only values from the attributes within the group are displayed.
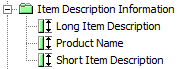
In this example, a small group with only three attributes is used.
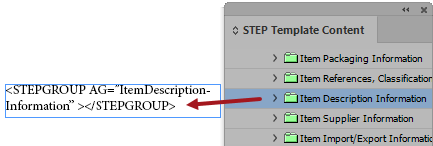
On product templates, a tag to mount values from an entire attribute group can be placed into a frame, as opposed to the more common practice of placing multiple attributes into the frame.
When an object is mounted onto an InDesign page using a product template containing this type of tag, the values from all attributes within the group are mounted.
If a repeat separator is not set on the attribute group tag on the product template, the values will mount together without a separator at all.
To apply a repeat separator to the attribute tag, follow the same steps used to add a separator to the multi-valued attribute tag, outlined above in the 'Adding a Repeat Separator' section.
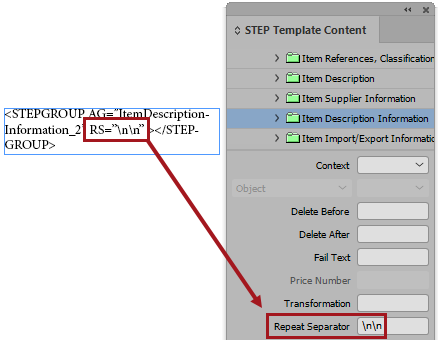
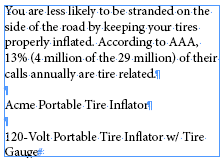
With a repeat separator added (in this example, \n\n), the values mount as pictured below:
Attribute Display Sequence for Print Output
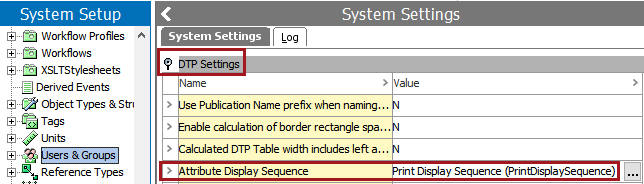
When mounting values from an attribute group, the values will be mounted in the order that the attributes appear within the attribute group. This is typically in alphabetical order, unless the attributes have been manually sorted previously. If you need the attributes to mount in a specific order on the page, an Attribute Display Sequence attribute is used. This is not configured on the product template; it is set up in the workbench.
Note: The 'Attribute Display Sequence' setting under DTP Settings is not the same as the 'Default Attribute to use as Display Sequence Attribute' setting under 'Product Information Manager Default Settings.' The attribute chosen for 'Default Attribute to use as Display Sequence' is used to sort the order of attributes as they display in the STEP Workbench. The 'Attribute Display Sequence' setting is solely used to control the order of attribute group values on mounted InDesign pages. The values added for a print attribute display sequence attribute do NOT affect the order that the attributes display in the workbench product editors.
An attribute display sequence attribute is created and configured in a near-identical fashion to the display sequence attribute used to control the order of attributes in the STEP Workbench. This topic describes how to use an attribute display sequence attribute for print output but not how to create the attribute itself. For information on how to create an attribute sequencing attribute, refer to the Attribute Display Sequence section of the Attributes documentation
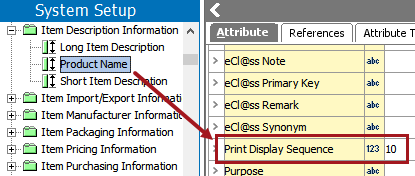
In this example, an attribute named 'Print Display Sequence' is used.
In the Item Description Information attribute group, the attributes are arranged alphabetically.
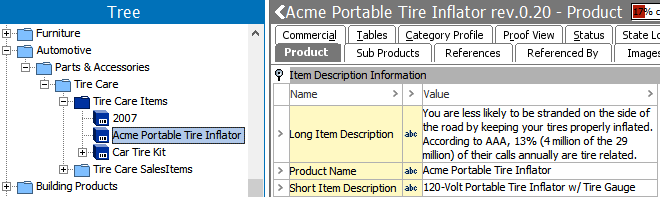
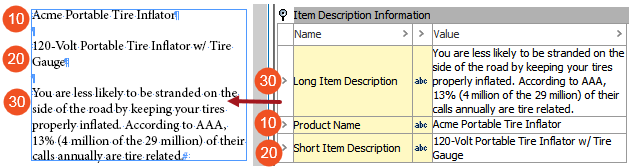
To set the mounting order on the attributes, locate the attributes in System setup and add the relevant numeric values. For this example, Product Name will mount first (value of 10, pictured below). Short Item Description will mount second (value of 20) and Long Item Description will mount third (value of 30).
The mounted product now displays with the attributes in the order set by the Print Display Sequence attribute:
Applying Styles to Attributes From Mounted Attribute Groups
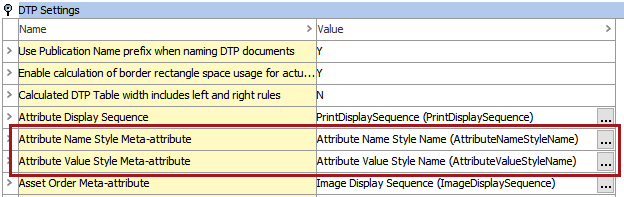
To apply styles to mounted attributes from mounted attributes, two metadata attributes are used and configured in System Settings under Users & Groups—Attribute Name Style Meta-attribute and Attribute Value Style Meta-attribute.
These attributes are required only when the style of the attributes' names and/or values differ from attribute to attribute within the attribute group. For instances where the styles of the attribute names and/or values do not change, the product template can normally be used to generate the desired effect.
The description attributes used for the 'Attribute Name Style Meta-attribute' and 'Attribute Value Style Meta-attribute' settings are used to call out paragraph styles (not character styles) in InDesign that are applied to the name of a mounted attribute and the value of a mounted attribute, respectively, when mounted as part of an attribute group. These attributes are made valid on the Attribute object type. The values of these attributes should be an exact match to corresponding paragraph styles in the publication template / mounting page.).
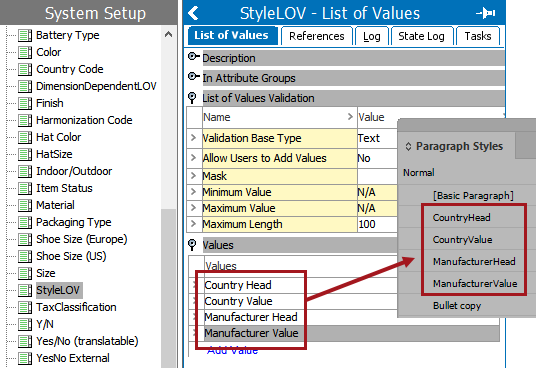
Style LOV
These attributes must use an LOV that holds all of the required style names used both for the attribute names and the attribute values. The values of this LOV must be exact matches to the names of the corresponding paragraph styles in InDesign.
Adding the Style Attributes in System Settings
- In System Setup, navigate to Users & Groups > System Settings.
- Expand the DTP Settings flipper and click the ellipsis button (
 ) for Attribute Name Style Meta-attribute.
- Browse to or search for the relevant attribute in the 'Attribute Name Style Meta-attribute' dialog, then click Select.
- Follow the previous steps to select the attribute for Attribute Value Style Meta-attribute.
Assigning Styles to Attributes in the Workbench
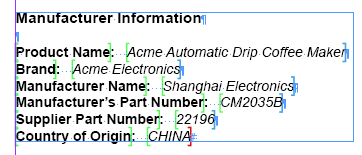
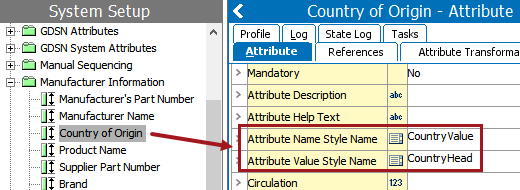
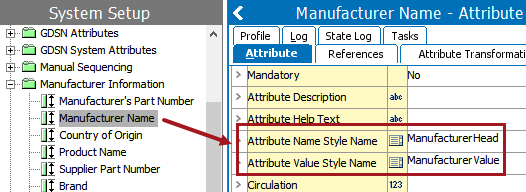
To assign the style attributes to the attributes that will be mounted, choose the relevant LOV values from the dropdown lists contained within the attribute name style and attribute value style attributes. The below screenshots show four different style selections: one for the Country of Origin attribute name, one for the Country of Origin attribute value, one for the Manufacturer Name attribute name, and one for the Manufacturer name attribute value.
Configuring the Product Template
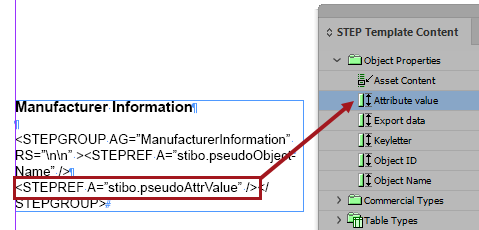
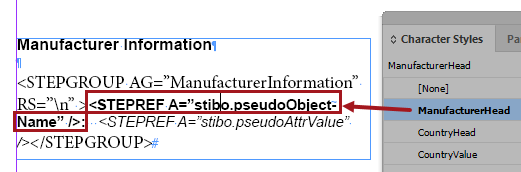
The following two tags under Object Properties on the STEP Template Content panel are used to pull in the attribute name and the attribute value, respectively: Object Name and Attribute value.
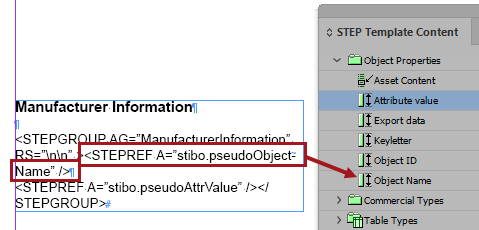
The <STEPGROUP> tag should appear at the beginning of the tag grouping and close with the </STEPGROUP> tag.
Note: The tags containing the attribute name and the attribute value must appear in separate paragraphs for the styles to be applied, since they are paragraph styles and not character styles.
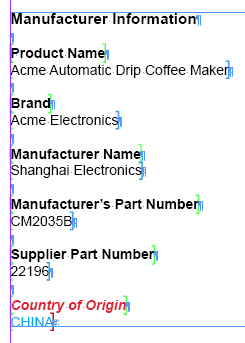
Mounted Product
The following attribute names and attribute values have been mounted on the page in this example.
Note that the attributes have also been sequenced, using the method outlined in the 'Attribute Display Sequence for Print Output' section of this topic.
Configuring the Product Template Styles Without Using STEP Workbench Metadata Attributes
If the paragraph styles should be the same for all attributes in the group, the styling can be controlled in the product template. This eliminates the need to set up the metadata styling attributes in STEP.
By using the product template to control the styles, character styles can be used, so the attribute name and the attribute value do not have to appear in separate paragraphs. However, paragraph styles can still be used if desired.
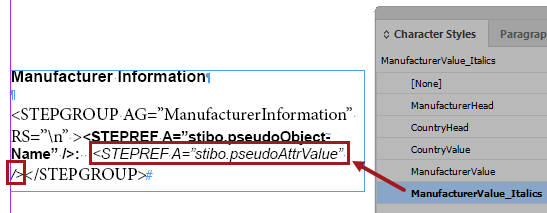
In this example, the attribute names and style meta-attributes are not being used in the system. The effect on the mounted page is accomplished via the setup in the product template.