Below is a description of the individual parameters available when configuring image frames on product templates using the STEP Template Frame panel in InDesign. For information on the parameters available for page templates and publication templates, refer to the bottom sections of this topic ('Image Frame Parameters for InDesign-created Page Templates' and 'Image Frame Parameters for Publication Templates').
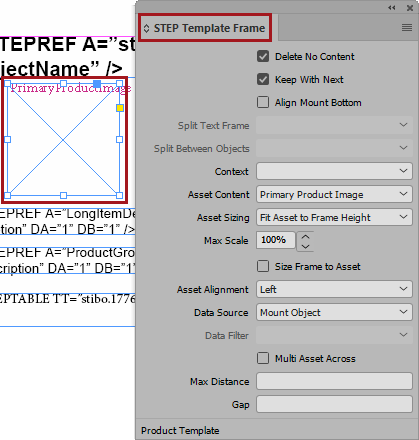
- Delete No Content: This option can be best understood as 'Delete IF No Content.' Check this box to ensure that empty image frames do not mount on pages if there is no image of the asset reference type linked to the mounted product.
- Keep With Next: Check this box to ensure that the selected frame remains with the frame that follows it (resides directly below) on the page. This setting prevents situations where, for example, the name of a product would be separated from its image if the product were mounted at the bottom of the page, and there is only enough room to mount the image frame. With this box checked, both the image and the text box below it containing the product name will mount on the following page in order to keep the elements together. A frame with Keep With Next set cannot have a Split setting of Anywhere or Within Spread and vice versa.
- Align mount bottom: Select this to ensure that an image frame will always mount at the bottom of the page. In Flatplanner, the frame will align to the bottom of the Flatplan frame. If more than one frame is designated to align mount bottom, the lowermost frame will align to the bottom and the other frame(s) will mount above it, separated by the same gap amount as on the product template.
- Split Text Frame: N/A; disabled for image frames.
- Split Between Objects: This option applies to repeating frames and is activated when a data source other than 'Mount Object' is selected, e.g., Mount Children. The three split options are Never, Anywhere, and Within Spread.
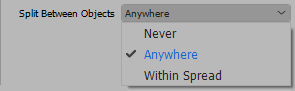
- Select Never to prevent a series of repeating image frames from splitting across a column or page if there are too many frames to fit in one column or on one page.
- Select Anywhere to allow the series of repeated frames to split across a column or onto another page, even if the split continues from a right-hand page to a left-hand page, creating a new spread.
- Select Within Spread to only permit the repeated frames to continue from a left-hand page to a right-hand page, disabling the ability to create a new spread.
- Context: The Context option allows for the selection of a STEP context from which to select the image. If left empty, the system will mount the image from your version into the page instead. Normally, you will only choose a specific context if you are building a multi-versioned document and need to determine exactly which context goes into a certain layer version. The quickest and most flexible solution is to leave the context selection empty.
- Asset Content: Used to assign an asset reference type to the frame.
- Asset Sizing: Dropdown list containing the following options:
- Import Asset at Scale: Image will be scaled according to the Scale value entered in the STEP Template Frame panel. By default, the Scale field is blank, meaning that the image will be mounted at actual size unless a percentage below or above 100% is entered.
- Scale Asset to Frame: Image will be scaled proportionally until either width or height fit into the box, unless a Max Scale limit is set (defined below)
- Fit Asset to Frame Width: Image will be scaled proportionally until the width is identical to the width of the frame, unless a Max Scale limit is set (defined below)
- Fit Asset to Frame Height: Image will be scaled proportionally until the height is identical to height of the frame, unless a Max Scale limit is set (defined below)
- Scale: Only active when Import Asset at Scale is selected. Using this option, images can be scaled with a certain percentage, calculated on the basis of their original scanned size.
- Max Scale: Only active when Scale Asset to Frame, Fit Asset to Frame Width, or Fit Asset to Frame Height are selected. Max Scale can be set from 5% to 500%.
The ability to constrain the image scale for the frame-fitting options using Max Scale prevents issues where scaling too high results in a poor image that is not acceptable when printed. For example, if the actual size of the image in STEP is much smaller than the frame to which it is being mounted, the Max Scale option will prevent this small image from scaling up to such a large size that its resolution is too low for print.
Note that if the actual size of the image is larger than the frame, it will still scale down to fit the frame, regardless of whether the Max Scale value is set above 100%. If Max Scale is left blank, images will scale up or down to fit the frame, frame width, or frame height.
- Size Frame to Asset: Automatically sizes the image frame to match the size of the image(s) linked inside. I.e., if the image mounts smaller than the image frame on the product template, the frame will shrink to fit the size of the image, and vice versa for images that mount at a larger size than the original image frame.
- Asset Alignment: Defines whether the images should be aligned left, center, or right within the image frame.
- Data Source: This controls whether the frame should mount content from the object that is being mounted (Mount Object; most common), from children of the mounted object (Mount Children), or from an asset or product reference type. By default, the data source is Mount Object, which mounts the object only.
Select Mount Children or a product / asset reference type when the image frame is intended to repeat on the page. The image frame repeats in instances where information is available from multiple child objects or from multiple referenced assets. When selected, the following options are activated in the STEP Template Frame panel: Data Filter, Multi Asset Across, Max Distance, Gap, and Split. (If anything other than 'Mount Object' is selected for Data Source, the checkbox is labeled Tile Across instead of Multi Asset Across.)

- Data Filter: Only activated when Data Source is 'Mount Children.' Used when mounting publication or sections objects to pull information from child sections / subsections. Available options are Sections Only - Sort by Section Name and Sections Only - Sort by Page Number. This functionality does not exist for images, but the dropdown exists for image frames in the instance that a future customer need may arise.
This functionality is typically used in AutoPage publications to create tables of contents / section indexes. Refer to the Creating Tables of Contents in AutoPage section of the Print AutoPage documentation
- Multi Asset Across: Is activated when Data Source is 'Mount Object.' When there are multiple images linked to a single product using the same asset reference type. this setting allows multiple images to be placed inside a single frame and tiled horizontally. If not selected, the images will be mounted vertically.
- Tile across: Check this box if repeated frames should be tiled horizontally across the page instead of stacking vertically beneath one another. Activated if anything other than 'Mount Object' is selected for Data Source.
- Max Distance: The maximum distance that horizontally tiled frames should repeated across the page (L-R) before stopping and wrapping back around to begin a new row of repeated frames underneath
- Gap: The amount of space to place between repeated frames when tiled horizontally
Image Frame Parameters for InDesign-created Page Templates
The below screenshot shows the available image parameters for InDesign-created page templates, which are only applicable for Flatplanner publications and typically are Galley templates. The options exclusive to page templates are Frame Type and Frame ID. The remainder of the options (Context, Asset Content, Asset Sizing, Max Scale, Size Frame to Asset, and Asset Alignment) are identical to those available for product templates.
For information on how to use these options, refer to the Galley Templates section of the Print Flatplanner documentation
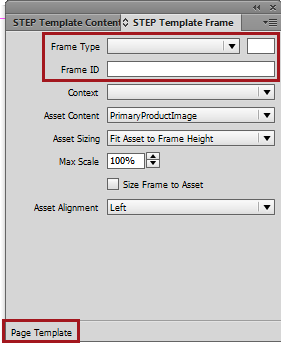
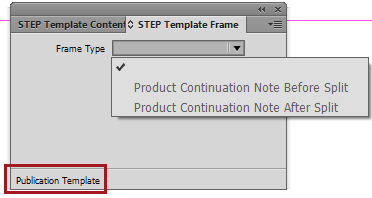
Image Frame Parameters for Publication Templates
Though a 'Frame Type' dropdown list is available for image frames when working with publication templates, the options are grayed out, as they are not applicable to image frames. The dropdown exists, however, in the instance that it might have a future use if a customer need arises.
These two options (Product Continuation Note Before Split and Product Continuation Note After Split) only apply to text frames on publication templates that will be used in AutoPage publications. Refer to AutoPage Pagination Rule Actions in the Print AutoPage documentation here for more information.