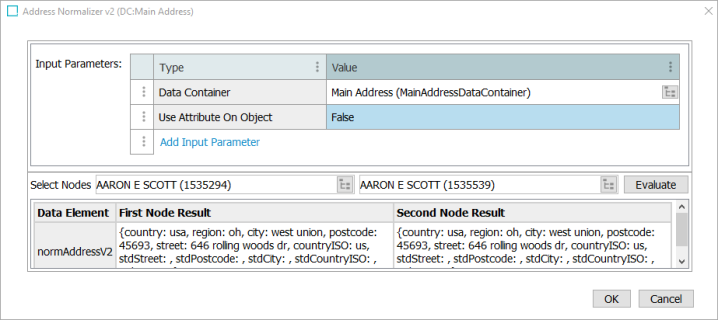
The Address Normalizer v2 produces a normalized set of addresses for use in address matching. The normalizer supports the Machine Learning Matcher for address matching.
For details, refer to the topic Matcher: Machine Learning Matcher in the Matching, Linking, and Merging documentation.
Prerequisites
Configure the Address Component Model (defined in the Address Component Model topic of the Data Integration documentation).
When configuring the Input Parameters for the Address Normalizer v2, the field allows selection of:
-
'Use Attribute on Object' – by default, this option is set to ‘True’ and indicates to read attributes on the object itself. Click the Value dropdown to manually set it to 'False' when using information from a Data Container or an Input Normalizer.
-
'Data Container' – read attributes from the data container.
-
'Input Normalizer’ – read outputs from the selected Match Expression, as defined in the topic Matching Algorithms and Match Expressions.
When the Input Parameters have been configured using option 1 or 2 above, the data is provided by the attributes that are mapped in the Address Component Model. The address object uses both the input attribute values and the standardized attributes. Refer to the 'Output' section below for details.
Output
The output of the Address Normalizer v2 is a class: java.util.Set<com.stibo.partydatamatching.domain.address.StandardizedAddress>
For more information on the contents of the class, refer to the Technical Documentation on the STEP Start Page and review the documents linked from within the Scripting API section.
When the Address Normalizer v2 is configured to use input from a node itself or a data container, the output contains both standardized and non-standardized values according to the mapping done in the Address Component Model as shown in the table below.
| Output | Address Component Model |
|---|---|
| street1 | Input Postbox, Input Address 1, Input Address 2, Input Address 3, Input Address 4, Input Address Line, Input Building, Input Dependent Locality, Input Dependent Street, Input Street, Input Street Name, Input Street Number, Input Subbuilding, Input Organization |
| postcode |
Input Zip |
| city | Input City |
| region |
Input State |
| country | Input Country |
| countryISO | Country ISO Code |
| stdStreet1 | Standardized Street, Standardized Organization |
| stdPostcode | Standardized Zip |
| stdCity | Standardized City |
| stdCountryISO | Standardized Country ISO Code |
| stdRegion | Standardized State |
1For 'street' and 'stdStreet,' the values are concatenated using whitespace as delimiter.
Functionality
The Address Normalizer v2 automatically makes the following modifications to the output fields:
-
All output fields: All leading and trailing white spaces are removed.
-
street, stdStreet, city, stdCity, region, stdRegion, country: Text is changed to lower-case.
-
postcode, stdPostcode: All spaces and dash (-) characters are removed and text is changed to lower-case.
-
countryISO, stdCountryISO: All characters other than Latin letters and numbers are removed.
Because address information varies between systems and countries, it is sometimes necessary to chain address normalizers. For an example of adding a custom address normalizer business function that further normalizes the address after the standard normalizer runs, refer to the Data Element: Business Function Normalizer topic.
Configuring an Address Normalizer Data Element
After adding the Address Normalizer v2 in the Data Elements flipper of the Decision Table dialog (defined in the Match Criteria topic), configure it as follows:
-
Click into the Data Elements column and click the ellipsis button (
 ) to access the configuration dialog.
-
On the Address Normalizer dialog:

-
For the Input Parameters, define the source of the data to be normalized. Refer to the Input section above for details.
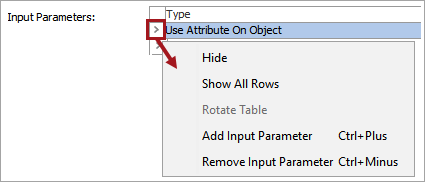
Right-click the ellipsis button in the first column of the Input Parameters table for additional display and edit options. Although it appears that the default 'Use Attribute On Object' parameter can be removed, after closing the dialog it will continue to display. Instead, if a different input parameter is used, click the Value dropdown and manually set 'Use Attribute On Object' option to 'False.'

Click the Add Input Parameter link to add other input parameters.

-
-
To test the configuration, for the Select Nodes parameters:

-
Click the selector button (
 ) for each field and select two objects for comparison.
 -
Click the Evaluate button.
An empty result field indicates the value is not available in the selected node. Adjust as indicated by the Evaluator results and repeat the evaluation.
-
-
Click OK to save and display the configuration in the Data Elements flipper. Click into a Comment cell to add relevant information as desired.
