Import of Images and Documents can be initiated in different ways.
- Determine the location of the assets that you want to import.
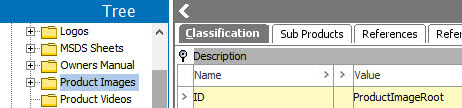
- In Tree > Classification hierarchy, select the folder that will house the imported asset files.
- Choose one of the following options to start the wizard:
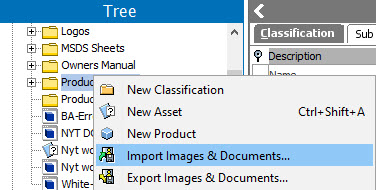
- Either right-click the classification folder and select Import Images & Documents from the menu.
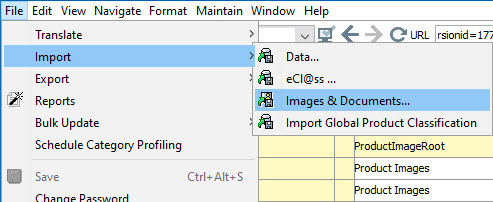
- Or from the File menu, point to Import, and then select Images & Documents.
- The Import Images and Document wizard opens. The wizard guides you through the required steps. Not all steps are necessary for every import. Often you can skip the later steps and proceed to the end to launch the import process.
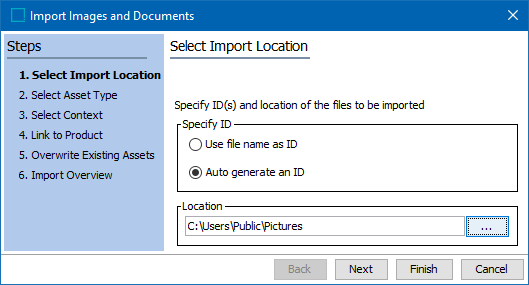
- Select Import Location allows you to determine the asset ID and choose the location of the objects to import.
- Select Asset Type allows you to set the asset object type to be used.
- Select Context allows you to set dimension dependencies.
- Link To Product allows you to create reference links between the imported assets and existing objects.
- Overwrite Existing Assets allows you to determine if the imported assets replace existing assets.
- Import Overview allows you to review a sampling of the assets to be imported.
-
The 'Asset Import Process' starts after clicking on Finish button in 'Import Images and Document' wizard. For more information on the asset import process, refer to the Manual Asset Importer topic.