In 'Import Images and Documents' wizard, step '6. Import Overview' you can review some of the assets that you are about to load - provided that you selected a folder and not an individual file.

- Review a sample of the assets to be imported. Depending on the number of assets found in the selected folder, not all will be displayed. When importing only a few, all are displayed.
The Import Overview shows you the following information about the file about to be imported:
- Name
- Object type
- Size bytes
- Modified Date
- Linked to Product ID: File Name / Product ID is displayed if a match exists. "None" is displayed when no match is found.
- Status = Skipping when the image already exists and you selected not to overwrite; or Overwriting when you chose to overwrite existing images and an image with the same name exists
- Click the View Existing Assets button to view any existing assets that may be overwritten. Click Close to close the report window.
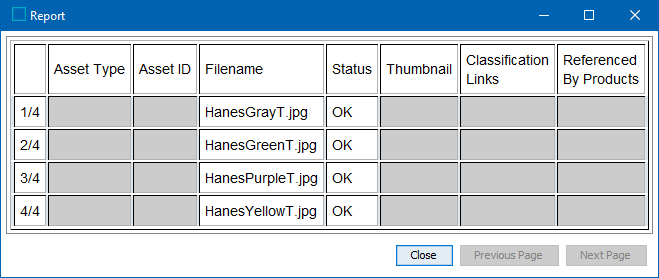
Note: If there are more than 20 assets that are being imported, then the Next Page and Previous Page buttons are activated. By default there are totally 20 images that are shown in one page and the remaining in the next page.
- If necessary, use the Back button to correct any errors displayed.
- Click Finish to start the asset import process.
- The Import Status window displays the progress of the import. As each asset is loaded, the screen updates with the percentage complete and the number of warnings.
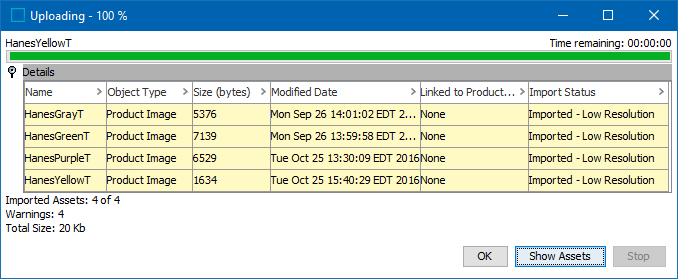
- Click the Details flipper to view the status of and any warning for each imported asset.
- Click Show Assets, to view a multi-view display of the imported assets and their location in the hierarchy.
- Click Stop to halt the import process.
- Click OK to close the import process dialog.