There are some prerequisites to Web UI configuration / usage.
Privileges
Privileges configured in STEP Workbench also apply when working with data in a Web UI. For instance, if a user can edit attributes in STEP Workbench, they will also be able to edit attributes through a Web UI.
Web UI configurations will, by default, not be user / user group specific. Apart from the fact that the standard privilege setup can influence what a user accesses / is able to do, the Web UI will be the same for all users logging in.
Users need privileges to be able to access and use Web UI. Different privileges can be set up for different users and user groups depending on the users' roles. As an example, if a user will maintain Web UI configurations in an admin role, the user will need the proper privileges to access Web UI Designer. Or, if an end user will be using workflows or viewing / maintaining objects, then there are separate privileges for these tasks. Furthermore, users can be prevented from accessing specific Web UI instances they do not need to use.
To follow any of the steps in the Web User Interfaces documentation, the proper privileges have to be granted (e.g., you cannot create a new Web UI unless you have the privilege to do so). For more information about privileges and user setup, refer to the Users and Groups topic and the Adding User Privileges for a Group topic of the System Setup documentation.
Web UI Access Privileges
At a minimum, the actions, 'Access Web UI' and 'View context' must be added to a user group's privileges before a user is able to log in to a Web UI. If these actions do not already exist as a standalone item or as part of an existing Action Set, then they need to be set up.
Below are the steps for creating an Action Set and applying it to a User Group.
- Go to System Setup in the STEP Workbench.
- Under Action Sets, right-click Setup Actions and add a New Action Set.
- Type in an ID and Name then click Create. In this example, the name is 'Web UI Access.'
- Click on the new action set that was just created (Web UI Access) and go to the Action Set tab.
- Click on the Add Action link and select 'View context' then click Select.
- Click on the Add Action link and select 'Access Web UI' then click Select.
- Go to the Users & Groups section of System Setup and click on the user group that needs Web UI access.
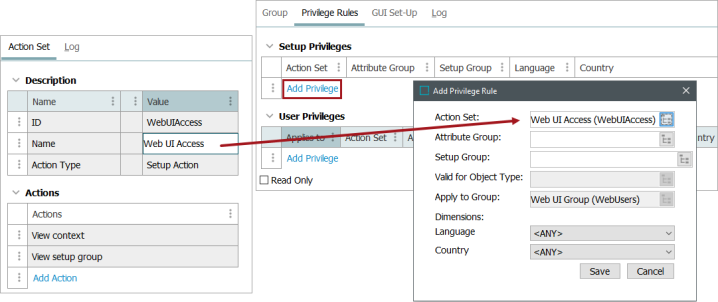
- On the Privilege Rules tab, click the Add Privilege link under the Setup Privileges flipper.
- In the 'Add Privilege Rule' dialog box, click the ellipsis button (
 ) next to the Action Set field and choose the Action Set you just created (Action Sets > Setup Actions > Web UI Access). Then, click Select.
Note: If the user(s) should only have access to specific Web UI instances, define the Setup Group in which those Web UIs reside. Click the ellipsis button () next to the Setup Group field and select the relevant Web UI Setup Group.
- Click Save.
Important: If restricting user access to specific Web UIs, make sure there are no competing Action Sets set for the user group. The action set with the most generous access applies, not the Action Set with the most restrictive access.
For admin users who will be using the Web UI Designer, refer to the Designer Access topic.
Restricting User Access to Web UIs
In certain instances, admin users may require that access to Web UIs be restricted to only specific privileged users. For instance, users in Group A should not be able to access Web UIs intended for Group B, and vice versa, while an admin user should be able to access all Web UIs. By following the steps listed below, admins can add Web UIs to Setup Groups to meet this requirement. For additional information on Setup Groups and how to set them up, refer to the Setup Groups.
To control access to a group of Web UIs, admin users must take the following steps:
-
Create a setup group and add the Web UI(s) that the first group of non-admin user(s) must access. In this instance, the setup group refers to a grouping of Web UIs.
-
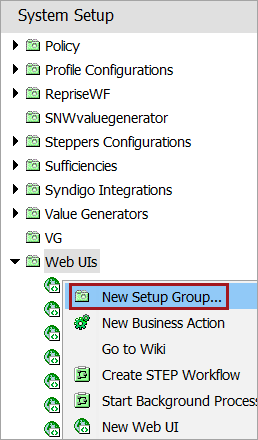
To create a new Web UI setup group, in the workbench, right-click on the 'Web UIs' node in the 'System Setup' tab and select 'New Setup Group' from the menu that displays.
-
Create the Web UIs that will be accessed by the first group of non-admin users into the new setup group.
Note: If you are moving existing Web UIs into a new Web UI setup group, right-click on the Web UI you wish to move and select 'Cut' from the edit menu dropdown. Right-click on the Web UI setup group into which you want to place the Web UI, and select 'Paste.' The Web UI now resides inside of the desired Web UI setup group.
-
-
Repeat step one to create a setup group for the Web UI(s) to be accessed by the second group of non-admin users.
-
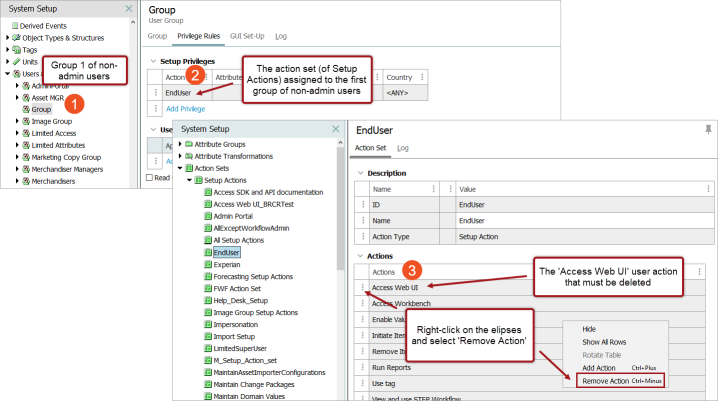
Verify that neither group of non-admin users have the 'Access Web UI' setup action in their setup privileges.
-
In other words, check the action set configured for the setup action group assigned to the relevant user group, and remove the 'Access Web UI' action from the group.
-
-
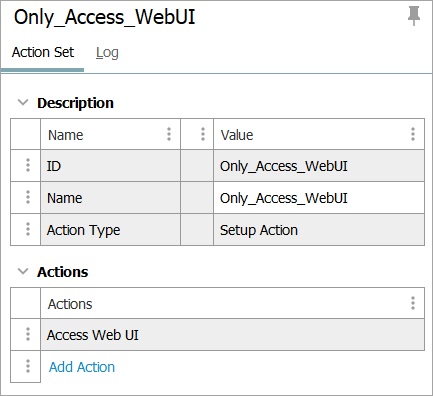
Create a new Action Set (in Setup Actions) that contains only the 'Access Web UI' setup privilege.
-
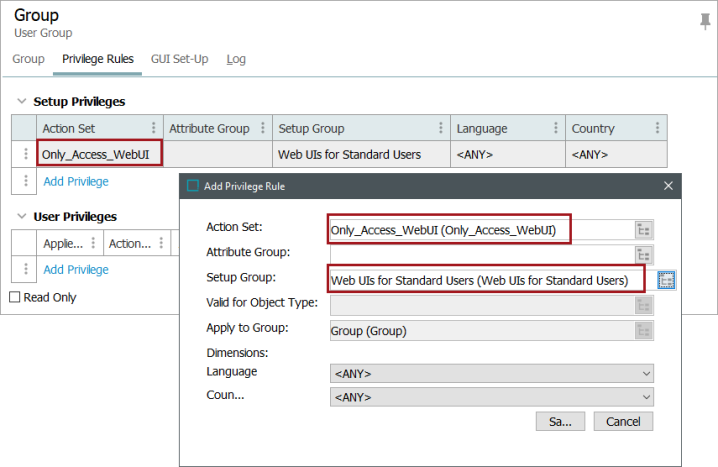
In the user group for the first group of non-admin users, under 'Setup Privileges', click 'Add Privilege'. In the 'Add Privilege Rule' dialog box, click the ellipsis button (
) next to the 'Action Set' field and select the new action set (the one with only 'Access Web UI' in it). (Action Sets > Setup Actions > 'Web UI Access-only' setup action). Then, click Select.-
For the 'Setup Group' field, find and select the setup group (created in step 1) that contains the Web UIs this group of non-admin users should access. The 'Add Privilege Rule' dialog should resemble the one pictured in the screenshot below.
-
-
In the user group for the second group of non-admin users, repeat the previous step.
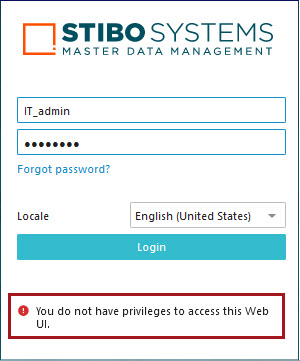
When this configuration is complete, both groups of non-admin Web UI users can access only those Web UIs they are privileged to access, while the admin users can access all Web UIs in the Web UI setup groups. For instance, users belonging to the second user group of non-admin users will get this message if they attempt to login to the Web UIs accessible only for users in the first group of non-admin users:
Timeout
The configuration property Portal.Timeout defines the number of minutes that the Web UI is allowed to remain idle before timing out. Upon time out, all credentials granted to the current Web UI user until the next log in. This property is also used for the timeout of the admin portal.
For example: Adding the property Portal.Timeout=30 to the sharedconfig.properties file means that a Web UI will remain accessible for 30 minutes of idle time before logging the current user out. The default time is 15 minutes, and if 15 minutes is the desired time, then no configuration property has to be added to the sharedconfig.properties file.
Note: If the 'Inactivity timeout period' option is set with a different timeout period, it will supersede the Portal.Timeout setting. Refer to the Security Policy topic in the System Setup documentation.