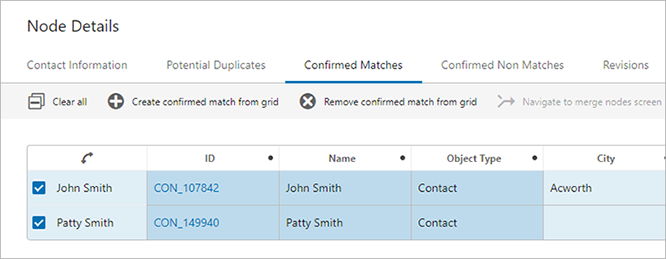
From the Confirmed Matches component screen, users can view all objects that have been confirmed as matches for the currently selected object, and may choose to either merge the selected object with one of the listed matches, or reject an object(s) as a viable match.
Important: The option to merge is not applicable to Golden Record configurations.
Before they can appear on this screen, matches listed must be confirmed via the Potential Duplicates List topic or the Deduplication List screen (as defined in the Configuring a Deduplication Clerical Review topic).
If applicable to the configuration, a merge nodes button can be added to the screen as defined in the Merging Confirmed Matches topic. To merge two matching nodes, select the relevant object from the list and click the 'Merge' ( ) icon.
To reject a confirmed match, select the relevant object from the list and click the 'remove' (![]() ) icon. Doing so sends the selected object back to the Potential Duplicates List / Deduplication List screen.
) icon. Doing so sends the selected object back to the Potential Duplicates List / Deduplication List screen.
Prerequisites
It is expected that anyone configuring the Confirmed Matches component is familiar with the Web UI Designer, as basic concepts for working with the designer are not covered in this section. In addition, the user must have appropriate privileges to access the designer. Additional information can be found in the Designer Access topic.
Configuring the Confirmed Matches component
A number of configuration options are available for this component that allow users to customize how the table is formatted. Additionally, a matching algorithm and corresponding action button(s) must be configured.
-
Select the Node Details screen. Example: Subscriber Details
-
In the Child components area, in the Main dropdown, select Tab Control.
-
Click on 'go to component' to configure the Tab Control component.
-
Add a Tab Page to the Tab Control.
-
On the Tab page, enter Title name. Example: Confirmed Matches.
-
On the Tab Page, set Tab Content to Confirmed Matches.
-
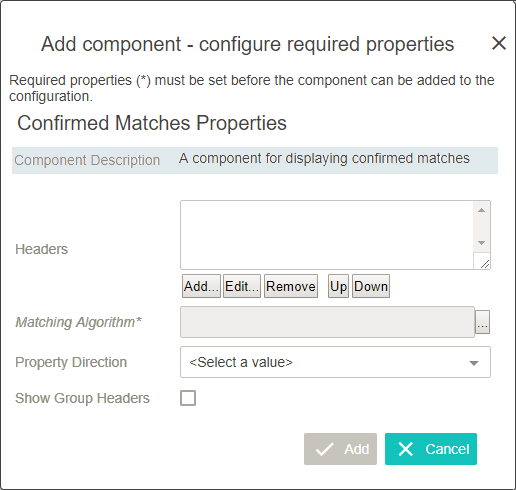
Confirmed Matches Properties screen will be displayed as shown in the image below.
-
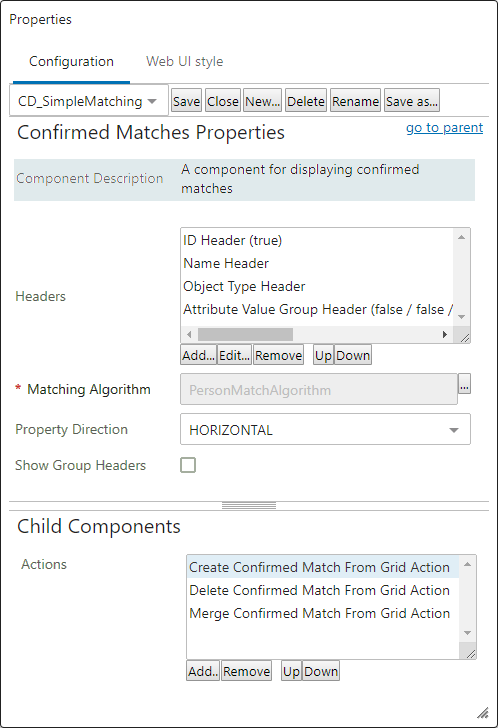
Headers: In this parameter, specify which headers will appear on the table by clicking Add... and selecting the desired header. Depending on the header selected, additional configuration steps may be required. Ideally, attributes most relevant to matching should be specified.
-
Matching Algorithm: In this parameter, click the ellipsis button (
 ) and select the relevant matching algorithm.
 -
Property Direction: For this parameter, determine whether to display the data in a horizontally or vertically aligned list via the dropdown.
-
Show Group Headers: Check the box for this parameter if attribute group headers should be displayed.
Once the tab has been created and configured, an additional field is made available as a child component:
-
Actions: In this parameter, click the Add... button to add actions to this component. The available actions are the 'Create Confirmed Match From Grid Action,' which adds a button to add new confirmed matches from the screen, the 'Delete Confirmed Match From Grid Action,' which adds a remove node button to the screen, and the 'Merge Confirmed Match from Grid Action' button, which allows confirmed matches to be merged. The 'Create Confirmed Match from Grid Action' requires configuration.
-