With the Match and Link solution, two objects that have been confirmed as duplicates can be viewed on a Confirmed Matches component screen. The user decides whether to merge the duplicates or reject the confirmation and revert the objects back to potential duplicates.
Merging matched objects invokes a Merge Nodes screen where users choose the object to survive the merge, thereby assigning an object to be deleted, in addition to selecting the specific attribute values and outgoing references to be applied to the surviving record.
For more information, refer to the topic Potential Duplicates List.
For more information about how to merge confirmed matches via the workbench, refer to the topic Match and Link in STEP Workbench.
Note: Although the Merge Nodes Screen can be used to merge any nodes of the same super type, it is intended for use with matching algorithms and the Match Action for Identify Duplicates in conjunction with the Merge Confirmed Match From Grid action in the Confirmed Matches component.
Configuration
The following setup is required to enable the merge confirmed matches functionality in Web UI.
Add Merge Nodes Screen
-
In design mode, click the New button.
-
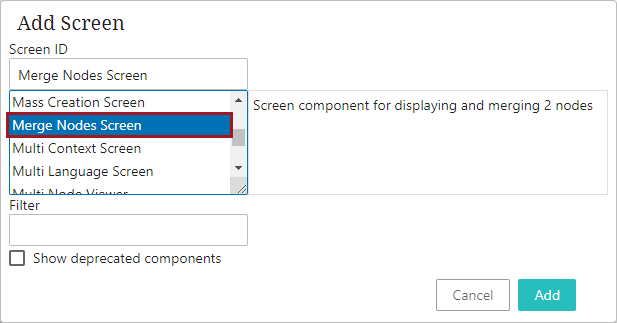
In the 'Add screen' window, select 'Merge Nodes Screen', enter a Screen ID, and click Add.
-
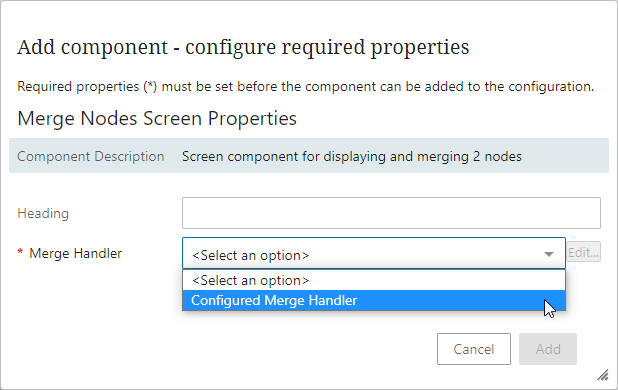
In the 'Merge Nodes Screen Properties' dialog, from the 'Merge Handler' dropdown select 'Configured Merge Handler' and click the Add button.
-
Click the Save button.
Map Merge Node Screen
-
In design mode, navigate to [MAIN].
-
Under 'Mappings', click Add.
-
On the Screen Mapping dialog, under 'Conditions', click Add, select 'Merge Duplicate Condition', and click Add.
-
From the 'Screen' dropdown, select the merge nodes screen configured in the previous section.
-
Click the Add button.

-
Adjust the priority of the screen as needed. For more information, refer to the topic Mappings in the Web User Interfaces documentation.
-
Click the Save button.
Add Merge Confirmed Match From Grid Action
Note: The Merge Confirmed Match action cannot be used on a Deduplication List screen.
-
In design mode, select a 'Potential Duplicates' component screen. If one does not exist, configure it on any Tab Page or Node Details component as defined in the topic Potential Duplicates List.
-
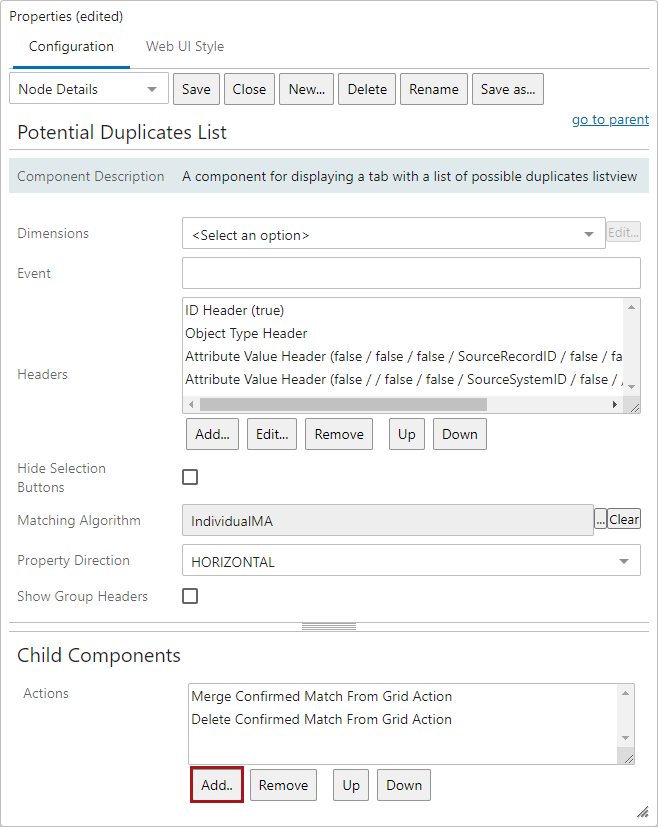
Under 'Child Components', in the 'Actions' parameter, click Add.
-
In the Add Component window, select 'Merge Confirmed Match From Grid Action' and click Add.
-
Click the Save button.
Performing a Merge
Important: Before beginning the merge process, review the following considerations:
-
Metadata attributes, inherited attributes, and inbound references are not merged.
-
If the object that remains after the merge contains no data in any context for a given attribute or reference, the data is taken from the deleted object and merged into the remaining object.
-
All attributes and references eligible for merging are displayed in the table.
Use the following steps to perform a merge.
-
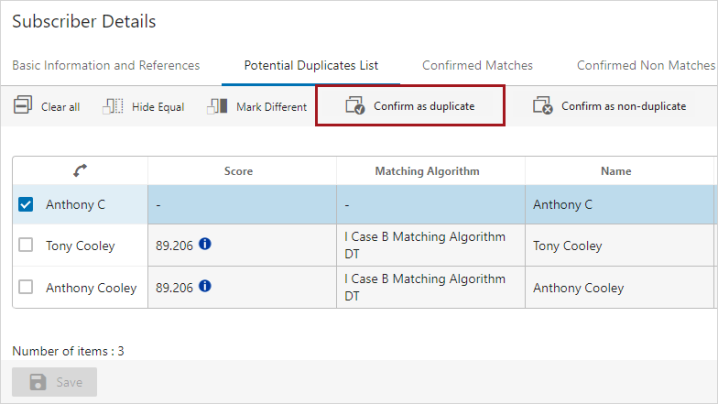
On a 'Potential Duplicates List' screen, choose the object to merge with the currently selected node.
-
Click the 'Confirm as duplicate' button.
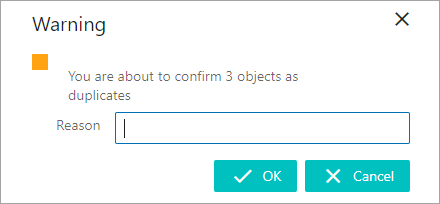
-
Explain why the objects are duplicates and click OK.
-
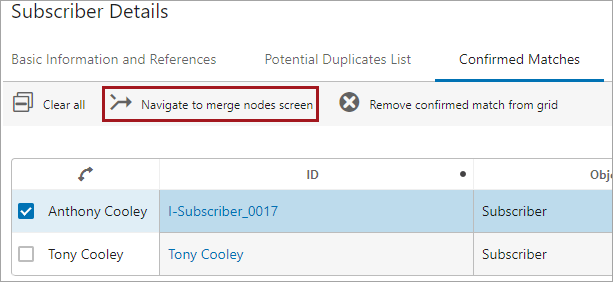
Navigate to the 'Confirmed Matches' component screen and select the object to be merged with the currently selected node.
-
Click the 'Navigate to merge nodes screen' button.
-
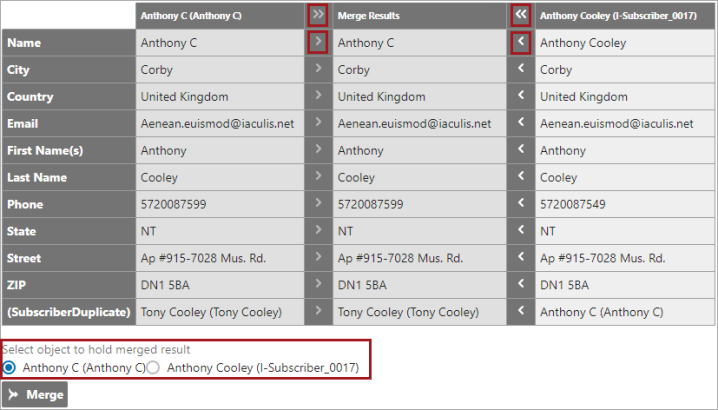
On the merge screen, click the arrow next to an element to choose the values for attributes and references to survive the merge.
Note: Surviving attributes / references appear in the center 'Merge Results' column. Select the surviving node via the radio buttons that appear above the Merge button.
-
Click the Merge button to merge the two objects. The object that was not picked to survive is deleted but the deletion is not automatically approved.