This topic describes a common setup for users of Print Publisher when connecting to an Asset Location from within the InDesign client. The asset location is specified in the STEP Preferences menu in InDesign. Typically, the asset location contains the path to high-resolution images that have been pushed from STEP onto the DTP (InDesign) server through an asset push event queue.
A common scenario for on-premises installations of STEP is that the images on the InDesign server are pushed again from the InDesign server to a local file location using a third-party file synchronization application such as rsync. But, even when using such an application, the file path placed into the Asset Location field in STEP Preferences must be an exact match to the file path of the image location on the InDesign server. This ensures that the image links remain unbroken between the mounted pages, the InDesign server, and STEP. (If these links become broken, they can be fixed using the asset relink features of Print Publisher. Refer to the next topic in this documentation, Relinking Assets in Print Publisher (here), for information on how to repair broken image links.)
Note: Although linking to the correct asset location is still required for Stibo SaaS environments, most of the configuration described below related to InDesign will only be relevant for on-premises installations of STEP. The InDesign-related configuration steps will have already have been done as part of the initial deployment on Stibo SaaS environments.
Assumptions
This topic does not cover the following and assumes that the applicable steps have been taken prior to users connecting to an asset location in InDesign:
- How to configure Asset Push event queues. For more information, refer to the Creating and Maintaining Asset Push Configurations topic in the Digital Assets documentation here.
- How to set up an InDesign server. For more information, contact Stibo Systems.
- How to remotely connect to an InDesign server. The method of connection will vary depending on your operating system and server setup. For more information, contact Stibo Systems.
- Alternate ('non-standard') setups for connecting to an asset location, such as connecting to an external image storage platform like Scene7. For information on this and other non-standard setups, contact Stibo Systems.
- How to share folders and map network drives. As these processes are standard Windows and Mac functionality, they are outside the scope of this documentation.
About the InDesign Server
An InDesign server is used in conjunction with STEP for the following Publisher-related capabilities:
- Print Proof View
- Creating documents via AutoPage
- Flatplanner planned page previews
- Creating documents from a Flatplan via a Flatplanner workflow
- Generating PDFs from documents in STEP
- Including actual pages when duplicating publications
- Import of Publication Transfer Packages
- Document-Asset Re-link
An InDesign server is not required for 'standard' Print Publisher functionality ('drag-and-drop'), as users can manually create publications by dragging and dropping objects onto pages, then manually saving the pages back to STEP. However, an InDesign server is required to autogenerate pages, and it unlocks much of the functionality of Print Publisher and its associated components, as listed above.
How the InDesign Server Locates an Image
In a 'standard' setup, asset push will push high-resolution images out to a folder on the InDesign server (though for on-prem installations, images can be pushed to any server within the STEP landscape, based on user needs). When the InDesign server application automatically mounts pages based on requests from STEP, it is 'told' where to locate high-resolution images by piecing together information that exists in the following locations. For information regarding the Asset Push locations, refer to the Asset Push topic in the Digital Assets documentation here.
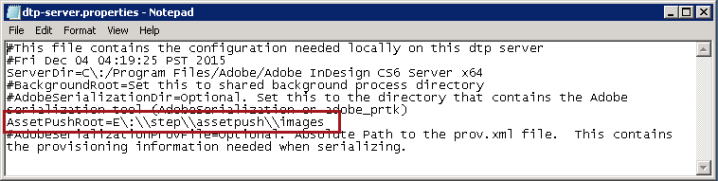
- dtp-server.properties: This file is located on the InDesign server and contains the 'stem' file path of the image location, for example, E\:\\step\\assetpush\\images
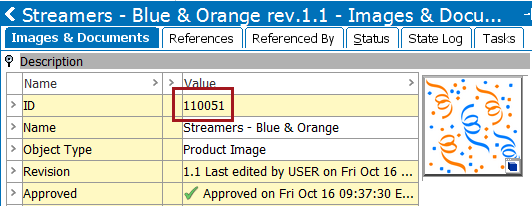
- Asset ID: The ID of the image
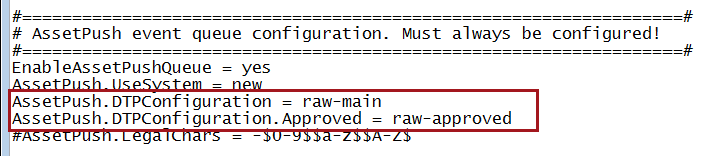
- sharedconfig.properties: This file is located on the STEP application server and contains configuration entries that tell the InDesign server the ID of the Asset Push Configuration (created in the workbench in System Setup) to use based on the workspace that is currently in use. For this example, the 'DTP Queue' event queue contains two asset push configurations, 'raw-approved' and 'raw-main.'
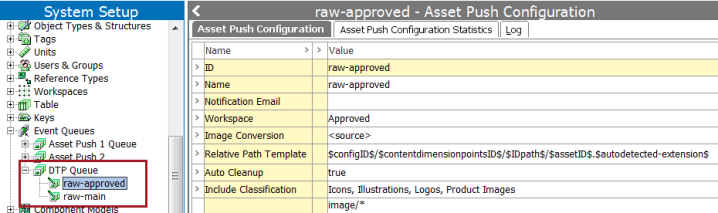
Configuration entries in the sharedconfig.properties file point the InDesign server to the appropriate queue. AssetPush.DTPConfiguration is the default queue to use when the workspace is Main, and AssetPush.DTPConfiguration.Approved is the default queue to use when the workspace is Approved.
Note: It is possible to configure these entries to pull images from a different workspace than the publication version that you are working in. For example, if you need to pull textual content from the Approved workspace but images from the Main workspace, then raw-main would be mapped to AssetPush.DTPConfiguration.Approved in the below screenshot, overriding the publication's workspace for images.
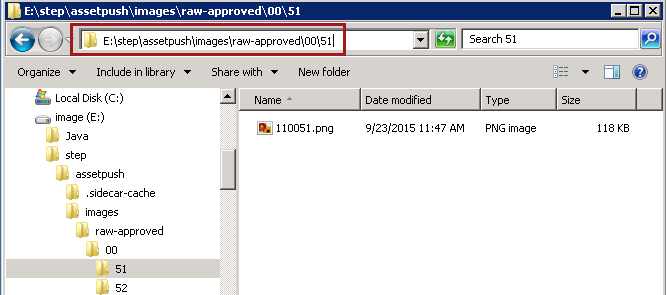
The combination of numbers 2 and 3 above (Asset ID plus Configuration ID) enable the InDesign server to obtain the 'STEP path' of the image. For example, raw-main/00/51/110051.png. The path is the result of the setup of the Relative Path Template. (For information on the Relative Path Template, refer to the Relative Path Template section of the Asset Push documentation

When this 'STEP Path' is combined with number 1 above, the 'stem' path, the InDesign server can now locate the external image by its complete path and file name. For example, E:\step\assetpush\images\raw-approved\00\51.
Setting an Asset Location in InDesign
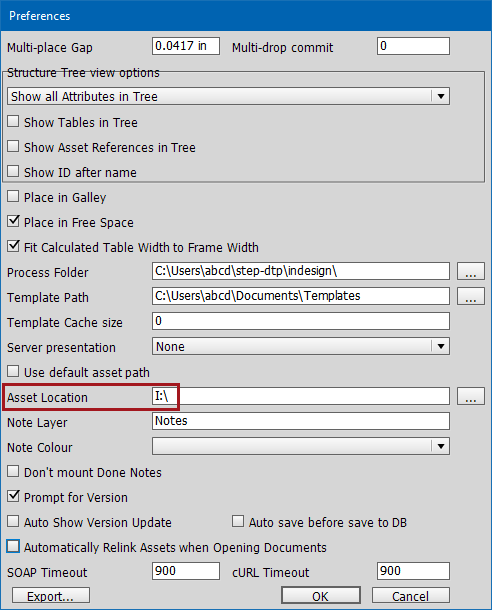
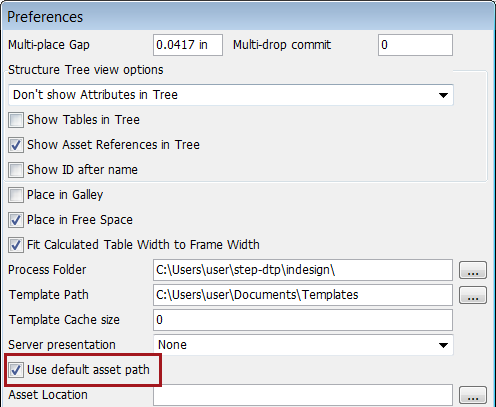
When mounting documents from InDesign, the Asset Location designated in the STEP > Preferences menu should be the same image location accessed by the InDesign server. By default, the Asset Location field is blank. When logging into STEP from within InDesign, the error message 'Warning: Asset path is not set' displays every time you log in until an asset path is specified.
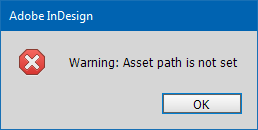
To keep this error from appearing, a path to the high-resolution images must be specified in the Asset Location field.
Important: Though acceptable for testing purposes, the Asset Location field should never be left blank in an actual production environment.
Determining the Asset Location
In order to connect to an asset location, you must first know what file path to enter. The following section describes a typical scenario in which images are located on a Windows InDesign server and the high-resolution assets have been pushed from STEP into a file location on this server by use of an asset push event queue.
Instructions for Mac users are nearly identical to those for Windows except for Mac file path formats and specifics of how to share folders on a Mac operating system.
Shared File Location
On any file location where images are stored, the folder containing the images must first be shared with users before they can connect. This section assumes that your image folder has already been shared. As the steps to share a folder are standard Windows functionality, they are not outlined in this topic.
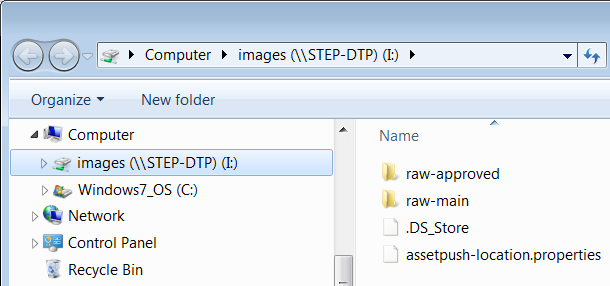
The following screenshot shows a sample 'images' folder hierarchy containing images that have been pushed from the main and approved workspaces in STEP (raw-main and raw-approved, respectively). To determine the correct path to enter into the Asset Location field in the STEP Preferences menu:
- On the InDesign server, navigate to the shared 'images' folder that contains the high-resolution assets pushed from STEP by asset push.
- Right-click on the 'images' folder and select Properties from the menu.
- In the 'images Properties' dialog, click on the Sharing tab. The Network Path: that is displayed in the 'Network File and Folder sharing' area is the location that should be specified in the Asset Location field.
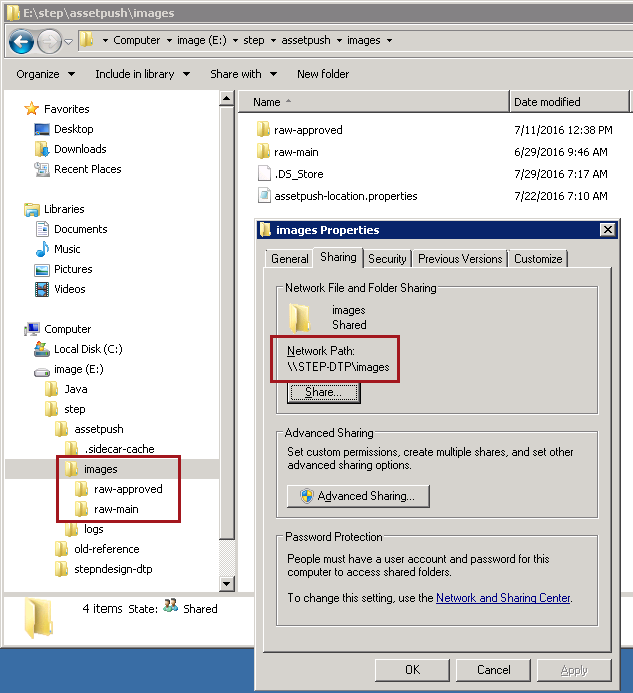
- Instead of directly typing this location into the Asset Location field, however, you must first connect to this location by mapping a network drive to the network path. In the above screenshot, the path is \\STEP-DTP\images.
(Instructions on how to map to a network drive are not included in this topic, as it is standard Windows functionality.)
- Once the network drive is mapped, go to STEP > Preferences... in InDesign.
- Click the ellipsis button (
 ) next to the Asset Location field.
 - In the 'Select a Folder' dialog, navigate to the 'images' network drive that you just mapped in step 4.
- The path to the high-resolution images on the InDesign server is now present in the Asset Location field. In this example, since the path is a mapped network drive, only the letter of the drive name displays.

Default Asset Path
A default asset path can be set in InDesign that allows users to connect to a client-specific asset location that overrides the default asset push location defined in the sharedconfig.properties file (the queues pointed to by AssetPush.DTPConfiguration and AssetPush.DTPConfiguration.Approved).
To set a default asset path, the AssetPush.DefaultDTPClientAssetLocation property must be inserted into the sharedconfig.properties file, followed by the asset location, as such:
AssetPush.DefaultDTPClientAssetLocation = \\\\server/images/AssetPush_highres
If a default asset path has been set in the sharedconfig.properties file, then users should leave the Asset Location field blank in the STEP Preferences menu and instead check the Use default asset path box. (If no default asset path has been set up in sharedconfig.properties file, even if this box is checked, it will be exactly as if no image path at all is set up.)
Note: Default asset path cannot be used for production environments that use a mix of PC and Mac clients. The environment must be either all PC or all Mac.