Two functions exist within Print Publisher to relink broken asset links (typically images) on mounted pages: Relink Assets (which is run via the InDesign Client on an open document) and Document-Asset Re-link (which is launched in STEP and causes a background process to run).
Although the standard InDesign function of relinking assets may be done via the Links panel, that method can be cumbersome because it requires users to manually search for or navigate to image locations. If links are broken on hundreds upon hundreds of pages, relinking assets by this method could become an extremely time-consuming task. As such, this method is not recommended.
The STEP functions of Relink Assets and Document-Asset Re-link automate this task when users are connected to a shared image location.
About Broken Links
Image links become broken when a document contains images that are no longer linked to the original location of the actual image files. Though images appear on the page, they are only screen-resolution renderings of the original files. Broken links can occur if the original file has been deleted or moved to a different folder or server after it was originally imported into the document. They can also occur if client machines are not connected to the shared image drive in exactly the same manner, or if users change the manner in which the shared drive is connected from one day to the next.
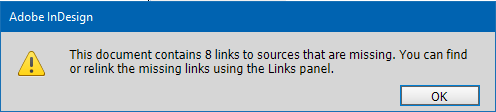
When opening a document in InDesign that contains unlinked images, the following warning dialog displays:
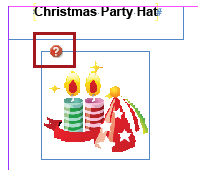
Unlinked images display a red question mark to indicate that InDesign can no longer locate the original image:
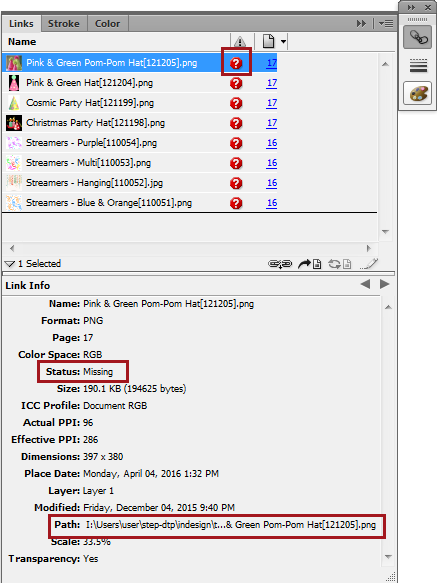
The Links panel displays the same red question mark for missing image links and a Status of 'Missing.' The displayed Path indicates where InDesign is expecting to find the image. This location is where the current user must be connected in order for InDesign to find the image.
Common Causes of Broken Links
Missing Asset Location
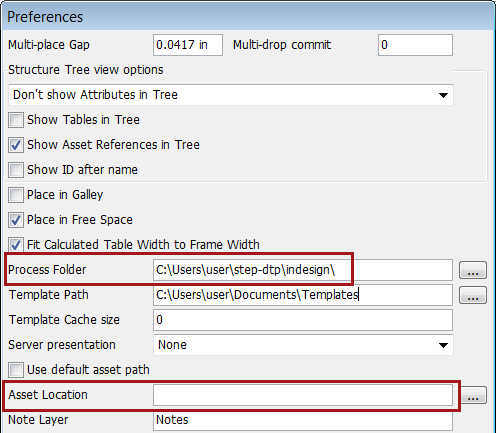
One cause of broken links may be if there was no Asset Location set in the STEP > Preferences menu in InDesign when the pages were originally mounted (this refers to pages generated either manually or by creating a document from a Flatplan). If no asset location is set, images are downloaded directly from STEP into a 'tmp' folder inside the Process Folder (designated in the STEP Preferences menu, pictured below). Once the InDesign client is closed, the tmp folder is emptied, causing broken links.
For information on how to determine what file path to place into the Asset Location field, refer to the Linking to an Asset Location documentation
Changes to How the Shared Image Drive is Connected
The most frequent cause of missing images is when the method by which the shared drive is connected to the client or the location of the InDesign server changes.
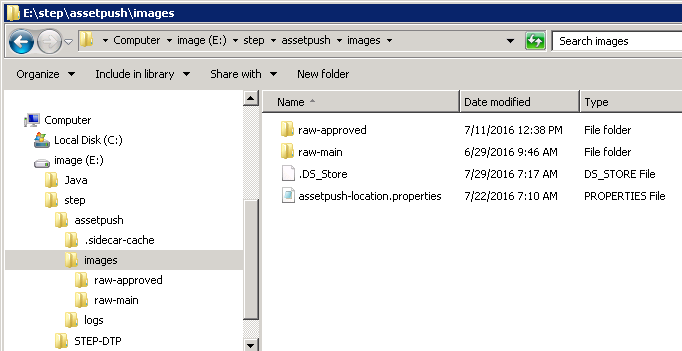
For example, broken links can be caused if users connect too far up or too far down in the shared image folder structure. In the following screenshot, the correct image location is highlighted (the 'images' folder). A user who connects to, for example, the 'assetpush' folder or the 'raw-approved' folder will experience broken links when opening a mounted page that contains images that are linked to the correct location ('images'), which is being used by the InDesign server.
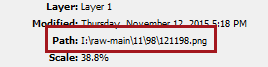
On Windows machines, the drive letter of the mapped network drive that is used to connect to the asset location can also cause broken links if other users are connecting to the asset location using a different drive letter. In the below screenshots, an Asset Location of 'I:\' is being used. The top screenshot shows how the Asset Location looks in the STEP Preferences menu. The bottom screenshot shows a sample, extended file path using the I drive. If another user is connecting to the asset location using, say, drive A, then their links will be broken when opening documents that use the 'drive I' file paths.

For information on how to connect to an Asset Location, refer to the Linking to an Asset Location topic here.
Mixed Windows and Mac Platforms
Another—less frequent—cause of broken image links is when there is a mix of PC and Mac platforms being used in the Print Publisher production environment. This mix commonly involves one or both of the following:
- An InDesign server is running on a Windows platform while end users are using Mac InDesign clients
- End users themselves are working on a combination of Mac and PC InDesign clients
Even though end users are accessing images from the same shared location as the InDesign server, the differences between Mac and Windows file path formats cause broken links. For example, when an InDesign document is saved back into STEP from a Mac, InDesign saves the image path in a 'Mac-like' format, as such:
Volumes:images:raw-main:std.lang.all:44:05:4405.tif
When an InDesign document is saved back into STEP from a PC, the same image path is in a 'PC-like' format:
E:\images\raw-main\std.lang.all\44\05\4405.tif
If a Windows user opens a document that was saved back to STEP from a Mac, the images will not be found. Likewise, if a document that was saved back to STEP from a PC (or was created by a Windows InDesign server and saved to STEP) is opened from a Mac, the images will not be found.
A 'standard' installation is when clients and the InDesign server are both on the same platform (either Windows or Mac). In these cases, there is no conflict in Mac versus PC drive and path names.
Correcting Broken Links
Relinking Assets from InDesign
Missing assets can be relinked from within InDesign by using the Relink Assets function. (An InDesign server is not required to perform this action.) Provided that the Asset Location is set correctly and connection to the shared drive (asset push images folder) is established, Print Publisher will be able to locate the images and change the path in the document so the images are no longer 'Missing' and their status in the Links panel reads 'OK.'
To relink assets on a page:
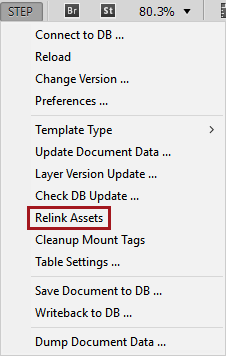
- In InDesign, open the STEP menu and select Relink Assets.
- STEP automatically searches in the specified asset location and matches the IDs of the images in the document to those of the images in the asset location.
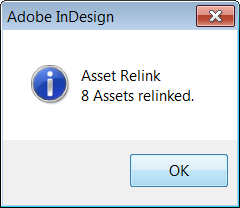
- Once the relink is complete, an Adobe InDesign dialog appears that displays the number of assets that were relinked.
If the relink fails, an error message displays to explain which images could not be relinked. 'Problem Asset IDs' may occur if an incorrect image path is specified in the Asset Location field in the STEP Preferences menu or if there is no connection to the shared image drive.

- An unbroken link icon now appears on the relinked images, and their status shows as 'OK' in the InDesign Links panel. In addition, the updated file path is now displayed.
Relinking Assets from STEP
A Document-Asset Re-link operation is performed from within the STEP Workbench and requires an InDesign server.
Document Asset Re-link enables a one-click relinking of assets throughout an entire publication or section. As mentioned in previous sections of this topic, image links can break on mounted pages when saved back to STEP from Mac clients but are opened by an InDesign server that is running on a Windows platform. The broken links become problematic when a user needs to perform an action on these document(s) within STEP that requires an InDesign server, such as 'Generate PDF.'
In this scenario, if the saved documents contain Mac-style image paths (which cause broken links for the Windows InDesign server), the Document-Asset Re-link function will correct all the links by locating the images and converting the image paths to Windows-style paths.
As long as the dtp-server.properties file has the AssetPushRoot parameter set correctly and a connection to the shared drive is established, the InDesign server will be able to open the InDesign documents that are in STEP, locate the images, and change the path in the documents so that all images are no longer 'Missing.' The InDesign documents are then saved back. Once completed, the InDesign server will be capable of, for example, generating a PDF that contains high-resolution images using the 'Generate PDF' function.
To relink all assets in a publication or section:
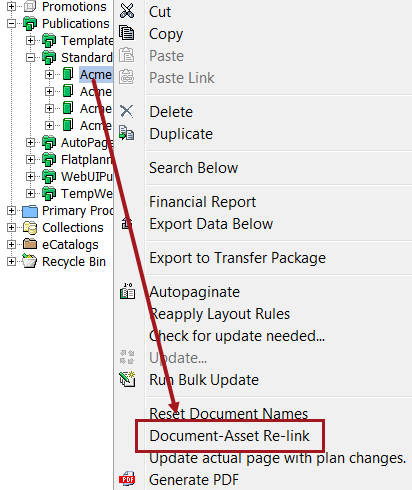
- In the workbench, navigate to the relevant publication or section, then right-click and select Document-Asset Re-link.
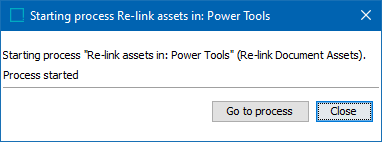
- A background process launches. Click 'Go to process' to monitor the relink progress.
- If the process is successful, a list of relinked asset IDs appears in the Execution report on the Background Process tab. If unsuccessful, error messages will appear to indicate the problem.