For each AutoPage pagination rule group, a number of actions are available. This topic provides an overview of what Action Groups are available within each pagination rule group and what their functions are.
Column Handling
Column handling rules 'handle' how mounted objects are placed into columns across an individual page or across multiple pages.
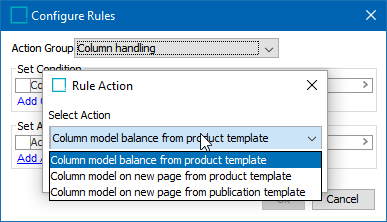
Column model balance from product template

Use Case #1
If the publication template does not have any columns set up, but the product template in use does, then products will flow across the page based on the width of columns in the product template instead of mounting vertically from top to bottom of the page.
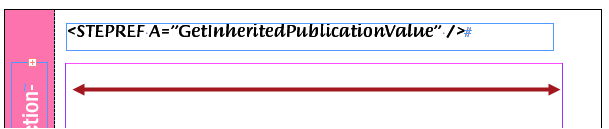
To illustrate, the below screenshot shows a portion of a publication template without any columns:
Products for this example will be mounted using a product template with three columns.
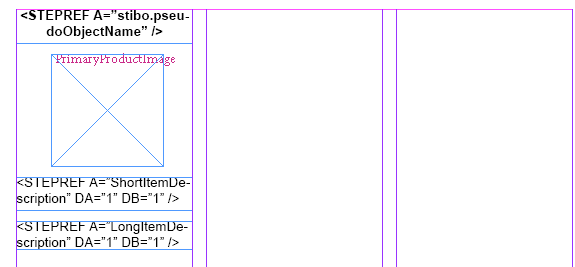
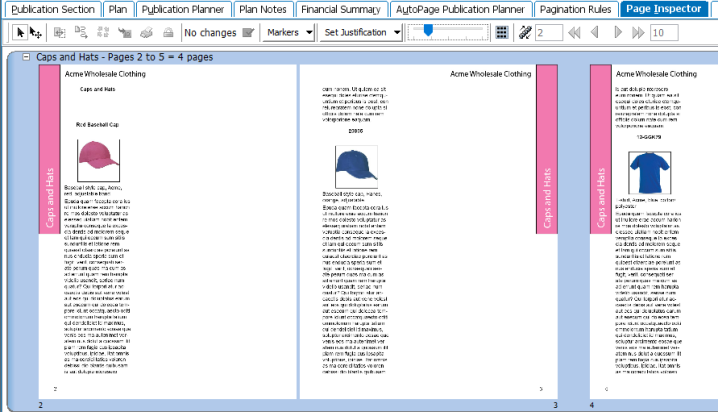
Without using this pagination rule, a selection of three products mounted using this three-column template will paginate as pictured in the following screenshot—each product will mount into the column, but split onto a new page once the column is filled.
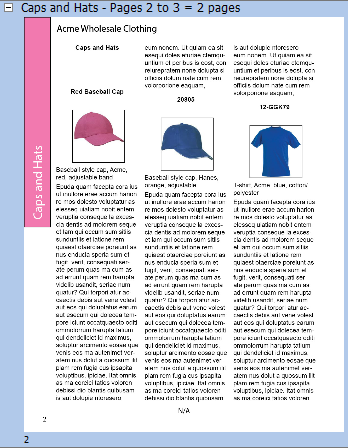
With the rule applied, the products will instead flow to the next column, using the column widths from the product template.
Use Case #2
If multiple products are mounted and a product using a column-based product template is mounted immediately after products that are mounted using product templates without columns, the product(s) mounted with the column-based product template will wrap around to the next column instead of splitting across to the next page.
'Using Gap'

When setting up the 'Column model balance from product template' rule, there is an additional setting where a gap value can be added. This gap sets the space between the product(s) mounted using a non-column template and the product(s) mounted using the column-based template. (Note that this gap value does not set the space between columns, which is picked up from the gutter space between the columns on the product template.)
Column model on new page from product template

Selecting 'Column model on new page from product template' functions similarly to 'Column model balance from product template' except that the product mounted with the column-based product template will be automatically mounted on the next page.
Column model on new page from publication template

This rule serves as a way to 'revert' object mounting to default behavior, which is to mount objects according to the columns set on the publication template. When one of the two aforementioned 'column model balance from product template' actions is used ('Column model balance from product template' or 'Column model on new page from product template'), the default mounting behavior is overridden; the columns on the publication template are disregarded and objects are mounted according to the columns on the product template instead. So, to revert to default behavior, the action 'Column model on new page from publication template' would be used on a section or subsection as a way to override an inherited 'column model balance from product template' rule.
Document Level Section Ending
Add a blank page to end a Document level Section
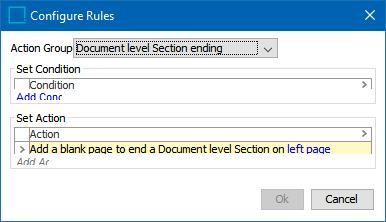
There is only one action in this rule group, 'Add a blank page to end a Document level Section.' This rule specifies whether a document in a document-level section / subsection ends on a left or a right page. This action will always be set as a default condition.
If no products are available to mount on the final page, STEP will add a blank page, which will include 'furniture' (background elements) from the publication template. In some cases, a blank page may be needed at the end of a section to ensure that the next section starts on the correct side.
For example, add a blank page to end a Document level Section on <left page>.
Execute Script
There is only one action in this rule group, 'Execute script.' This rule specifies which JavaScript should be executed when the specified condition is fulfilled. The JavaScript interacts with and customizes the mounting.
For example, execute script <name of script> when mounting objects.
Minimum Split Size
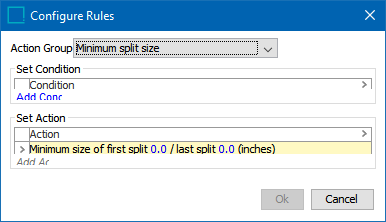
Minimum size of first split / last split
There is only one action in this rule group, 'Minimum size of first split / last split.' This rule controls where lengthy product presentations are split across columns and pages. Its purpose is to avoid situations where a single line or word (known as a widow in typography) flows to the next column or page when the rest of the product is on a previous column or page. This rule ensures that a minimum amount of copy splits over to the top of the next column or page. The maximum amount that can be set for either split size (first and last) is 342 points (equivalent to 4.75 inches or 120.65 mm).
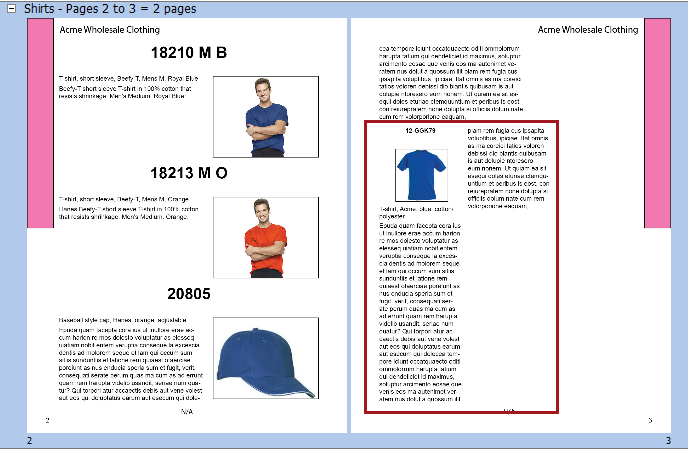
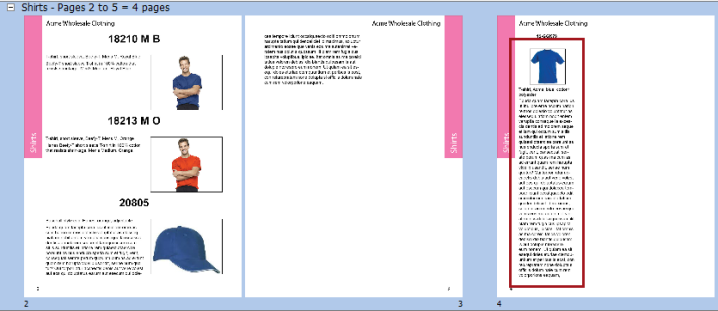
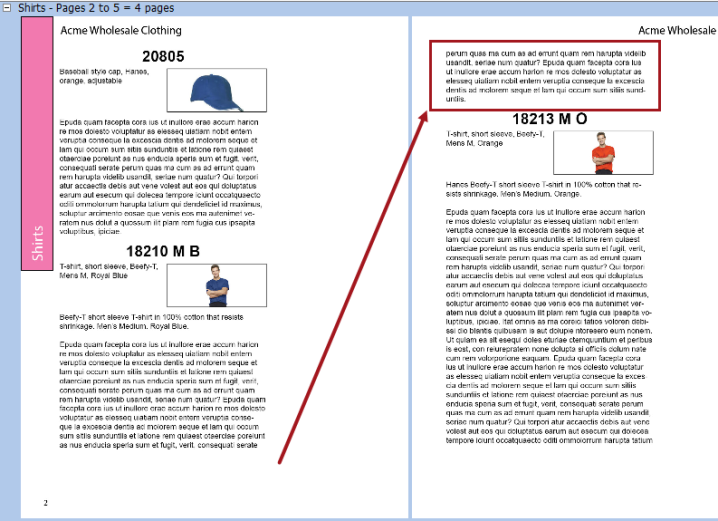
To illustrate, the following screenshot shows an example of a lengthy presentation without a minimum split rule applied. A dangling line (orphan) has wrapped to the top of the next page.
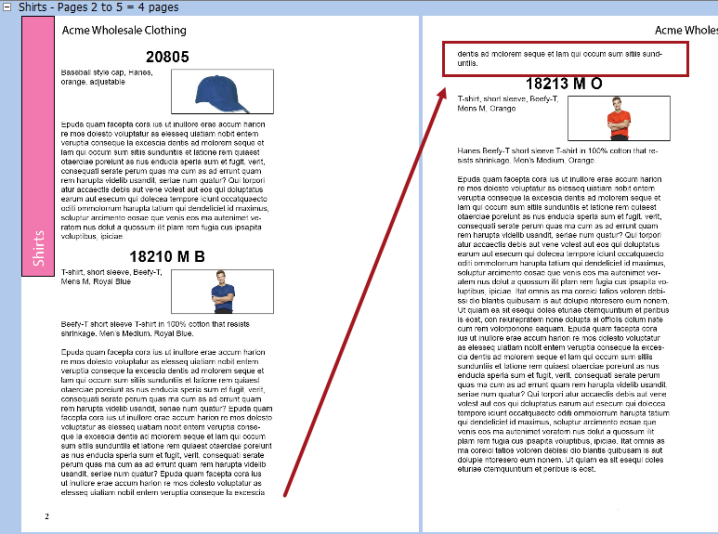
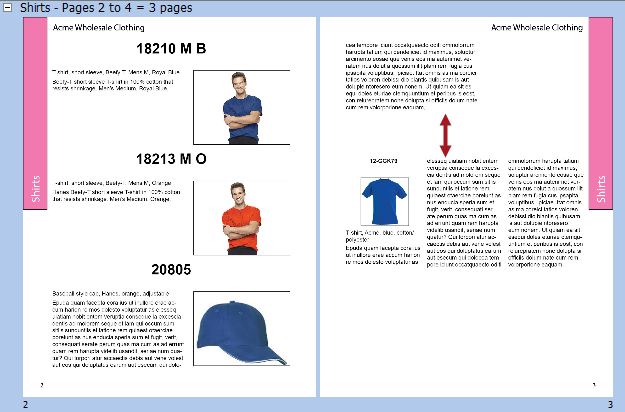
The following screenshots shows how the same presentation would split with a minimum split size of 1 inch, followed by an illustration of how the rule is configured in STEP. This example rule configuration ensures that at least 1 inch of copy will be rolled over to the top of the next column or page.

Object Layout
The object layout rules specify what product templates to apply to the objects being mounted.
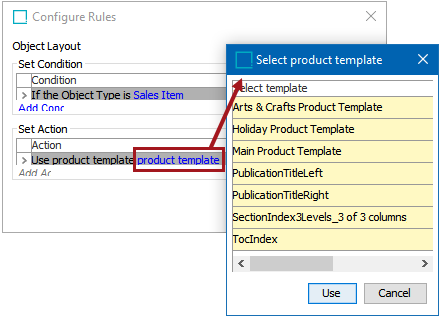
Use product template
Uses a product layout from a specified product template. The list of product templates that display when the 'product template' hyperlink is clicked under 'Set Action' are the product templates applied to the publication on the Publication tab.
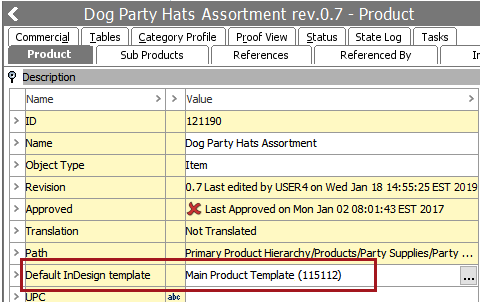
Use default product presentation
Uses the default product template (Default InDesign template) that has been assigned to the object. For more information, refer to the Default InDesign Product Templates topic in the Publisher (Adobe InDesign Integration) documentation here.
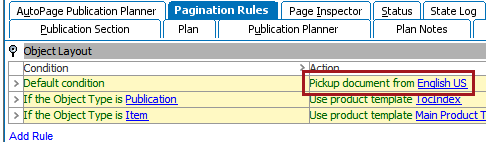
Pickup document
The pickup document option is used to reuse the layout(s) from a version of a specified preexisting publication when an object is mounted. When this rule is applied, the system will scan all actual pages within the chosen publication version, then use the layout that was applied to the object in that publication.
When adding the rule, the system prompts you to select the publication version from where it should take the layout, as shown in the below screenshot.
Note: A publication version must be chosen since an object's final layout on the InDesign page can vary between different versions within the same publication.
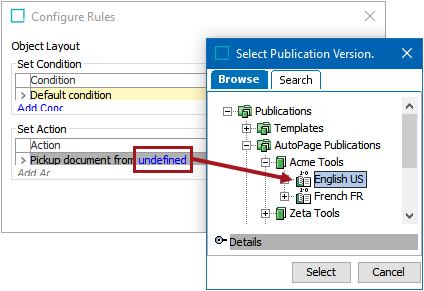
After the version is chosen, the rule will resemble the following:
Position Rules
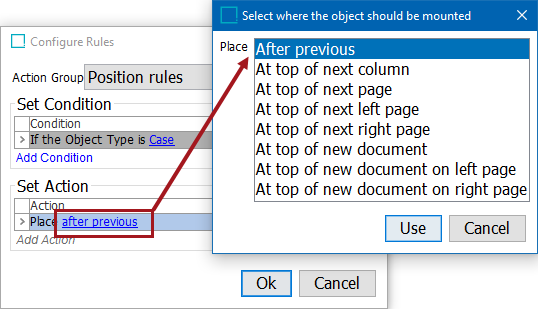
The actions available in the 'Position rules' group specify where to place objects on pages.
Place
The available options for 'Place' are:
- After previous (following the previously paginated object)
- At top of next column
- At top of next page
- At top of next left page
- At top of next right page
- At top of new document
- At top of new document on left page
- At top of new document on right page
For example:
- If the object type is product, then position at the top of the next column
- If the attribute value equals a specific value, then position the product at the top of the next page
Repeat Rules
These actions specify the repeat rules for mounting publication and/or section objects themselves. If no rules are set up, no publications, sections, or subsections will be mounted during the autopagination process.
Repeat Publication
Specifies whether the publication should be mounted (and repeated, depending on the object layout rules that are set up for publications). For example, by mounting the publication, a table of contents that pulls the name of all sections in the publication can be placed at the beginning of the publication, or the STEP name and/or metadata (description) attribute values from the publication can be repeated throughout the publication.
Repeat Section
Specifies which section level to be mounted and repeated, depending on the object layout rules that are set up for sections. For example, a table of contents that pulls the name of all subsections in a section can be mounted at the beginning of each section, or the STEP name and/or metadata (description) attribute values from the section(s) can be repeated throughout the section(s).
For example, if first in section 1, then repeat section at level 1.
For more information on use cases for repeat rules, refer to the Creating Tables of Contents in AutoPage topic here.
Set Minimum Pages Per Document
Set minimum pages per document
There is only one action in this rule group, 'Set minimum pages per document.' This rule specifies the minimum number of pages that a document must contain before AutoPage forces a new document to be made. The default is two pages per document, which is used if nothing is defined.
For example, always create a minimum of six pages within a document before AutoPage creates a new document.
Set Publication Spread Index
Set publication template spread index
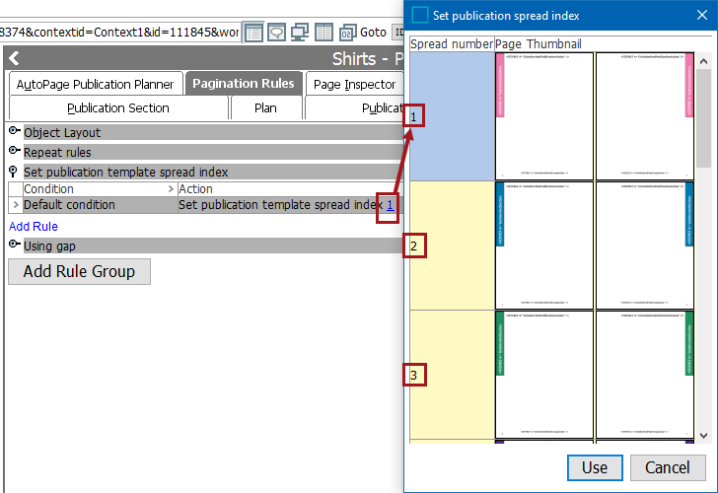
There is only one action in this rule group, 'Set publication template spread index.' This rule specifies which spread within a publication template should be used when an object is paginated on the page.
A publication template often consists of several spreads, containing thumb tabs for each chapter. A typical setup in InDesign would be as follows: a page spread created from master spread A would equal spread index number 1, a spread created from master spread B would equal index spread number 2, and so forth.
The following screenshot shows the view in the workbench when a publication template spread index is selected.
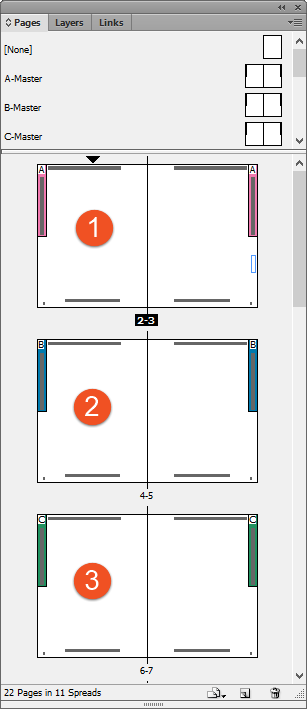
This screenshot shows the corresponding 'spread indexes' of the publication template in InDesign, as viewed from the Pages panel.
For example, always use publication template spread index number 1.
It is also possible to specify a different publication template spread index for the left and right pages. To configure this, set up rules that resemble the following:

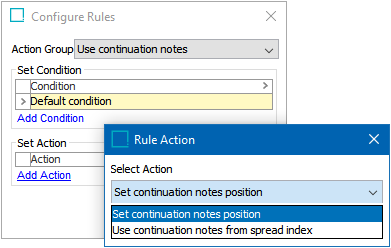
Use Continuation Notes
These actions specify the publication template spread number where continuation notes are defined and how continuation notes are going to be placed related to the split presentation. Continuation notes are used for longer product presentations that will be split across multiple pages (for example, products that contain very lengthy tables). Wording such as 'Continued' can be placed at the bottom of the page(s) to inform readers that the presentation is continued on the following page(s).
For full details on how to configure and use continuation notes, refer to the Using Continuation Notes topic here.
Use Vertical Alignment
Use vertical alignment
There is only one action in this rule group, 'Use vertical alignment.' This rule specifies how to justify objects on a page:
- Top
- Bottom
- Balance (space between objects is distributed evenly)
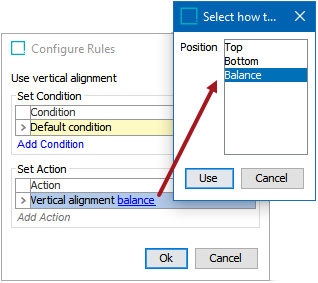
For example, always balance space between objects on a page.
Using Gap
Using gap
Specifies the distance between objects on a page.
For example, by default, place using gap of 10 mm between all objects on pages.
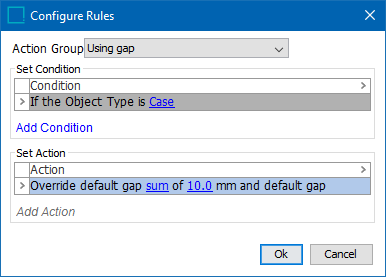
Override default gap
Overrides 'Using gap.' It can be defined as a sum of 'using gap' and the override gap or a minimum or maximum gap.
For example, if the object type is 'Case,' override the default gap of 10 mm and add an additional 10 mm (setup pictured in below screenshot).