The features accessible on the toolbar, (located beneath the menu bar), are geared towards navigating between objects and viewing object data in different ways.

The features available on the toolbar are described below.
Stibo Systems Logo
![]()
Clicking the Stibo Systems logo toggles between the STEP dashboard and the STEP Workbench. For more information regarding the dashboard, refer to the Global Dashboard topic of the Data Profiling documentation.
Context

'Context' is a filter that allows a user to view object data defined by, for example, country or language.
To select the context, click the dropdown and then choose the desired context. It is useful to check that the context is properly set because viewing data in the wrong context is likely to cause significant confusion. For more information regarding contexts, refer to the Contexts topic in the System Setup documentation.
Approved Workspace
The Approved Workspace button toggles the user's view of a given object:
-
 indicates you are working in the 'Main' workspace where object values can be edited.
 -
 indicates you are in the 'Approved' workspace where you cannot edit values, but you can examine values that have been approved.
For more information on workspaces, refer to the Workspaces topic in the System Setup documentation.
View Mode
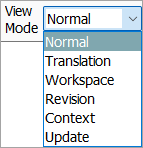
View Mode enables the user to view data in a variety of ways, dependent on the need. Click a 'View' option to present data in different ways, as described below:
-
Normal - The default view of the STEP Workbench. With this view selected, users can examine a listing of all relevant attribute and metadata associated with that object.
-
Translation - Users can view all object-related data in up to two languages. The data is presented in a comparison display format. Attributes that require translation are automatically highlighted in green. More information of translations is available in the Translations documentation.
-
Workspace - Users can refer to object data as it appears in both the 'Main' and 'Approved' workspaces. This comparison view can be useful to allow a user to view which values have changed since the object was last approved. However, if the object is in 'Never been approved' status, only the 'Main' workspace displays when this view is active. For more information on workspaces, refer to the Workspaces topic in the System Setup documentation.
-
Revision - Users can view the current state of an object's data as well as all previous revisions in a comparison display format. By default, current and previous versions are displayed. The number of revisions viewable at the same time is configurable. For more information on revisions, refer to the Revisions topic in the System Setup documentation.
-
Context - Users can view all of an object's data for two or more available contexts in a comparison display format. The number of contexts viewable at the same time is configurable. For more information regarding contexts refer to the Contexts topic in the System Setup documentation.
-
Update - Users can view and compare the values of an object's attributes in both the Approved and Main workspaces. The 'Compare and Update' tab clearly displays differences between the workspaces.
Navigation

To navigate backward or forward to a previously viewed screen or to refresh the current screen's data, click the 'Back', 'Forward', or 'Reload' buttons, respectively. When clicked, these buttons behave in a way similar to most web browsers' 'Back', 'Forward', and 'Reload' functions.
URL

To maximize navigability of the STEP tool, all objects may be accessed via an in-tool URL. As with the URL field in a standard web browser, a product can be displayed within STEP by pasting its unique URL into the URL field. Sharing an item's URL is effective for directing another STEP user to a specific object. The STEP URL always begins with 'step://'; where web URLs begin with 'http://' or 'https://.'
Search

This field allows searching for specific objects in the hierarchy by typing their ID, name, or key into the 'Search' field. When the desired item appears in this field, click on it to display the object. For more information regarding the Search field, refer to the Search topic in the Getting Started documentation. For more information on keys, refer to the Unique Keys topic in the System Setup documentation.