Mapping a constant value allows you to replace the default data with your own text. For example, use a constant value to change a header from the default of <Name> to 'Product Name', or to add static text to the value.
The user interface for the mapping step of the Export Manager tool and the outbound integration endpoint tool are not exactly the same. For Export Manager, mapping is described in the Export Manager - Map Data topic. For OIEPs, mapping is handled in the Output Templates section under the Format parameter as described in the OIEP - Event-Based - Output Templates Section topic or the OIEP - Select Objects - Output Templates Section topic.
For more information about the additional wizard steps, refer to the Creating a Data Export topic or the Creating an Outbound Integration Endpoint topic.
After mapping, most output options can be altered using transformations. For more information, refer to the Outbound Map Data - Transform topic.
For an expanded example of mapping aspects and constants, refer to the Header and Value Aspects Example topic.
Mapping Constant Value as a New Field
- Select the data to be exported for the output tool. For more information, refer to the Data Exchange topic.
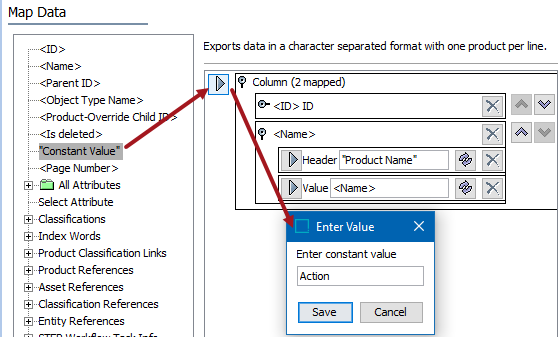
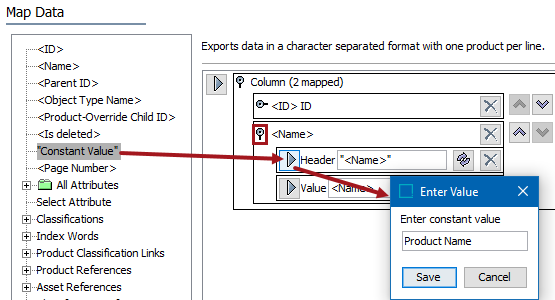
- On the Map Data step, in the left panel, select Constant Value.
- In the right panel, click the top-most right arrow (
 ) to add a new field to the export file.
 - In the Enter Value dialog, enter the constant value to assign to all records in the export file, and click Save.
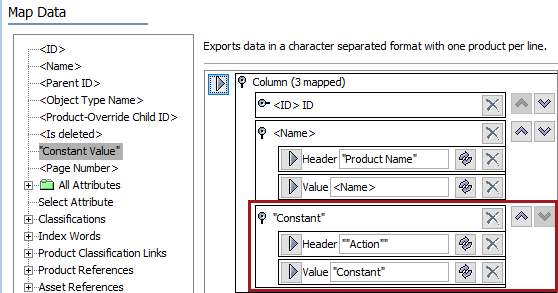
- The new "Constant" filed is displayed using the text you entered as the Header.
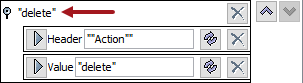
- Use the transformation button to update the Value field, if necessary. You can also use the transformation to remove the extra set of double quotes displayed by default.
![]()
- Click Save and the value is then displayed as the field name.
- Complete the mapping and initiate the export.
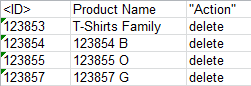
Results
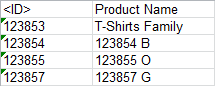
The exported file includes ID, product name and an action column with constant value “delete”.
Mapping Constant Value Within a Field
- In the left panel, select Constant Value.
- In the right panel, click the right arrow () for the desired field.
- In the Enter Value dialog, enter the constant value to assign to all records in the export file, and click Save.
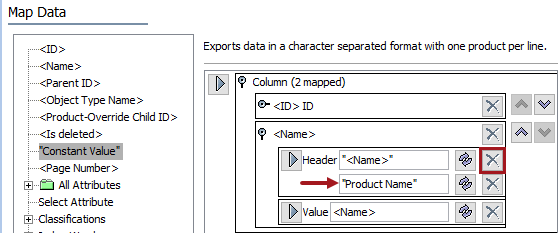
- The constant value is displayed as a new element in the right panel. If necessary, remove any duplicate data by clicking the X button
- Complete any additional mappings and initiate the export.
Results
The exported file includes existing name column header to be modified with a constant value as 'Product Name.'