The Excel Custom Template is an export component that allows users to quickly export one or multiple objects into a polished Excel output.
Configuration
To configure an export of objects using the Excel Custom Template, follow these steps:
- Create Excel template with placeholder tags – Users may set up a custom Excel template to fit a wide array of requirements. A template can include static elements, like headers or non-STEP images, that will display unchanged in the final export. To export attribute values from STEP into the export file, users must add placeholder tags to the template. A placeholder tag consists of any text appearing between a greater than ( <) and less than (>) symbol. As long as the attribute is properly mapped in the Export Manager (addressed later in this same topic) and is both valid and instantiated for that object, the attribute value will be pulled into the exported Excel file.
STEP images may also be brought in, but the placeholder tag for images must be formatted differently.
What follows is an example of a correctly formatted image tag: <img:ProductImage_10x16>.
Just as with attribute placeholder tags, image placeholder tags must begin and end with the greater than (<) and less than (>) symbols. Inside of these tags, the image placeholder tags must begin with 'img:.' Any text can be used following the colon, but recommended practice is to insert text relevant to the kind of image that should be exported. If the image will always be, for example, the primary product image, then the image tag text might be 'PrimaryProductImage.' It is important to note that only PNG, JPG, and JPEG image file types are allowed using the Excel Custom Template export format. Following the text is an underscore (_) followed by two numbers on either side of an 'x.' These numbers are dimensions, and dictate how many Excel cells the exported image will take up, the first determining the width (columns) of the image, and the second the height (rows). Below is an example of a simple Excel Custom template that will produce a simple Excel export file:
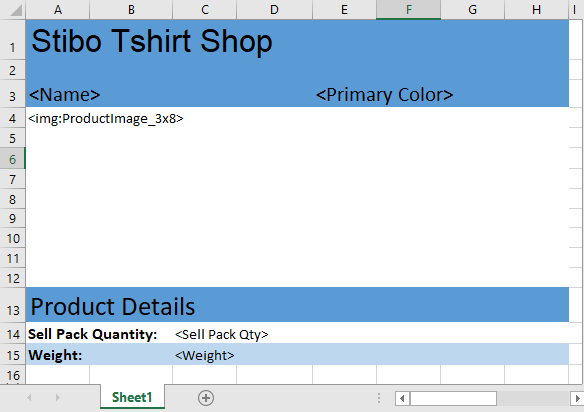
- Create a Custom Excel Template asset type – In the System Setup tab in the workbench, expand the Object Types & Structures node and select the 'Assets' node. Right-click 'Assets' and select 'New Object Type.' Assign an ID and name to a new object type ('Custom Excel Templates' would be appropriate), and click 'Create.'
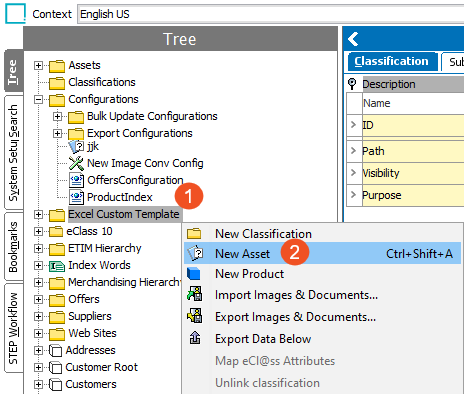
- Save the template as an asset in STEP – The Excel custom templates are stored in STEP as assets. During export of objects using the Excel Custom Template export format, users will navigate to the appropriate template and select it for the export. To save the template as an asset, users may elect to create an asset root node and title it 'Excel Custom Templates,' as shown in the screenshot below. To save the template as an asset, select the root asset in which the template will be saved, right-click, and select 'New Asset.'
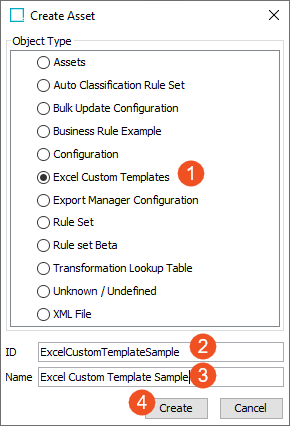
In the 'Create Asset' dialog, select the asset object type created in step two, in this case it is 'Excel Custom Templates,' and assign an ID and name to the template being saved.
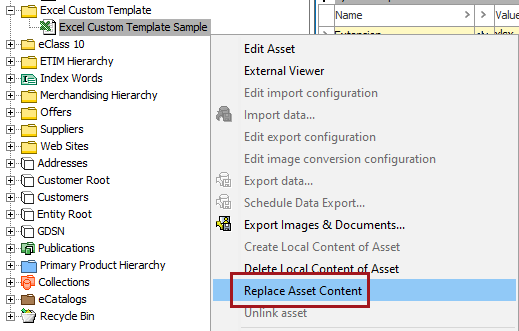
Be sure to also upload the template to the asset by right-clicking the asset and selecting 'Replace Asset Content.' STEP will prompt the user to select a file from the user's system to upload to the asset object.
- Create an export configuration asset – In order to retain the mappings that users establish in the Export Manager during configuration of their custom Excel export, it is useful to create and save an export configuration asset into which the export configuration can be saved. To create an export configuration asset, navigate to the 'Asset' root node, select it, right-click and select 'Add Asset' from the menu. Select the 'Export Manager Configuration' and then assign an ID and name to the asset.
- Export object(s) – To access the Export Manager and generate an Excel export file from the custom template, select 'File' from the toolbar, then 'Export,' and then 'Data....' The user will map the placeholder tags to STEP data, and then execute the export. For more information on the Export Manager functionality, refer to the Export Manager topic.
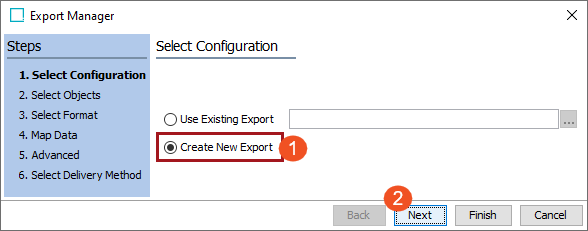
- Select Configuration – Select 'Create New Export,' then 'Next.'
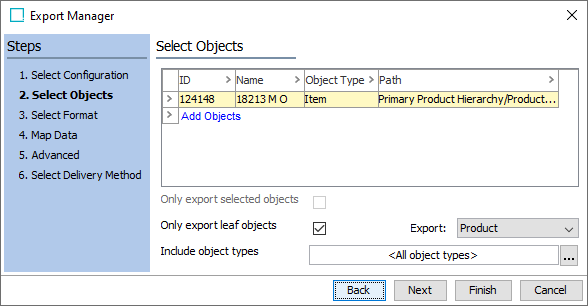
- Select Objects – Select one or more object(s). You may select multiple objects to export using a custom Excel template, but each object and its data will go into its own Excel file and then gathered into a .ZIP file, rather than all objects and their data going into a single Excel file.
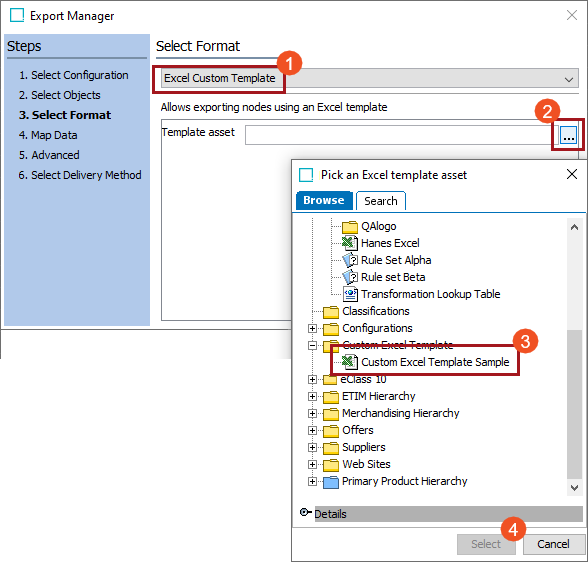
- Select Format – Select the ‘Excel Custom Template’ export format from the dropdown, and then, in the 'Pick an Excel template asset' dialog, select the Excel Custom template asset that was saved in step three.
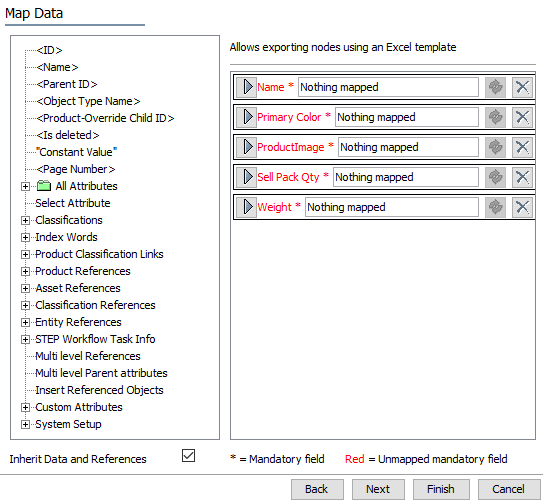
- Map Data – In the 'Map Data' screen, users will map the placeholder tags inserted into the custom Excel template to STEP attribute values. Listed in the right panel (mapping targets) are the placeholder tags that STEP read from the Excel template. In the left panel are the data sources. The placeholder tags must be mapped to a data source from the left panel for the data to export correctly into an Excel file. Map all targets in the right panel. When that is complete, click 'Next.'
For more information on mapping data, refer to the Outbound Map Data - Data Source topic.
- Advanced – Make default selections, if applicable.
- Select delivery method – Select delivery method for the Excel document. For this example, 'File' has been chosen. Then click 'Finish.' Single-object exports will export to a single Excel file; multiple-object exports will export to a .ZIP file containing an Excel file for each exported object.
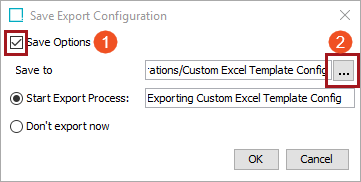
- Generate and save the export configuration – Before the export is executed, a 'Save Export Configuration' window displays. Users may leave the 'Save Options' box blank and execute the search as it has been configured. Doing this means the export can only be run once as configured. If an export of the object or objects using the custom template must be run again, the mappings established between the placeholder tags and the attributes and references must be re-established. This is why, if exports are to be run on a custom Excel template more than once, it is recommended practice to save the configuration as an export configuration asset. To do this, check the box for 'Save Options,' and then click the ellipsis button (
 ) for the 'Save to' parameter.
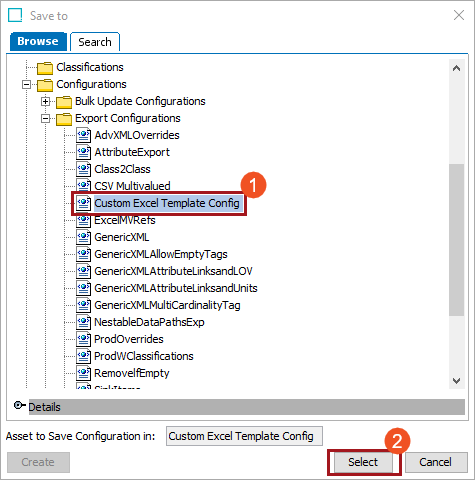
In the 'Save to' window that displays, navigate to the export configuration asset created in step four. Select the asset and click 'Select.'
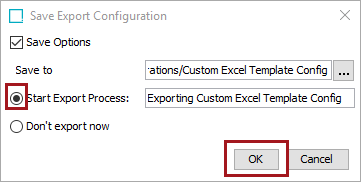
Then, back in the 'Save Export Configuration' window, check 'Start Export Process' and then click 'OK.'
When the exported Excel file is opened (accessible in the completed background process), the result should look like the sample output shown below. This output is derived from the template image accompanying step one in this topic.
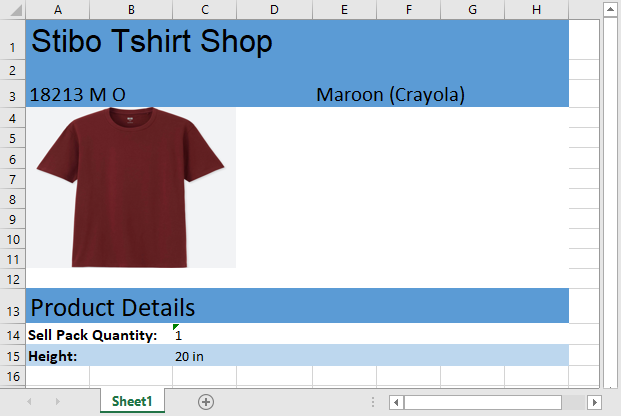
Image conversion configurations with Excel Custom Template
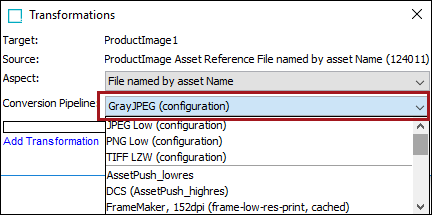
Users can also deploy an Image Conversion Configuration when exporting data using the Excel Custom Template. These are useful if users want to, for example, remove image distortion from exported images, or ensure that very large images are properly downscaled on export. To apply an image conversion configuration, users can click the 'Add Transformation' button during the 'Mapping' step once the images have been mapped to the appropriate image reference type.

In the 'Transformations' dialog that displays, users must select values for the 'Aspect' and 'Conversion Pipeline' parameters. For 'Aspect', select either 'File named by asset Name' or 'File named by asset ID.' Only these two aspects will enable application of an image conversion pipeline to the export. With either selected, the 'Conversion Pipeline' aspect's dropdown menu becomes active. Select the appropriate pipeline from the dropdown and save.
For more information on creating and configuring image conversion configurations, refer to the Image Conversion Configuration topic of the Digital Assets documentation.
It may be useful to keep the following points in mind when working with the Excel Custom Template export format:
- The user can also access the Excel Custom Template export from a Task List or Node List screen in Web UI using the 'Export Action' toolbar action button.
- There is no import aspect to the Excel custom template. Custom templates can only be used to export STEP data.
- All values will be handled as text in Excel. (Not applicable to images.)
- Data can only be exported to standard Excel cells.