This topic describes a detailed procedure for creating a customer-specific channel for a retailer. For the purposes of the documentation, a new channel named Woodlands Treats will be created.
Procedure
Creating a Configured Channel requires multiple stages of configuration. First, users will create the shell of the Configured Channel followed by numerous configurations to meet the channel's requirements.
To create and configure the shell of a channel, follow the steps below:
-
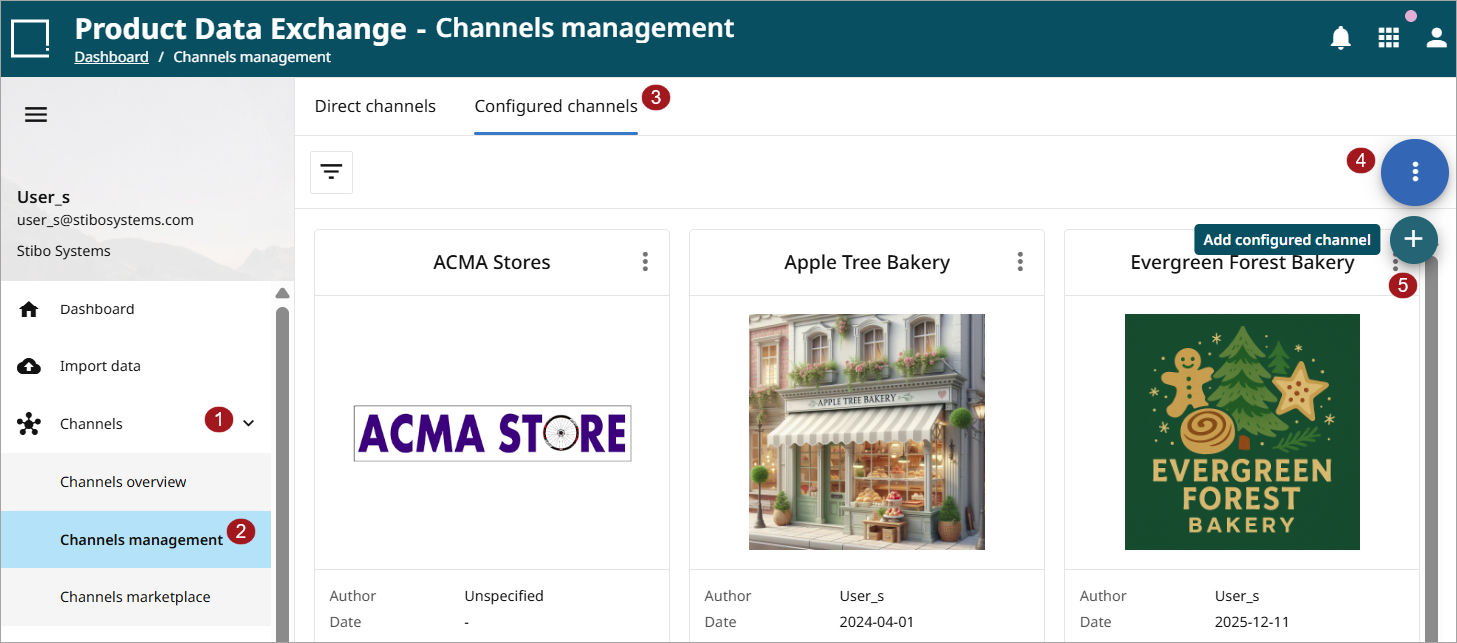
Expand the Channels menu in the sidebar to open Channels management.
-
Click 'Channels management' to open the screen.
-
Click the 'Configured channels' tab.
-
Click the kebab icon to open the add channels option
-
Click the + icon to add a new configured channel.
-
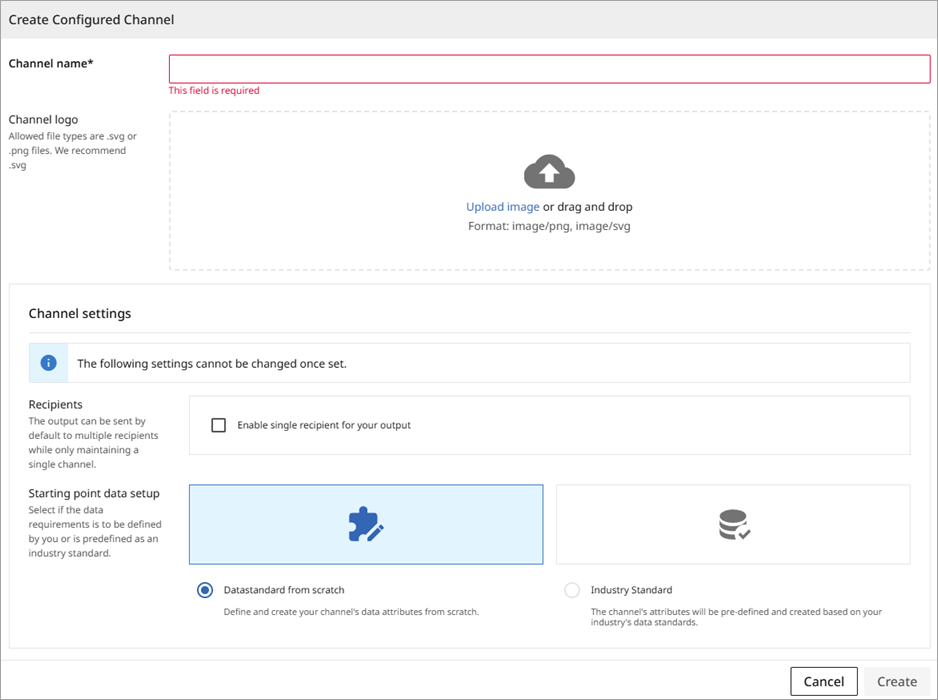
The Create Configured Channel dialogue will appear.
-
Populate the fields within the dialogue as described below to create the shell of the channel:
-
Channel name: Populate the field with a name that best describes the channel.
-
Channel logo: This field allows users to upload an image that will be set as the logo for the channel and displayed on the dashboard. Upload an image for the channel by clicking the 'Upload new logo' link available below the field. If no logo is uploaded, the channel will display with only its name.
-
Channel settings: This section allows the user to configure 'Recipients' and 'Starting point data setup.' These settings cannot be changed once the channel is created.
-
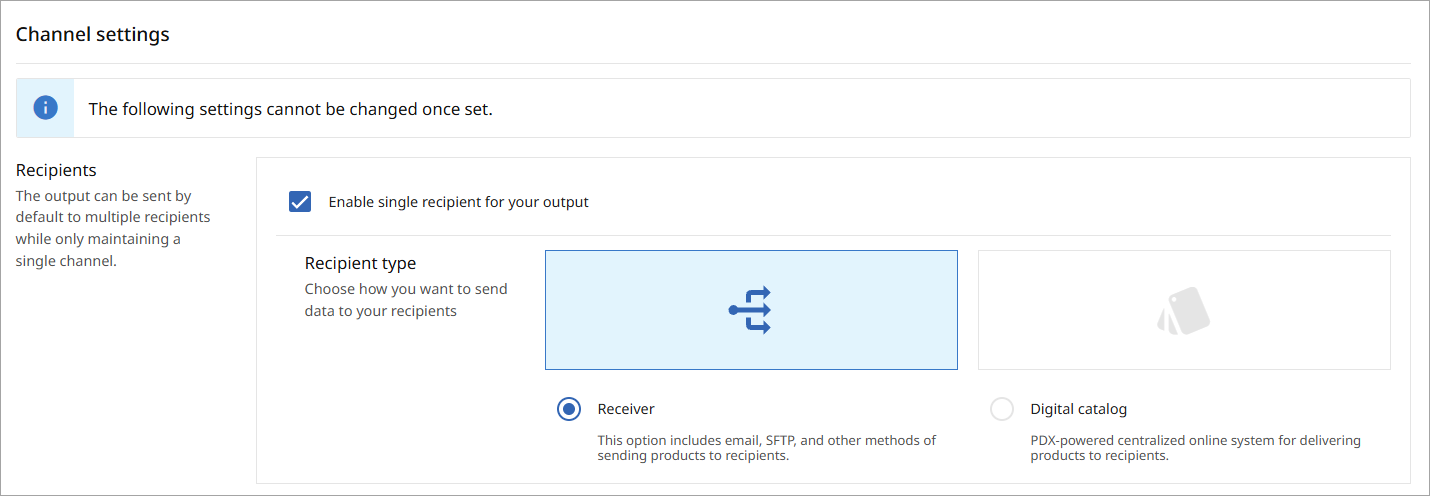
Recipients – Refers to the number of receivers for a single channel. The default setting is for multiple receivers, but a single receiver can be selected by checking the 'Enable single recipient for your output' box. The options for setting a single recipient are 'Receiver' and 'Digital Catalog.' Additional information on receiver types is available in the Receivers Tab Page for Output topic. Additional information on the Digital Catalog is available in the Digital Catalog topic.
-
-
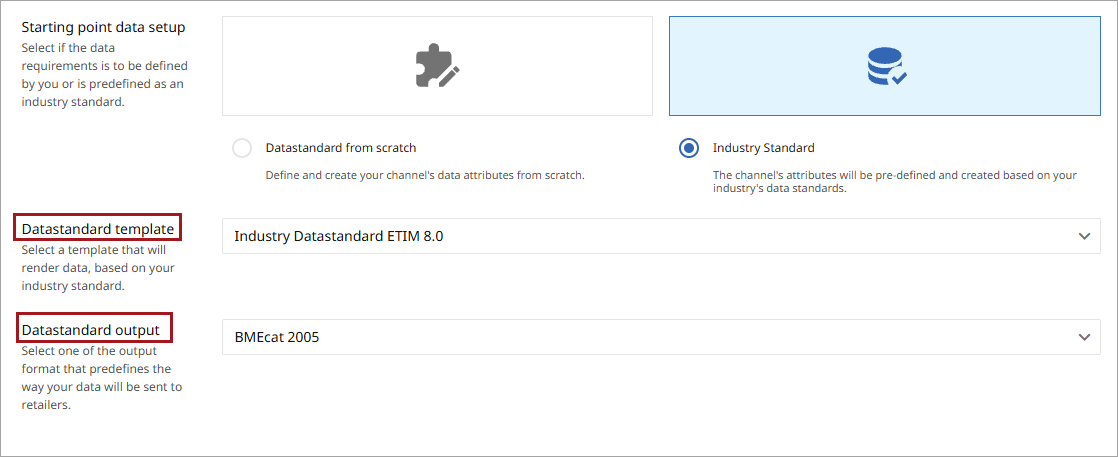
Starting point data setup – The options available within this field determine if the retailer uses an industry standard or not. The following options are available:
-
Datastandard from scratch: This option is selected if the retailer does not operate with industry standards. Selecting this option implies that there will not be any preconfigured attributes or categories available, and the user has to define new data attributes and categories for the channel.
-
Industry standard: This option is selected if the retailer uses an industry standard. Selecting this option comes with a bulk of preconfigured attributes and categories. The industry standard options for the Datastandard template and Datastandard output options available are identified in the below screenshot.
-
-
-
Once all the required parameters in the 'Create Configured Channel' dialog are populated, click the Create button available at the right bottom of the screen. Clicking this button will create the shell of the new Configured Channel.
-
Next, users will be navigated to a new screen with the following six tabs that allow users to add details and configure the channel further:
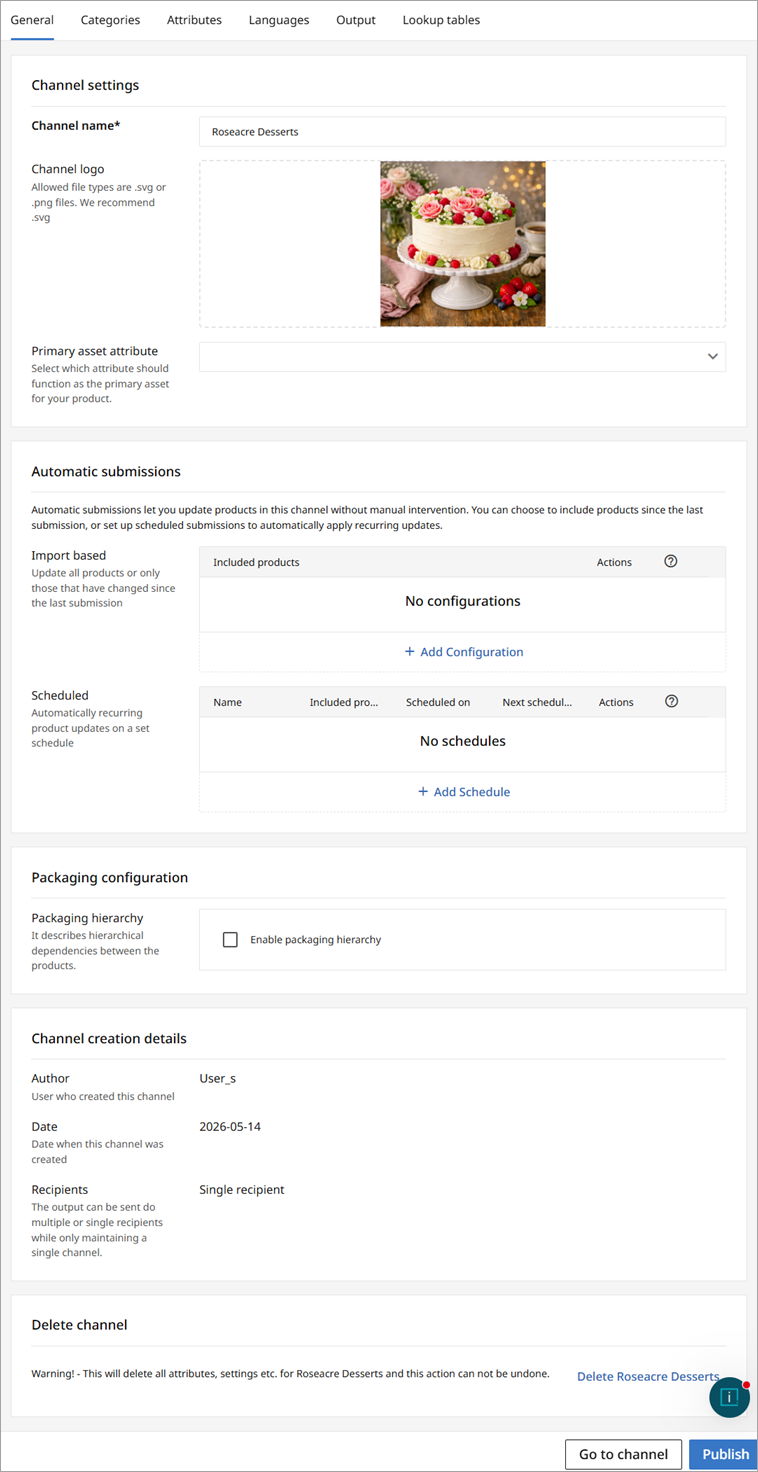
Note: The 'Primary asset attribute' dropdown is available to select once the appropriate attribute has been added. Information on creating attributes is available in the Attribute tabs topic.
-
General Tab Page: This tab allows users to do general configurations like editing the channel name, adding / changing the channel's logo, defining a primary asset attribute, defining settings on automatic submission of products, etc.
-
Categories Tab Page: This tab includes the settings related to categories that the retailers use.
-
Attributes Tab Page : This tab allows users to add attributes to the channel.
-
Languages Tab Page : Language dependent information are defined in this tab.
-
Output Tab Page : This tab deals with the settings related to output configurations.
-
-
The fields available within each of the tabs mentioned above are explained separately within their respective topics in this section. Once all the necessary fields within each tab are populated, click the Publish button that is available at the right bottom of the screen to save changes.