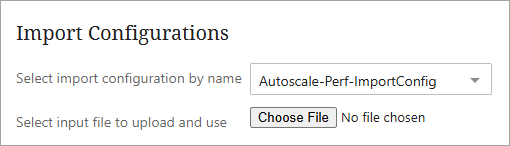
The Data Import screen is designed to facilitate the process of importing data files, enabling users to create or modify datasets based on their selected import configurations.
Before configuring the Data Import screen, users must first create the necessary import configurations in the workbench. For more information, refer to the topic Creating a Data Import.
The following steps detail how to configure the Data Import screen. The screen is designed to be accessed via the Links Homepage Widget. For further details, refer to the section Accessing the Screen below.
Prerequisites
Because basic concepts for working with the Web UI designer are not covered in this section, it is expected that anyone configuring the Data Import screen is familiar with the Web UI designer. In addition, the user must have appropriate privileges to access the designer. Additional information can be found in the Designer Access section of the Web User Interfaces documentation
Screen Configuration
To configure a Data Import screen, open the Web UI Designer and follow the steps below.
-
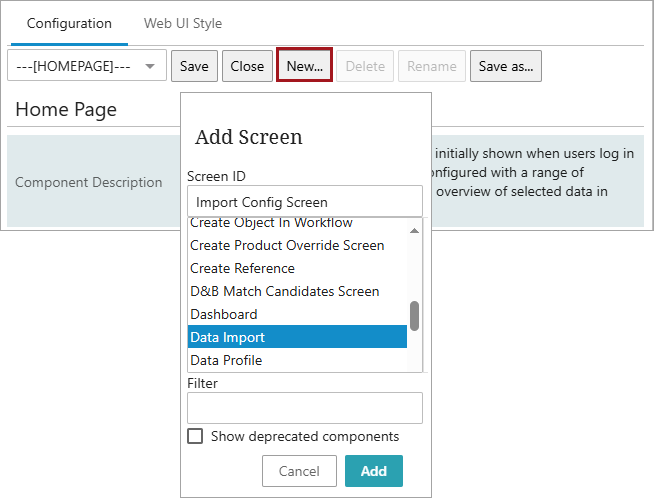
In the dropdown, select the HOMEPAGE screen and click New.
-
In the ‘Add Screen’ dialog that displays, select the ‘Data Import’ screen. Enter an ID and click Add.
-
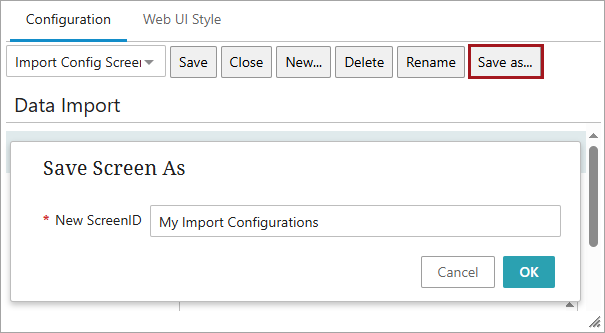
Select your newly created screen to display the ‘Data Import’ screen. Click on Save as… to display the ‘Save Screen As’ dialog. Enter an ID, click OK, and Save.
-
Still on the ‘Data Import’ screen, go to the ‘Title’ parameter to change the title.
-
Then go to ‘Narrowed Import Configurations’ and click the Add button. The ‘Select Node(s)' dialog displays. Select the configurations to display on the Data Import screen and click OK. Click Save to save the configurations on the screen.
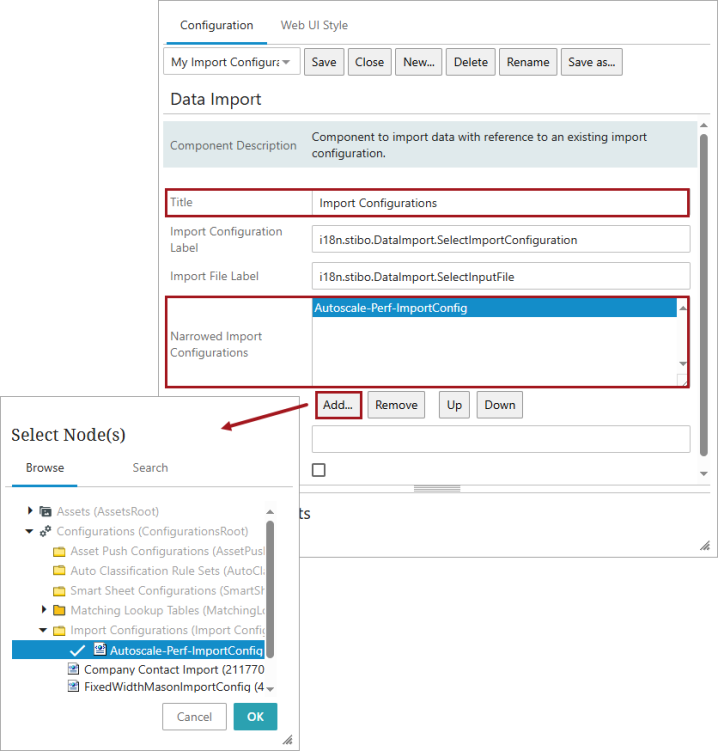
Note: The sequence of the import configurations determines the display sequence of them in the Web UI dropdown list.
Accessing the Screen
The following steps (1-2) describe how to create a Links Widget and then add a link to the widget to access and quickly navigate to the Data Import screen from the homepage (steps 3-4).
-
On the 'Home Page' screen, go to ‘Child Components’ and click Add to add the ‘Widget Grid’.
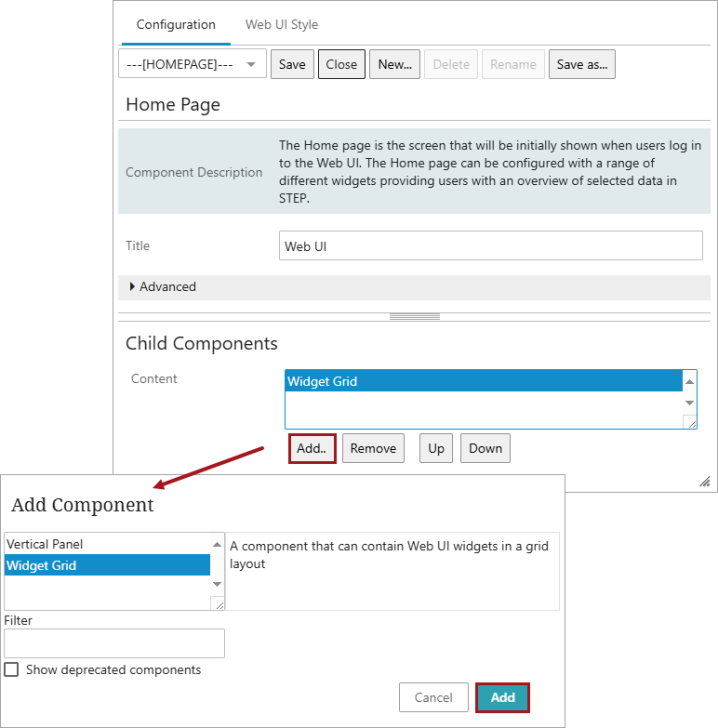
-
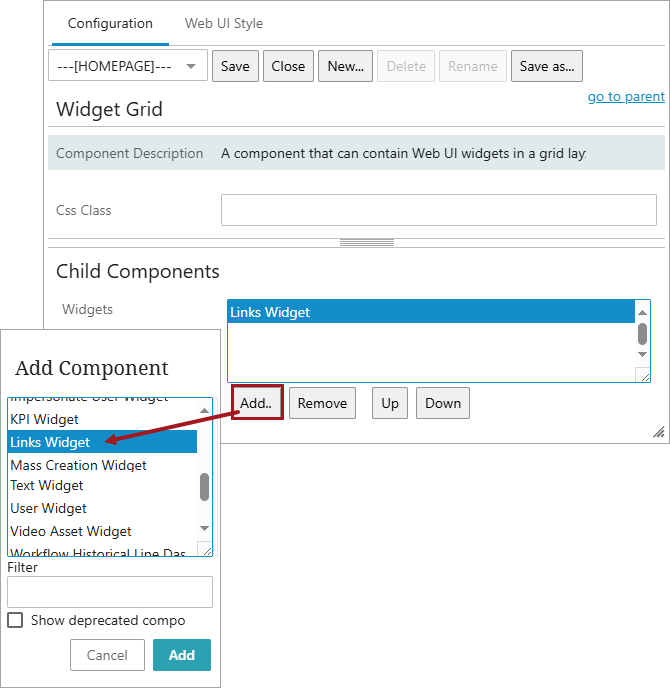
Double-click the ‘Widget Grid’, and on the ‘Widget Grid’ screen that opens, go to ‘Child Components’ and click Add to add the ‘Links Widget’.
-
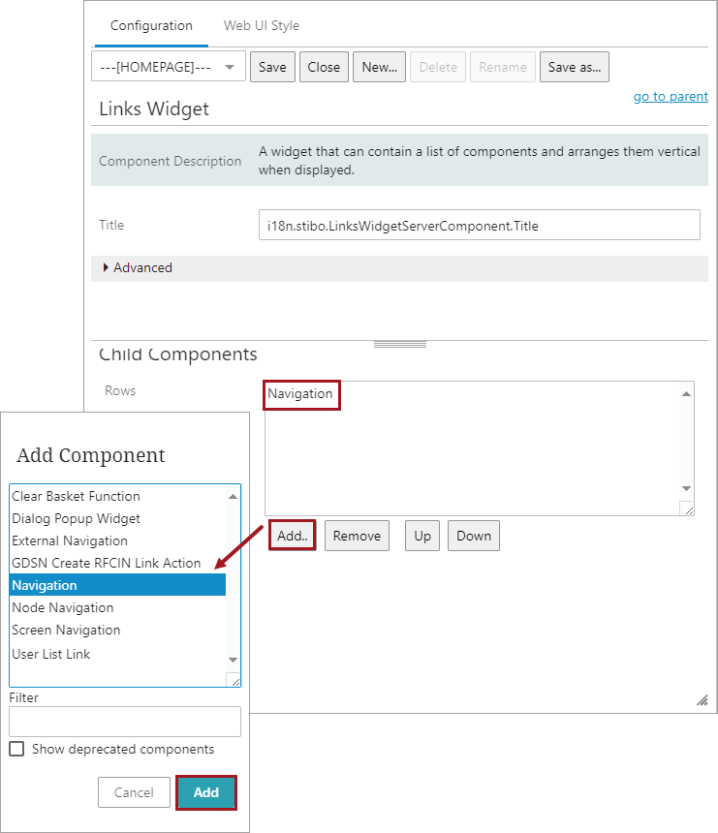
Double-click the ‘Links Widget’, and on the ‘Links Widget’ screen, go to ‘Child Components’ > Rows, and click Add to add ‘Navigation’.
-
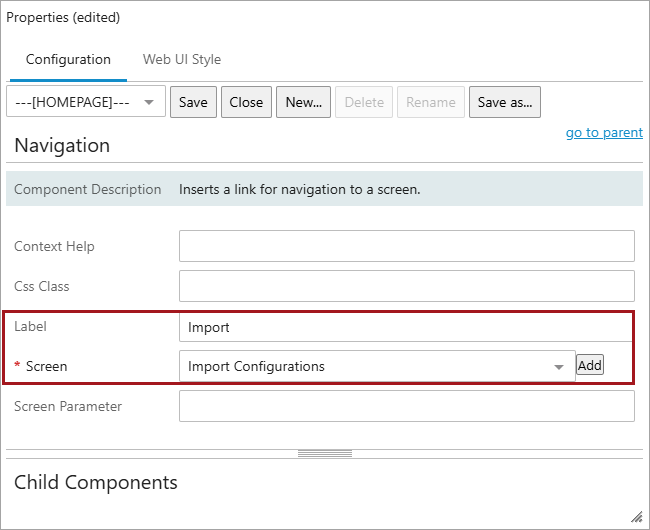
Double-click on ‘Navigation’ to configure the required properties. Select a label for the Links Widget and select the newly created Data Import screen. Click Add, Save, and Close.
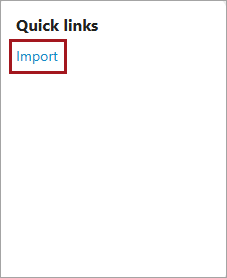
Go to the Links Widget and click on the ‘Import’ link.
Select the import configuration in the dropdown or upload a file with the corresponding data.