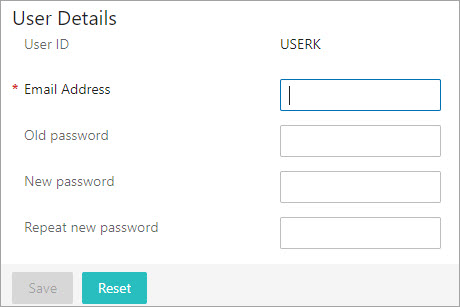
The User Details screen provides access to information specific to the logged-in user. A User Details screen can display the logged-in user's User ID, email address, username, and password. Depending on a user's privileges, these fields can be configured according to individual needs.
Prerequisites
Because basic concepts for working with the Web UI designer are not covered in this section, it is expected that anyone configuring the User Details screen is familiar with the Web UI designer. In addition, the user must have appropriate privileges to access the designer. Additional information can be found in the Designer Access topic.
Pre-Configured User Details Screen
When creating a brand new Web UI, a User Details screen named 'userdetails' comes pre-configured. This default screen can be used, or a new one can be created (as described below).
Adding a New User Details Screen
To add a User Details screen to a Web UI, follow the steps described below.
For full details on how to create and add a new screen to a Web UI, refer to the Design Mode Basics topic. Users should be familiar with the process of creating new screens before attempting the steps listed below.
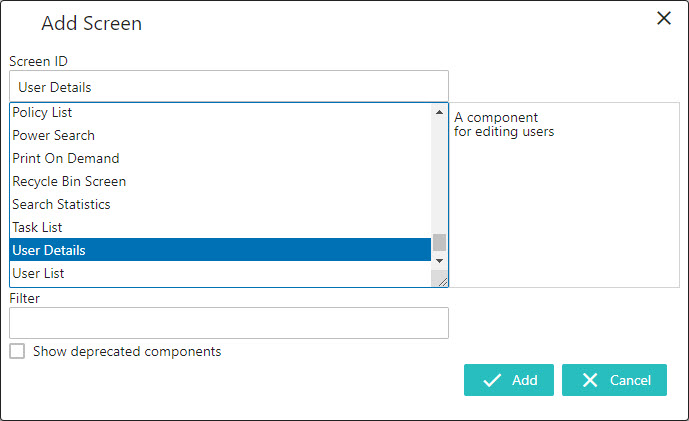
- In the 'Add Screen' window, select 'User Details' as the screen type, as shown in the screenshot above.
- In the 'Screen ID' text field, create a name for the User Details screen. In this example, the Screen ID is 'User Details.'
- Click 'Add.'
The User Details screen is now ready to be configured.
Configuring a User Details Screen
Steps for configuring the User Details Screen Properties are below.
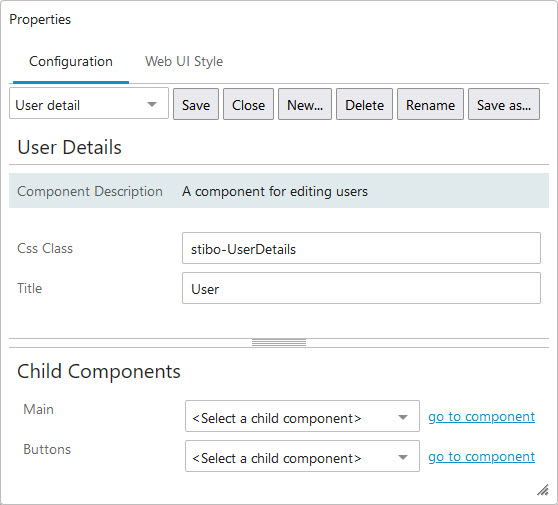
- To access the User Details screen, open the designer and select 'User Details' from the screen dropdown. This will open the User Details Properties in the design mode.
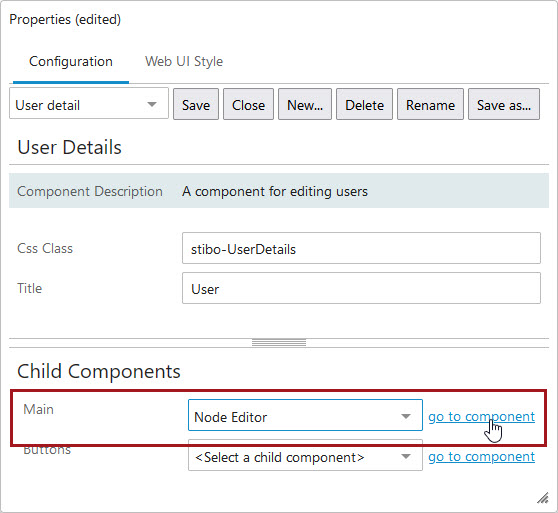
- On the 'Main' parameter in the Child Components section, select 'Node Editor' from the dropdown menu and then click 'go to component'.'
- Click the 'Add..' button and select the desired components. In the example below User Email, User Id, User Name, and User Password components have been added. Once you have selected a component click 'Add..' and repeat the process until all desired components are added.
Note: Multiple components cannot be selected and added at one time. Rather, each component must be added individually.
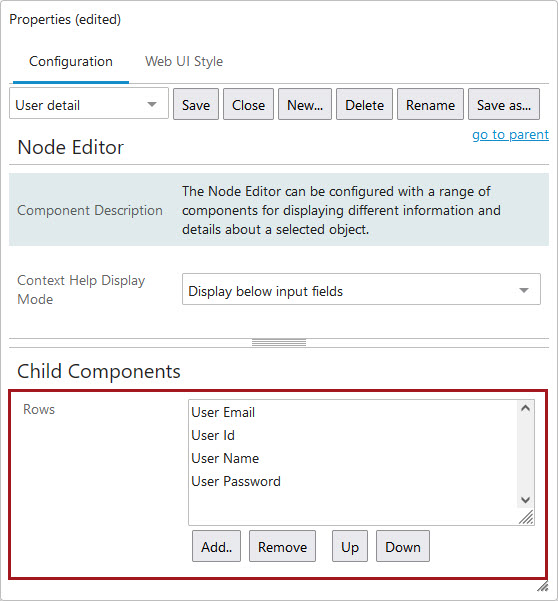
- To configure the Child Components, double-click on the component and make any desired changes.
- Click 'Save'.
Adding the 'Save' and 'Reset' Buttons
- Click 'go to parent' to return to the User Details properties.
- On the 'Buttons' parameter in the Child Components section, select 'Buttons' from the dropdown menu, and then click 'go to component'.
- Click the 'Add..' button, and using the same process as adding the components above, select the desired components. In this example, the Save Action and Reset Action are added.
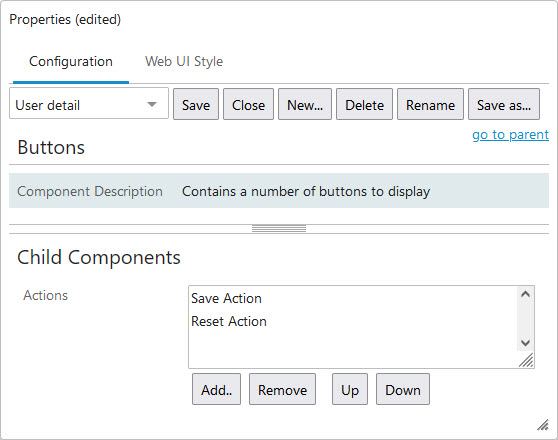
- Once the desired components are added, click 'Save,' and then 'Close' to exit design mode.
The User Details screen is now configured and will display as shown at the beginning of this section.
For this screen to appear on the homepage, it will need to be configured as the User Details screen within the User Widget properties, or it can be added to a Links Widget for easy homepage access. For more information about widgets, refer to the Homepage Widgets topic.
Using a User Details Screen
In this example, if the screen is configured as described above and accessed via a User Widget, users can add / change their email, username, and password.

In the example below, the user has received an error message due to an incorrect password entry.
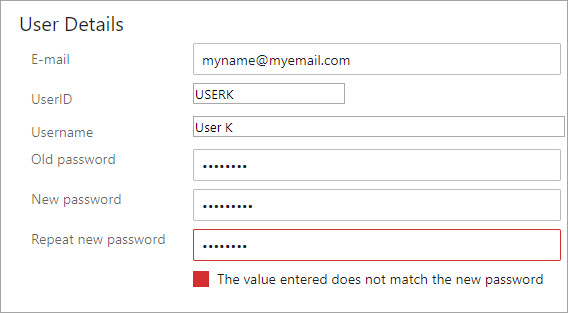
To successfully save a fully updated User Detail screen and avoid an error message, the current password must be correctly entered into the 'Old password' text field and information entered into the 'New password' and 'Repeat new password' text fields must match each other.
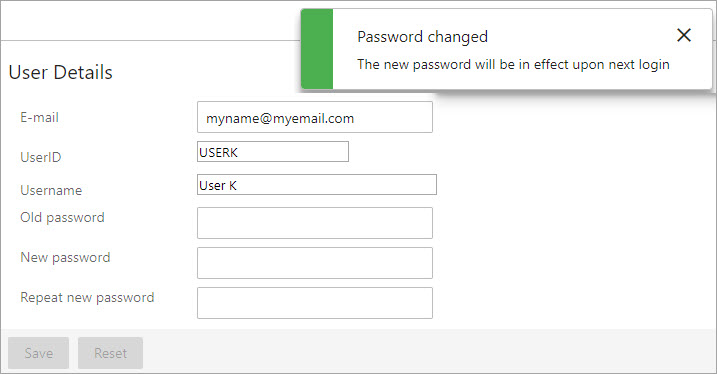
The example below shows a correctly filled out and saved User Details screen. The user has entered the correct current password (the old password), both the new password and the repeated password match, the 'Save' button has been clicked, and the 'Saved' message is displayed, telling the user that the new password will be in effect upon next login.
For more information on how to change your password in the workbench, refer to the Changing a User Password topic in the System Setup documentation.