The Asset Importer Widget offers users a simple method of importing assets from the Web UI Homepage. Multiple asset importer configurations can be mapped to the same widget, which are accessed individually by dragging and dropping files into the appropriate area on the widget or by clicking on the Select File button for the corresponding configuration.

Before this widget can be used, ensure that the Asset Importer functionality has been enabled and that there are configurations available on the system.
For more information on enabling Asset Importer, refer to the Asset Importer Initial Setup topic of the Digital Assets documentation.
For more information on creating asset importer configurations, refer to the Asset Importer Configuration topic of the Digital Assets documentation.
Configuration
It is expected that anyone configuring the Asset Importer Widget is familiar with the Web UI Designer, as basic concepts for working with the designer are not covered in this section. In addition, the user must have appropriate privileges to access the designer.
For information on adding a widget to the homepage, refer to the Adding Widgets to a Homepage topic in the Getting Started documentation.
- When configuring the Asset Importer Widget for the Homepage, there are four optional parameters to consider; Label, Process Description, Upload Asset Parameters, and Use Multi Drop Area.
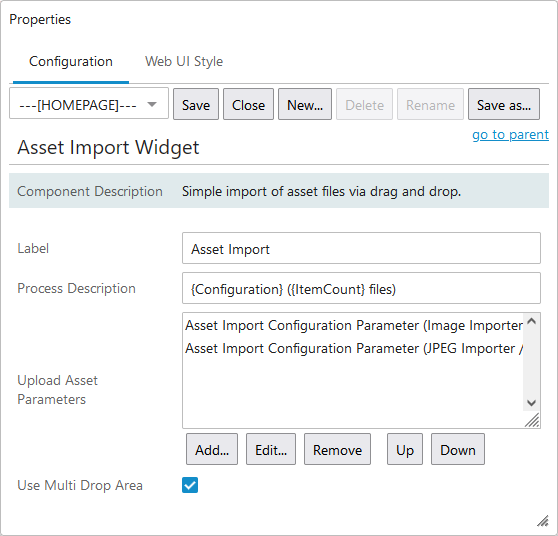
- In the 'Label' parameter, enter a label for the widget.
- In the 'Process Description' parameter, create a template for the background process description. The template may contain a number of place holders that are expanded when the background process is started.
Available placeholders include:
- [Action]: The name of the action.
- [Configuration]: The asset importer configuration.
- [ItemCount]: The number of files to import.
- [ImportFile]: The name of the file(s) in a comma separated list.
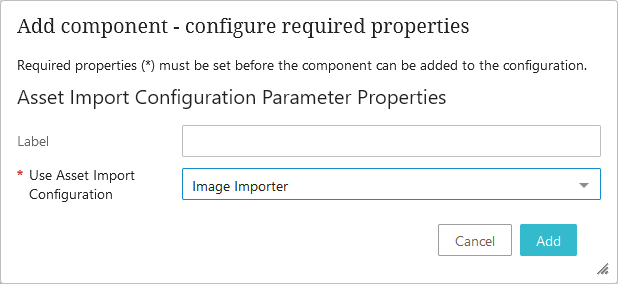
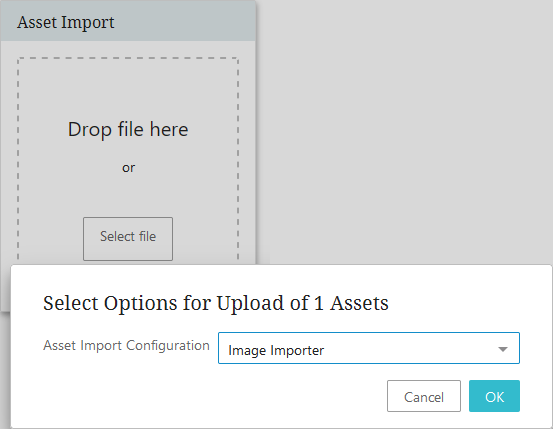
- In the 'Upload Asset Parameters' field, click Add (and follow the below steps) to map an asset import configuration to the widget. If no selections are made, the user will be prompted to specify which configuration to use among all those present on the system upon import.
- In the dialog that appears, enter a label for the area in which the configuration will reside.
- Select the desired Asset Configuration.
- Click Add when finished.
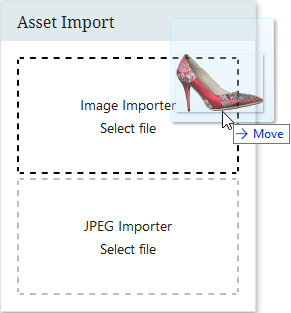
- In the 'Use Multi Drop Area' parameter, check the box to enable multiple drop areas on the widget. Each of these drop areas represent an individual asset importer configuration that was specified in the above step. If unchecked, the widget will have one large drop area, that when used, will prompt you to select a configuration from those specified in the previous step.
Note: It is recommended to leave the box unchecked if you want to map many different configurations to the same widget.
Importing Assets
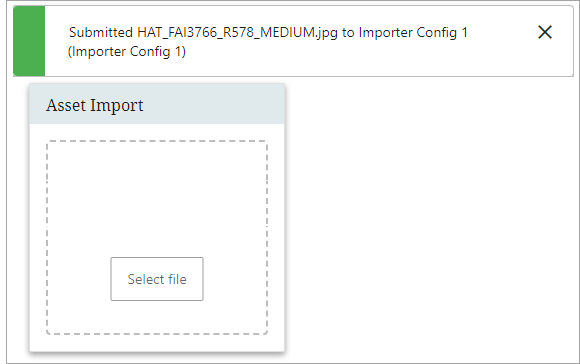
Once the widget is configured, assets can be easily uploaded by either dragging and dropping the relevant file into the widget drop area or by clicking on the Select File button for the corresponding configuration.
Drag and drop
Files can be dragged and dropped directly into the widget.
If 'Use Multi Drop Area' is not configured, the user will be prompted to select a configuration. Once a selection is made, click OK and the import will initiate.
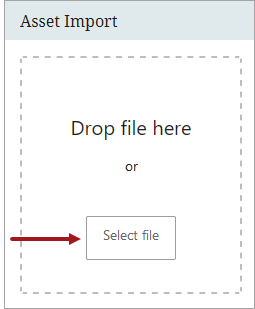
'Select file' option
In addition to drag and drop, users can click Select file for the corresponding importer configuration.
You are provided a notification on screen submission of the asset file.