The Merge Rows/Columns transformation enables you to merge single columns or rows, groups of columns or rows, or a range of columns or rows into one column or row.
When you merge columns or rows, the values of all rows or columns are retained and usually separated by a separator character. After the merge, it will look as if two or more attributes are placed in the same column or row.
Prerequisites
The instructions in this topic assume that you have already added the transformation to your table by following the instructions in the Add a Transformation to a Table or Table Type subsection of the Table Transformations topic here.
Example
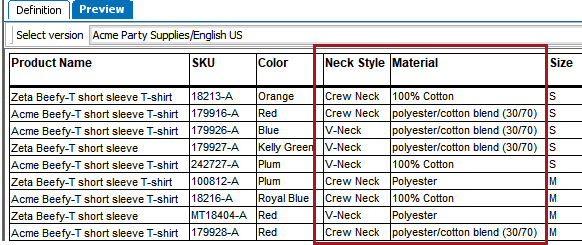
In the following example, the 'Neck Style' and 'Material' columns are merged. Though it is common to merge columns or rows that are directly adjacent to one another, any columns or rows can be chosen. E.g., in the below example, 'Product Name' and 'Color' could be merged, and so forth.
Before
Before the merge, the 'Neck Style' and 'Material' attributes are maintained in two separate columns.
After
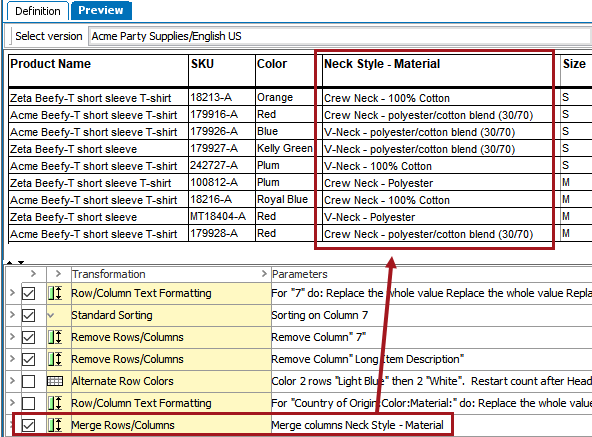
After the merge, the contents of the two columns are now merged into one column, and the values are separated by a hyphen with a space on either side.
Steps
The Merge Rows/Columns transformation is set up in a three-step wizard. The steps are Orientation, Rows/Columns, and Result.
To get started, after adding the transformation, click the ellipsis button ( ) under Parameters to display the Merge Rows/Columns wizard.
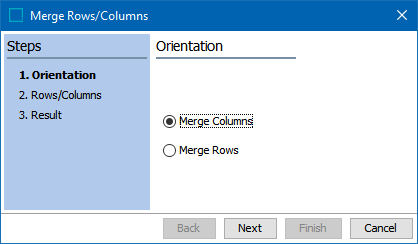
Orientation
In the Orientation step, specify whether you want to merge columns or rows. Click Next.
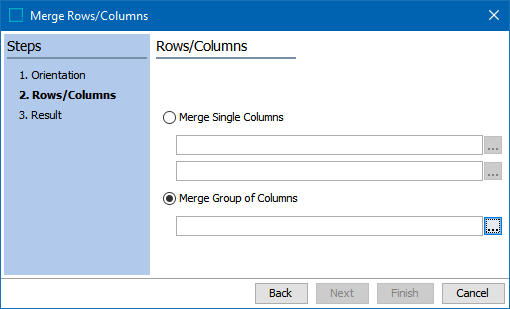
Rows/Columns
In the Rows/Columns step, two merge options are available—Merge Single Columns and Merge Group of Columns.
To Merge Single Columns
- Select the Merge Single Columns radio button, then click the ellipsis button () on the first parameter to choose the first row or column that you want to merge.
- In the Select Column dialog that displays, choose the column or row by selecting one of the available options (Attribute, Product/Classification/Asset, etc.). These options are explained in detail in the Rule When Different subsection of the Layout Transformations topic here; refer to that topic for more information.
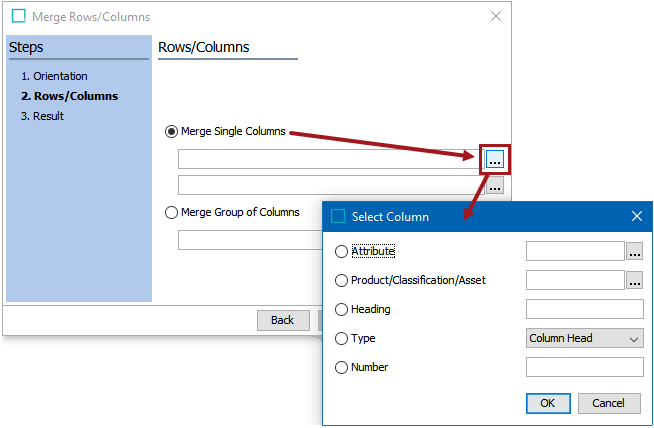
- Click the ellipsis button () in the second field to choose the second row or column to be merged, following the same steps that you used to choose the first row or column.
- After choosing both rows / columns, click Next to go to the Result step.
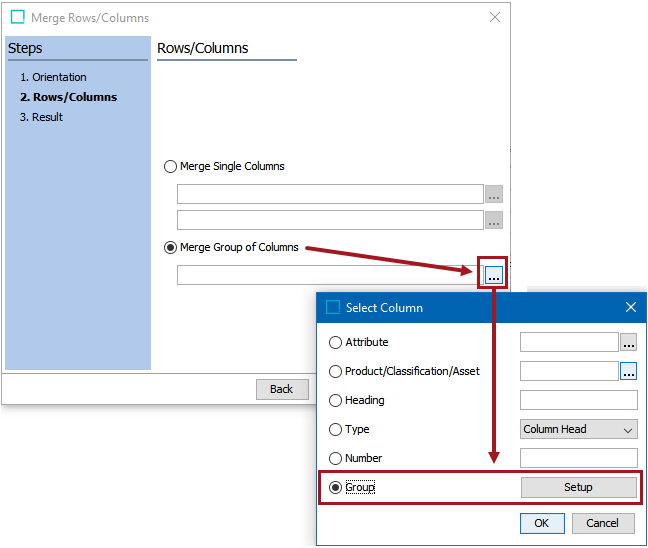
To Merge a Group of Columns
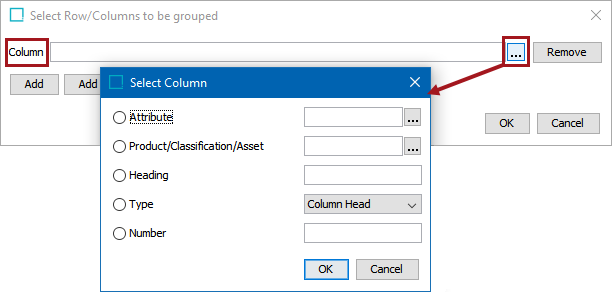
- Select the Merge Group of Columns radio button, then click the ellipsis button ().
- In the Select Column dialog that displays, select Group, then click Setup.
- On the Select Row/Columns to be grouped dialog, click Add to select individual columns to be grouped.
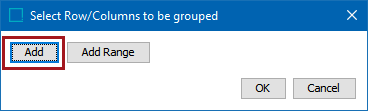
- If you are grouping columns, a Column field will appear (and conversely, a Row field will appear if grouping rows). Click the ellipsis button () to launch the Select Column (or, Select Row) dialog. Specify the first row to be grouped, then click OK.
- Click Add again to create a second Column (or Row) field. Repeat these steps until you have added all of the desired columns or rows to the group. Click Remove to remove a column / row selection.
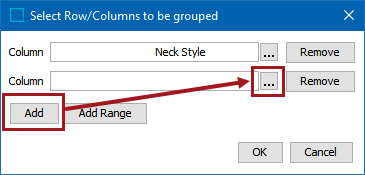
- When finished, click OK in the Select Row/Columns to be grouped dialog. Then, click OK in the Select Column (or, Select Row) dialog.
- Click Next to go to the Result step.
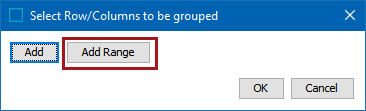
To Merge a Range of Columns
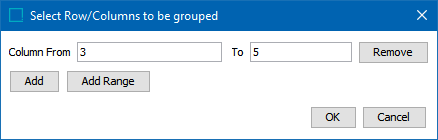
- On the Select Row/Columns to be grouped dialog, click Add Range.
- If merging columns, a Column From field and a To field will display. If merging rows, a Row From field and a To field will display.
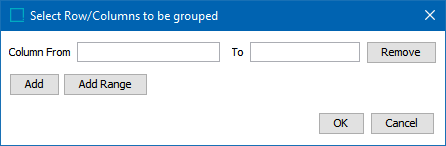
- Enter the number of the 'from' column / row in the Column From / Column Row field, then enter the number of the 'to' column / row in the To field. Note: These fields will take number entries only.
- To add an additional range, click Add Range again and follow the previous steps.
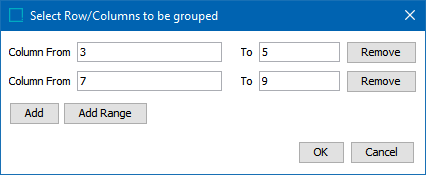
- When finished, click OK in the Select Row/Columns to be grouped dialog. Then, click OK in the Select Column (or, Select Row) dialog.
- Click Next to go to the Result step.
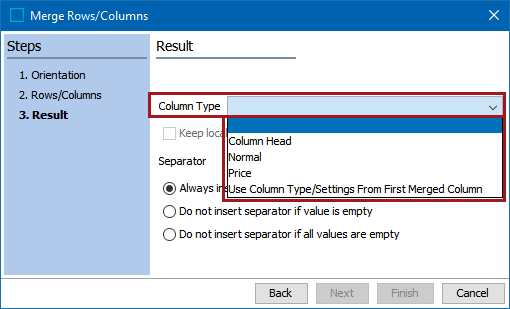
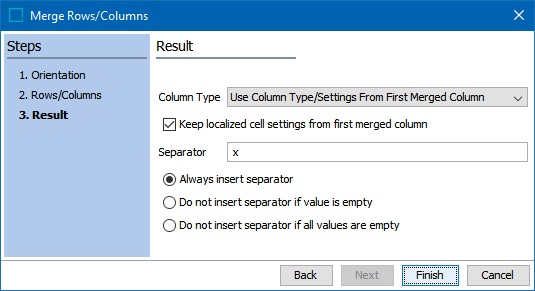
Result
- In the Result step, specify the row or column type to use for the merged column or row. In addition to the legal column types / row types available for the table, you can also choose to keep the style of the first merged column / merged row.
- If you choose 'Use Column Type/Settings from First Merged Column' (or, if merging rows, 'Use Row Type/Settings from First Merged Row'), the Keep localized cell settings from first merged column / Keep localized cell settings from first merged row checkbox will become activated. This setting enables cell-level formatting to be retained from the first merged column or row.
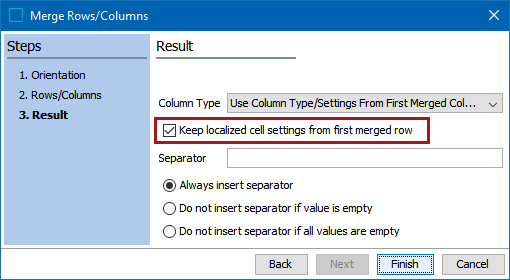
- Next, enter the Separator character(s) that should appear between values in the merged column or row. In this example, the separator is ' x ', an x with a space on both sides. Then, choose one of the three available options:
- Always insert separator
- Do not insert separator if only one value is empty
- Do not insert separator if both values are empty
- Click Finish to complete the transformation setup.
Additional Example - 'Keep localized cell settings' and 'Separator'
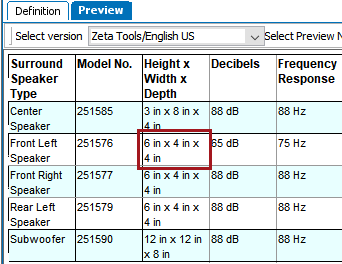
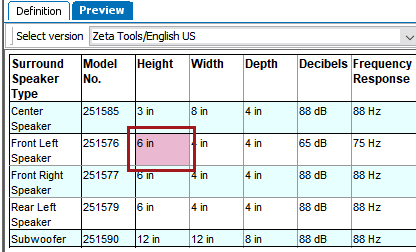
In the following example, the 'Height,' 'Width,' and 'Depth' columns will be merged using the Merge Rows/Columns transformation. Before the transformation is applied, a single pink cell appears in the 'Height' column, and all dimension values appear independently, each in their own column.
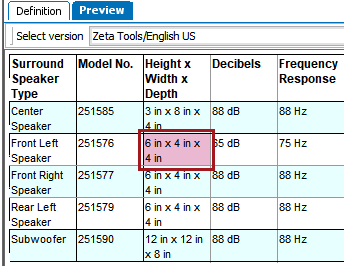
After the transformation is applied, the pink shading is retained in the merged cell, and all merged values now appear in the same column, separated by ' x '. This is due to Keep localized cell settings from first merged column being selected and a separator of ' x ' being used as the separator on the Result screen of the wizard.
Had Keep localized cell settings from first merged column been left unchecked, the pink shading would have been lost and the table would look like this: