This section describes how to create, edit, and delete contexts, and how to specify a default context. It also explains 'hidden values', which can be caused when a context is deleted.
Creating a Context
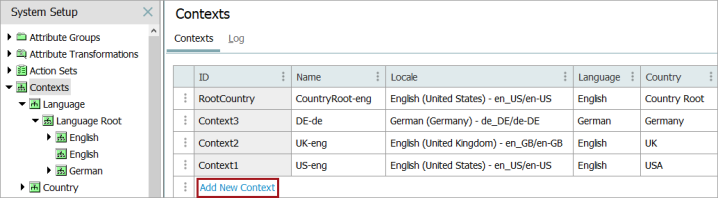
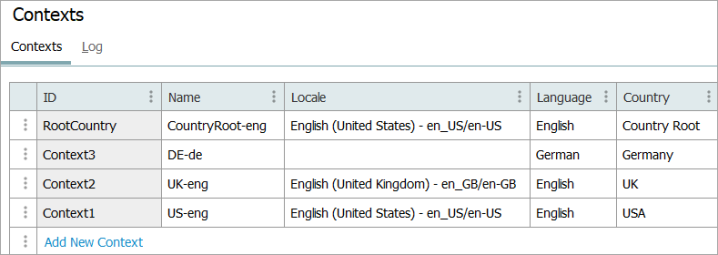
Contexts are maintained on the System Setup tab under the Contexts node. A context must contain, at minimum, one language dimension point; for example, English.
-
Verify that the required dimension and dimension points exist. For more information, refer to the Maintaining Dimensions and Dimension Points topic.
-
On the System Setup tab, click the Contexts node, and click the Add New Context link.
-
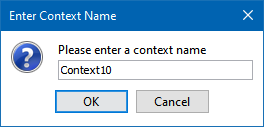
In the Enter Context Name dialog, enter a name for the context and click OK.
Important: By default, the name entered in this field also becomes the context ID. Refer to the Context Recommended Practices topic for suggestions on context ID format.
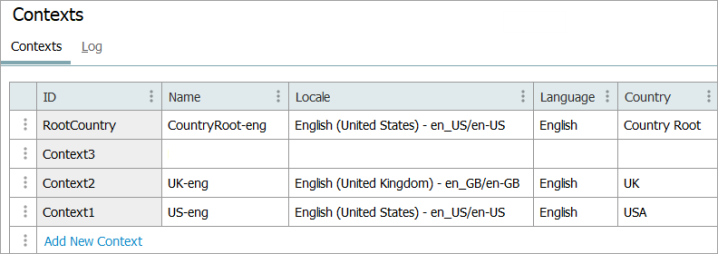
A new context displays with a blank locale and selections for the available dimensions.
-
In the Name column, replace the auto-created name with a new, user-friendly name that is different than the ID. Refer to the Context Recommended Practices topic for suggestions on naming contexts.
-
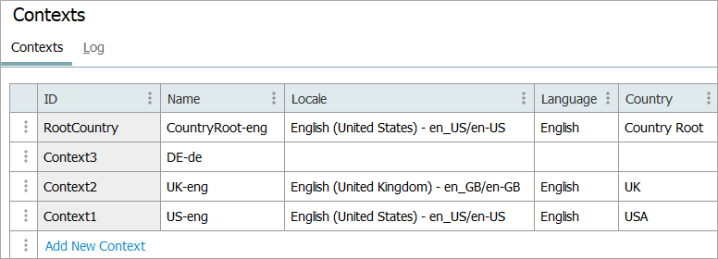
Click into the available dimension point column(s) to display a dropdown and make a selection. For example, Language and Country as shown below.
-
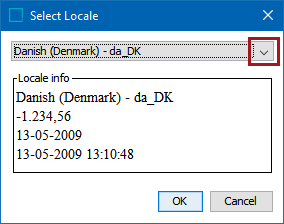
Click into the Locale field to display an ellipsis, click the ellipsis button (
 ) to display the Select Locale dialog.
 -
In the Select Locale dialog, choose the relevant locale from the dropdown list and click OK.
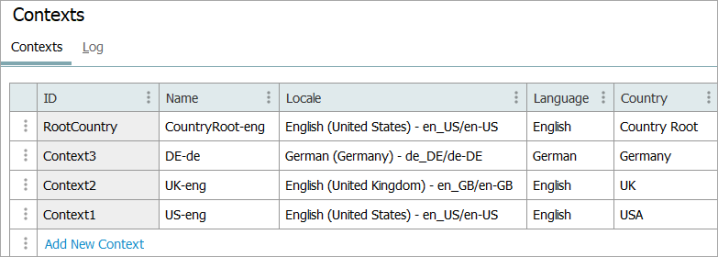
The locale now displays in the Locale column.
For more information on locales and how they are used in contexts, refer to the Context Locales topic.
The context is created and available in the dropdown list of available contexts in the upper left corner of the workbench, as well as in the System Settings menu in the Web UI.
Contexts are displayed on the Contexts node, and are also displayed below the dimension points that are part of the context. Use the editor on the Contexts node to edit more than the name of a context. Expanding the folders of the Dimension hierarchy to view the context icons provides a visual representation of the applicable contexts and can help to validate that the required contexts are configured. On systems where there is more than one dimension, contexts display under each hierarchy where they are configured.

Editing a Context
For existing contexts, the following values can be edited on the Contexts node:
-
Name
-
Locale
-
Dimension point selection
The ID cannot be edited; instead, create a new context to generate a new ID.
Deleting a Context
To delete a context:
-
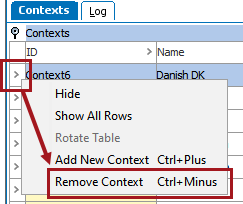
Identify the context to delete, right-click on the arrow to the left of the context ID to display the context menu.
-
Click Remove Context (or use the Ctrl + Minus keyboard hot key) to delete the context.
Hidden Values
Values are hidden when a context is deleted:
-
If attribute values exist in the deleted context
-
If no other contexts use the dimension point
-
If the attribute(s) are dependent on the dimension point contained within the context (e.g., language or country)
Hidden values are visible on the Status tab within the 'Hidden values' flipper.
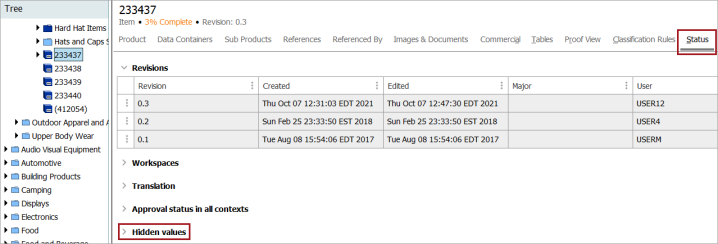
The values redisplay if the context is added again, or if another context is created that uses the same dimension point.
In a standard editor, values inherited from another dimension have a red indicator in the attribute icon, as shown below:

Note: Deleting a context can also cause a product to not be fully approved even if it is approved in all contexts, due to existing values in a deleted context.
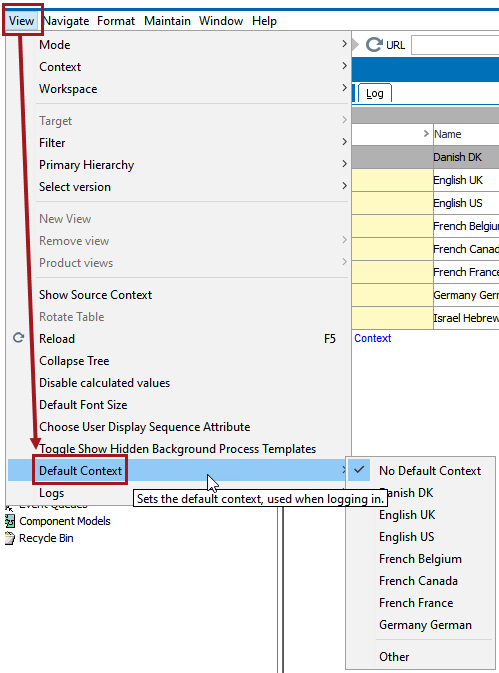
Specifying a Default Context
It is recommended that users work in a single context to avoid adding data in the wrong context (for details, refer to the Context Recommended Practices topic). Setting a default context can help alert users when they are not in the preferred context.
To specify a default context, use the following steps:
-
From the View menu, highlight the Default Context option to display the available contexts.
-
Make a selection:
-
Choose 'No Default Context' to remove any default.
-
Select a preferred context from the list.
-
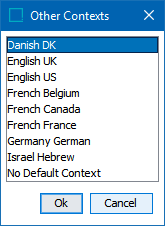
Click Other to display more contexts, select from the 'Other Contexts' dialog, and click OK.
The selected default is identified with a checkmark on the Default Context menu item.

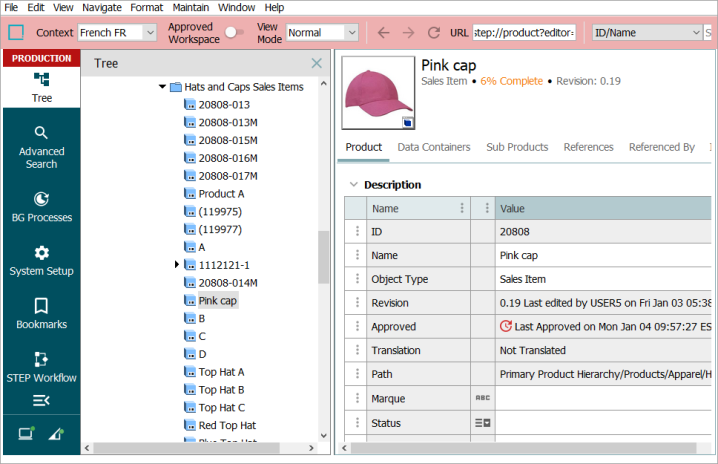
When a Context is selected, a dark pink / light red title displays on the toolbar to indicate that the selected context is not the default. Additionally, attribute editor fields will turn pink when selected. In this example, since the default context is Danish DK, the toolbar color changes when French FR context is selected.
-