When a calculated attribute displays on an object, the value is read only. Occasionally, the calculated value for a specific product, even though correct, may not be what is desired. Below are options for overriding calculated attributes, restricting override, removing override values, and restoring a calculated value.
Note: For calculated attributes, the value is expected to be controlled by the resulting value within the actual calculation, so the settings for the attribute's validation base type, assigned unit, and dimension dependencies etc. are all ignored. It is only when a manual override is applied to the attribute value that those limits and setups are active.
Override a Calculated Attribute
Although a calculated attribute value is displayed as read-only in the workbench or Web UI Tree object editor, it can be overridden.
To manually override the value on specific product (and child products for specification attributes, if the value is inherited), right-click the calculated value and click Override.
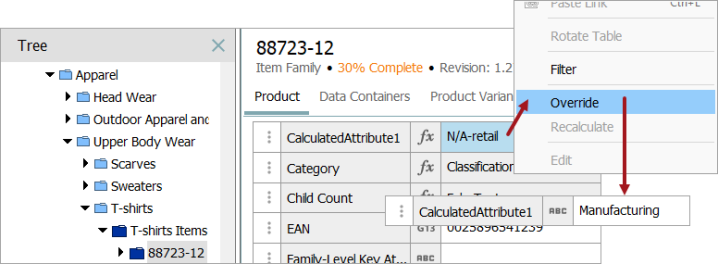
The parameter can then be edited, allowing you to enter the value to replace the calculated value. If values existed prior to clicking Override, then those values become static text. When static text has been defined, it is displayed with a white background. No calculations are performed on static text. The text entered is displayed in the object editor for the objects where the attribute is valid. Static text can also be used in combination with functions.
Another option is when a space added as a value is used to override a calculated attribute value. In the following image, Status 1 is a calculated value that uses data from Product Status, in this case the value of 'Active.' Status 2 adds the value of Status 1 to some text.

When Status 1 gets a space value for an override, that space is passed onto Status 2.

This method can be used to overwrite calculated values per object.
Restrict Overrides of a Calculated Attribute Value
Calculated attribute values can be overridden as described above, and can also be overwritten via import.
For example, consider an export that includes the calculated attribute values (among other values). After making a change to non-calculated attributes, you then re-import the file. Since the file contains the value of the calculation, the calculation is overridden with an actual value, making it a local value. In this case, it might be beneficial to apply a mask to prevent the calculated value from ever being overridden unintentionally.
Important: Using an input mask places a restriction on the attribute override value. The only override allowed via keyboard entry or import is one that matches the mask. For more information, refer to the Input Masks topic.
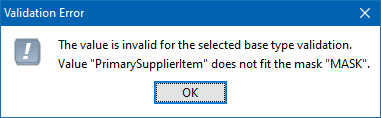
Continuing with the override example above, a mask of 'MASK' has been added to the calculated attribute named 'GetRefTypeID'.
- Click the Override option for a calculated attribute value that includes a mask. The following validation error displays and compares the calculated value to the mask.
Note: This error is also displayed if override values already exist for a calculated attribute that is being modified to include a mask. In this case, follow the steps in the Remove Override Values section below, and then add the mask.
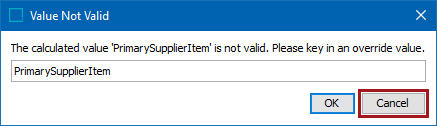
- In the Value Not Valid dialog, add the mask text as an override or click Cancel to resume using the calculated attribute value.
Remove Override Values
To delete existing override values:
- Use Export Manager to create an export of the attribute (and any other attributes needed for identification) for all objects. For more information, refer to the Creating a Data Export topic in the Data Exchange documentation.
- On the Export Manager wizard Advanced step, uncheck the 'Include Calculated Attribute Values' Advanced option. This outputs only local values. For more information, the Export Manager - Advanced topic.
- In the output export file, replace the attribute's local values with '[delete]' and save the file. For more information, refer to the Delete Values - Map Inbound topic.
- Use Import Manager to import the modified file. For more information, refer to the Creating a Data Import topic.
Restore a Calculated Value
To restore the calculated value in the workbench or Web UI, delete the manually entered value to have the calculated value display again.