The Smartsheet Export Action is used alongside the Smartsheet Import Action to maintain product data. Specifically, this action allows users to download Smartsheet maintenance files from products in a workflow. Once the product data has been updated in the sheet, you can import the changes into STEP via the Smartsheet Import Action.
For more information, refer to the Smartsheet Import Action topic.

This action can be configured on a Task List screen, and is available for products moving through a workflow.
Prerequisites
It is expected that anyone configuring the Smartsheet Export Action is familiar with the Web UI Designer, as basic concepts for working with the designer are not covered in this section.
To access the Smartsheet Export action, the user must be a member of a supplier group. In addition, the user must have appropriate privileges to access the designer. Additional information can be found in the Designer Access topic.
Note: Specification attributes valid by object type will only be included for the products exported in a Smartsheet if the attribute is linked to a direct ancestor of the exported product. This means that attributes linked to the product or classification are included in a Smartsheet export.
Additionally:
- attributes must be linked to product or classification categories
- attributes must be valid for the object types being exported
Configuration
The only mandatory parameter for this action button is Narrowed Export Configurations, which determines which Smartsheet export configurations are available for selection.
Note: All messages, titles, or labels in this configuration are displayed from the translation i18n keys which resides on the server.
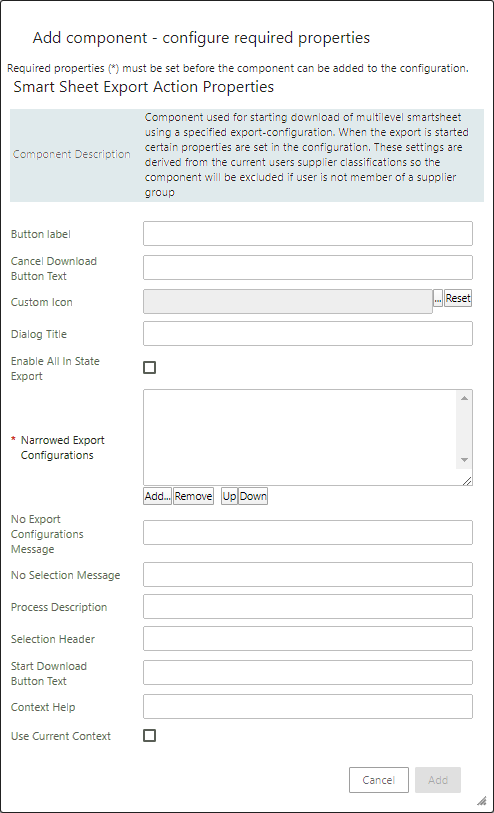
- In the Button label parameter, enter a label for the action button.
- In the Cancel Download Button Text parameter, enter the displayed text for the cancel button.
- In the Custom Icon parameter, click the ellipsis button (
 ) and select an icon to use for the action button.
 - In the Dialog Title parameter, enter a title for the export dialog.
- In the Enable All In State Export parameter, check the box to add a radio button to the export dialog, allowing for the export of all products in the current workflow state.
- In the Narrowed Export Configurations parameter, click Add... and select which export configurations should be made available to the end user.
Note: This must be a data export configuration, not a template configuration.
- In the No Export Configuration Message parameter, enter a message to display when no configurations can be found.
- In the No Selection Message parameter, enter a message to display when no configuration has been selected.
- In the Process Description parameter, enter a template for the process description.
- In the Selection Header parameter, enter a header for the export dialog.
- In the Start Download Button Text parameter, enter text that should be displayed for the download button.
- In the Context Help parameter, enter text to display for the action button tooltip.
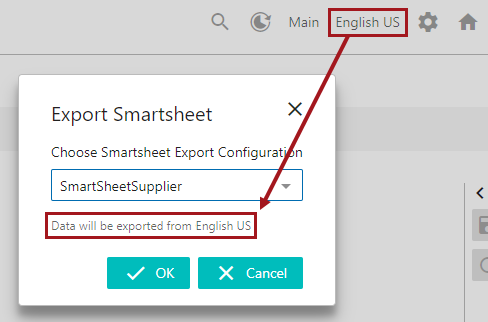
- Select the Use Current Context parameter to export data from the context in which the user is currently working. When the export process is initiated, the 'Export Smartsheet' dialog will display a message that the data will be exported from the current context (e.g., 'Data will be exported from English US').
Note: This feature is not compatible with cross-context exports. If an export is attempted using a Smartsheet export configuration that has been configured to use a cross-context export, an error message will display, and the export will not occur.