The Proof View Web UI component is used to display print layouts for Product, Entity, and Classification objects and is optimized for use on a Node Details page, either alone on a Sub Screen Tab Page or on a Tab Page with a child tab component of Border Panel or Draggable Split Panel. The non-draggable Split Panel can also be used, but the Draggable Split Panel is recommended to optimize viewing of proofs, which should be viewed with the largest amount of screen space available.
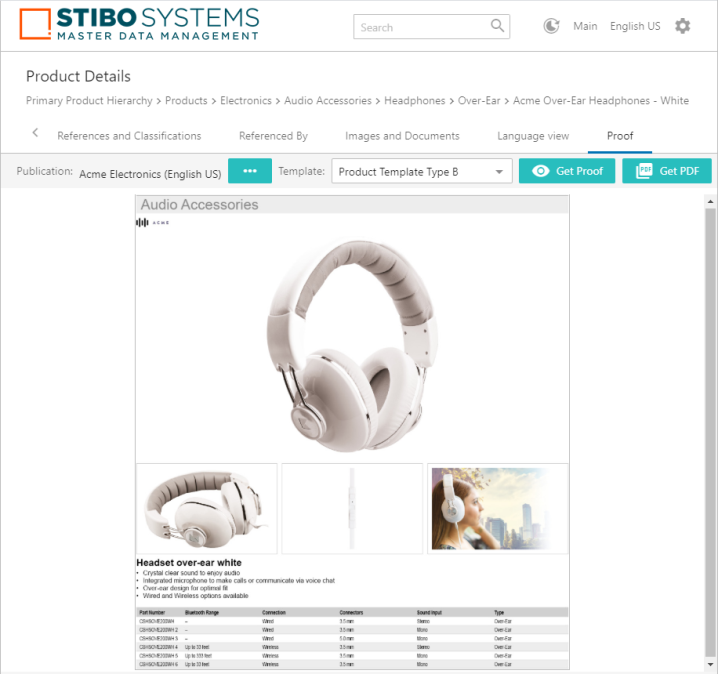
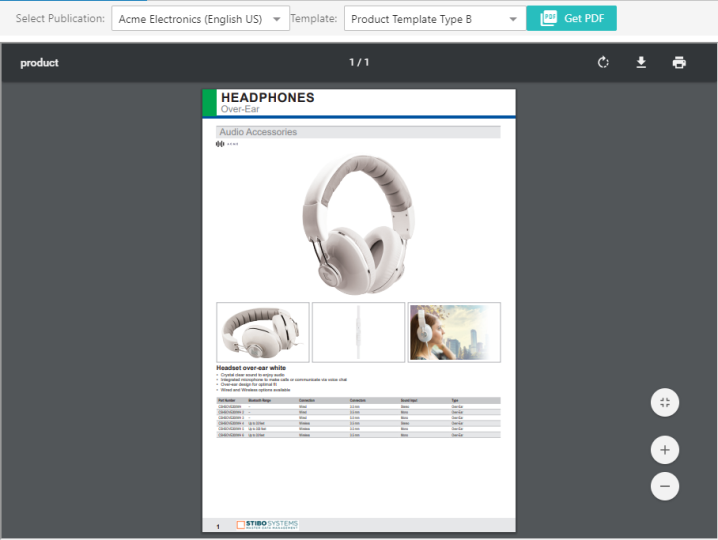
The following screenshot shows an example of a product proof view on a Tab Page child of a Node Details screen. The proof uses a full-page product template that includes a primary product image, three secondary product images, a table, and other elements such as a brand logo and feature bullets.
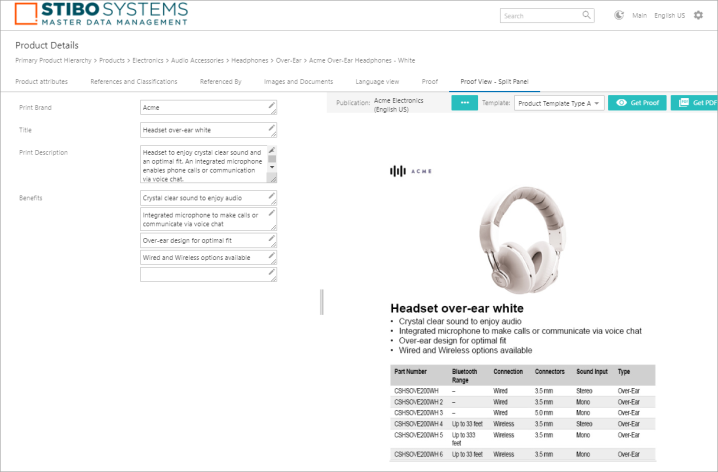
The next screenshot shows a product proof view configured on the right side of a Draggable Split Panel screen. An attribute group value component is configured on the left side, which displays the attributes used in the proof and allows users to edit them. A different product template is used in this example than in the previous example; only a single image is used, but other elements such as brand logo and feature bullets are still present. The layout is also different; it is configured for a single column instead of an entire page.
Proof View Component Configuration
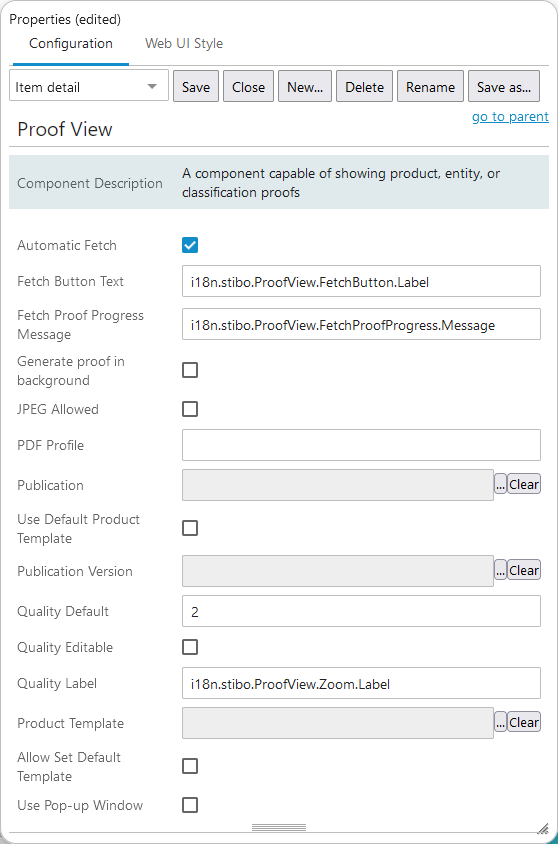
A number of parameters must be configured in the Web UI designer to determine the behavior and appearance of the proof view. Each parameter is described in detail below the following screenshot.
- Automatic Fetch: Select this parameter to have the proof view automatically 'fetch' from the InDesign server when the page is loaded. When proofs are automatically fetched, the 'Get Proof' button will not display. (If the 'JPEG Allowed' option is disabled, users will instead receive a PDF rendering of the proof, and the 'Get PDF' button will not display either. The JPEG Allowed option is detailed further below in this list.)
At least one of the following parameters must be configured to enable automatic fetch:
- Publication
- Publication Version
- Template
If both Publication Version and Template are configured, users will not be able to choose which version or layout (product template) to use for the proof.
Note: When 'Publication Version' is chosen, Publication can be left blank, since the publication is automatically included when one of its versions is selected.
If Publication is selected but no version is selected for Publication Version, then the publication version that comes first alphabetically in the publication will be chosen for the proof when the page loads. For example, English will be chosen over German if these are the only two versions. If no product template is chosen for Template, the product template linked to the publication first alphabetically will be selected. For example, a product template named 'Arts and Crafts' will be selected over a template named 'Electronics.' If a default InDesign template has already been applied to the product, however, the default template will display first in the dropdown.
Despite the automatic selection, users will still have the option to manually choose a version and/or template from dropdown menus. This allows users to toggle between different versions and/or layouts for the same publication without having to manually click the 'Get Proof' button.
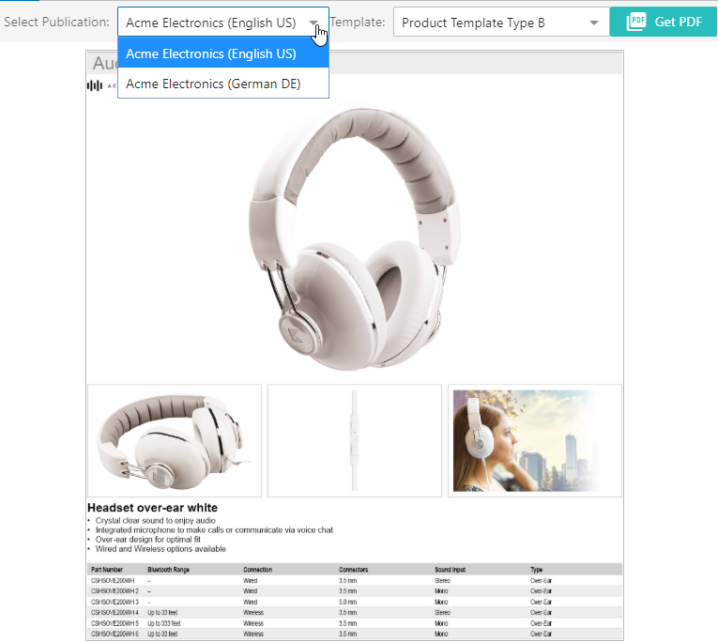
The following screenshot shows how the proof view component looks with only Publication configured. Users do not have to manually choose a publication, but they have the option to choose a publication version and template.
- Fetch Button Text: Enter the text that you would like to be displayed on the 'fetch JPEG proof' button. The default value is 'Get Proof.'

-
Fetch Proof Progress Message: The text added will display as a notification to the user when the proof is delivered. The message only displays when the 'Generate proof in background' parameter has been checked.
-
Generate proof in background: Checking the box generates the proof as part of a background process. Although this option may take more time, users with more complex proofs can use this setting to ensure proofs complete before a security-driven timeout that may cause the proof generation process to fail. Users with less complex proofs can leave the box unchecked and receive their proof faster.
- JPEG Allowed: Check this box to allow users to request a JPEG proof, i.e., to display the 'Get Proof' button.
A JPEG proof is what is fetched from the InDesign server for viewing basic proofs in the Web UI. JPEG renderings display the elements driven by the product template (e.g., layout, images, tables, etc.), but none of the 'furniture' provided by the publication template (e.g., page numbers, headers, footers and other static design elements).
If JPEG Allowed is unchecked, a PDF profile must be specified. The InDesign server will then render full PDFs for viewing, as shown in the below screenshot. PDF renderings do show static elements from the publication template, which may be preferable to JPEG proofs for users who want a more accurate view of how the finalized page will look.
If JPEG Allowed is disabled and Automatic Fetch is enabled, a PDF will automatically display when the page is loaded. If Automatic Fetch is not enabled, users will need to click the 'Get PDF' button to view the PDF.
- PDF Profile: The PDF profile to use. If blank, then the PDF option is disabled. In InDesign, a PDF profile is referred to as a PDF Preset, which is a configuration file that contains a series of options that define how a PDF file should be created. If a PDF profile is not specified, then JPEG proofs must be allowed.
Note: PDF profiles are system dependent. For more information on PDF Profiles, refer to the Setting Up PDF Profiles (Presets) for the InDesign Server topic in the Publisher (Adobe InDesign Integration) documentation. Additional information can be found on the web at https://helpx.adobe.com/indesign/using/pdf-options.html.
- Publication: Click the ellipsis button (
 ) to select the publication to use for proof views. Leave this option blank to allow users to choose the publication. This option can also be left blank if the Publication Version option is configured, since the publication is automatically included when one of its versions is selected.
 - Use Default Product Template: Select this parameter to have the proof view use the default product template applied to the product (if applicable) in STEP. For information on default product templates, refer to the Default InDesign Product Templates topic in the Publisher (Adobe InDesign Integration) documentation. Users can also apply a default product template to a product from the Web UI by using the 'Set as default' button on a proof view page, which becomes visible on a page when the 'Allow Set Default' option is checked in the designer for the Proof View component. This option is detailed later in this bullet list.
- Publication Version: Click the ellipsis button () to select the publication version to use for product proof views. Leave this option blank to allow users to choose the version.
Note: If this option is selected, the Publication option should be left blank, since choosing a publication version automatically includes the related publication. Additionally, choosing a publication version from a publication different than the one chosen for Product Proof Publication will likely result in invalid or proof views that cannot be viewed.
- Quality Default: The default quality factor for the JPEG proof, which is a number between 1 (lowest) and 8 (highest). Leave blank to use the system default of 2.
- Quality Editable: Selecting this option will display a 'Quality' dropdown list, allowing users to change the quality factor of the displayed JPEG proof.
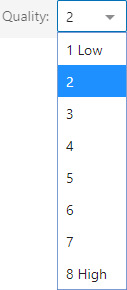
- Quality Label: Label to display for the quality control dropdown. The default is Quality:.
- Product Template: Click the ellipsis button () to select the product template that will be used for the proof view. Leave this option blank to allow users to choose the template.
Note: Even though this option will let you select any product template, the template should be linked to the publication that was selected for the 'Publication' and/or 'Publication Version' parameters. Choosing a template that is not linked to your publication will likely result in invalid proof views.
- Allow Set Default Template: Selecting this option will cause the 'Set as default' button to display, which allows users to apply a default product template to the product being viewed in the proof view. The default template selection made from the Web UI also sets the default product template on the product in the workbench.

Note: If there is already a default product template assigned to the product, clicking Set as default will overwrite the previously chosen template.
- Use Pop-up Window: Select this option to have the generated PDF display in a browser pop-up window instead of within a frame on the page. If your browser has been configured to block pop-up windows, the PDF will not display in a pop-up window, but will instead download automatically.
Choosing a Proof View Start Page
A proof view can either be started on page 1, for a right-hand page, or page 2, for a left-hand page. To choose the starting page number, the Proof View Start Page Number setting in System Settings (located under System Setup > Users and Groups > DTP Settings) must be set to either 1 or 2. By default, proof views begin on page 2. However, a selection of '1' is useful, for example, when producing documents for PDF output, such as data sheets, which may not be produced in a 2-page spread format and should start page numbering at 1. For more information, refer to the DTP Settings topic in the System Setup documentation.