This topic explains how to edit View Options in the following areas of the Flatplanner interface in the STEP Workbench:
- Basket view
- Sticker Book view
- Publication Planner
- Financial Summary view
The following sections of this topic explain the initial steps for editing a view, how to add new elements to a view, how to edit existing view elements, how to remove elements from a view, and how to change the sequence in which elements display in a view.
Note: Users may not create, edit, or delete public views of the basket, financial summary, publication planner, or sticker book unless they have the privileges to do so. Refer to the Public and Private View Options topic in this guide here for more information.
Edit Views Using View Options
Follow these steps to add, edit, remove, and resequence the elements in a view using the View Options dropdown.
Edit the View
- In the Tree, select either a publication, a section, or planned page.
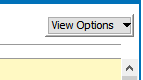
- In the upper right-corner of the interface, click the View Options button.
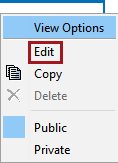
- In the menu that displays, click Edit.
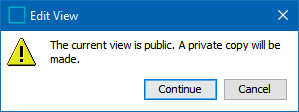
- If the current view is Public, an 'Edit View' warning dialog will display that says 'The current view is public. A private copy will be made.' Click Continue to create a private copy of the view and proceed with editing.
Note: This newly created view will only be visible to the user currently making the edits. To make this view available to all users, it must be made Public. For more information on how to maintain Public and Private views, refer to the Public and Private View Options section of this guide here.
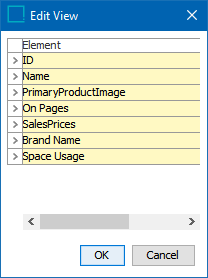
- The Edit View dialog displays, showing a list of the current view content elements. This list will be different depending on how the view was last configured before being edited.
Add New View Elements
To add new elements to a view:
- Either right-click an existing element or right-click in the white space below the existing elements, then select Add to display a list of the eight most recently used elements.
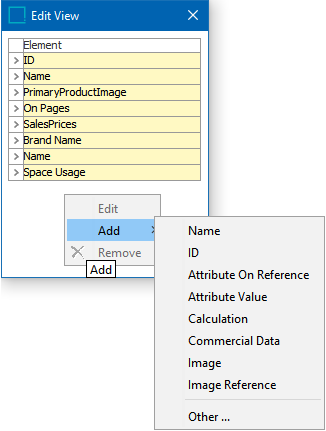
- To view the full list of content element options, click Other … to display the Select type dialog.

- Select the element that you want to add by either selecting it from the Add dropdown list or the Select type dialog.
Some content elements are added immediately and require no further action. However, some elements need additional configuration. For detailed information on each element, refer to the View Elements topic in this guide here.
Edit Existing View Elements
Existing elements in a view can be edited if they required configurations when being added originally (e.g., if an attribute had to be specified, for 'Attribute Value'). Elements such as ID, Name, On Pages, and Space Usage cannot be added.
To edit an existing element in a view:
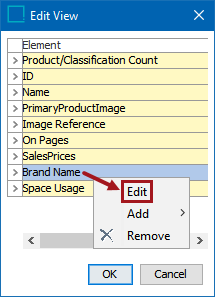
- In the Edit View dialog, select the row containing the desired element, then right-click and select Edit. In this example, an existing attribute entry called Brand Name will be edited.
- Depending on the element type selected, an 'Edit' dialog will display that behaves identically to the corresponding 'Add' dialog that displayed when the element was originally added. In this example, the edit dialog is 'Edit Attribute Value.'
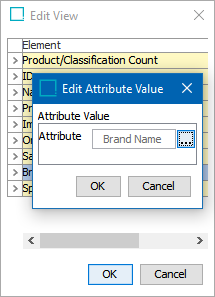
- Follow the same steps outlined in the previous 'Add New View Elements' subsection to edit the element. E.g., in this example, click the ellipsis button (
 ) to select a new attribute.
- Click OK to finish editing the element.
Remove View Elements
To remove an element from a view:
- In the Edit View dialog, select the row containing the desired element, then right-click and select Remove.

- Click OK to remove the element.
Change the Sequence of View Elements
The order that the elements appear from top to bottom in the Edit View dialog is how they will display from left to right in the Basket and vertically in the Sticker Book view.
To resequence the elements in the Edit View dialog:
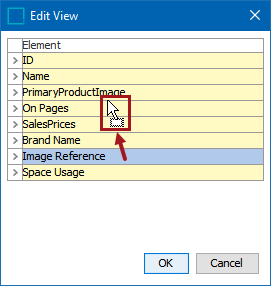
- Left-click on the element to move to a different position, then hold down the mouse button and drag the element up or down to the desired location.
- Release the mouse button when the element has been properly positioned.
- Click OK to save changes.
Edit Views by Column
If using a view that contains columns (Basket, Publication Planner, Financial Summary, but not Sticker Book), a view can edited through right-click actions on the columns themselves. Columns cannot be resequenced this way; that can only be done by using View Options.
Add a Column to a View
- Right-click on the header of the column that is adjacent to where you would like to add the new column, then select Add Column. (The new column will be added immediately to the right of the selected column.) A menu displays that lists the eight most recently used elements.
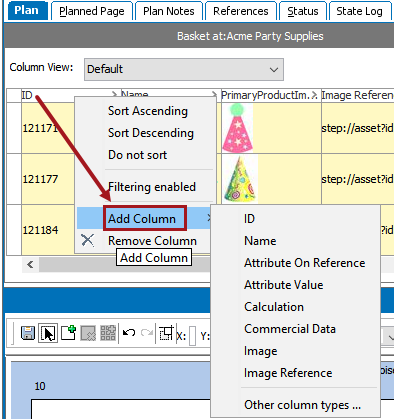
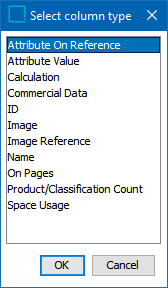
- Select the relevant column from the list, or, to view the full list of column options, click Other column types… to display the Select column type dialog. The available options are identical to those listed in the Select type dialog outlined in the previous subsection.
- If the column type requires no additional configurations, the column will be immediately added to the view. (If adding the column from the 'Select column type dialog,' the column will be added after clicking OK.)
- If additional configurations are required, such as selecting which attribute to display for Attribute Value, then an additional dialog will display. For detailed information on each element, refer to the Configurable View Options topic in this guide here.
Remove a Column from a View
- Right-click on the header of the column that you would like to remove from the view, then select Remove Column.
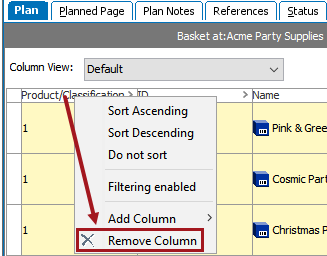
- The column is removed.