This topic serves as a 'how-to' primer for working with a sample Flatplanner workflow and illustrates some common tasks that are performed as a Planned Page moves through the various workflow states. The example is simple but is examined on a state-by-state basis to provide you with a working knowledge of how a Flatplanner workflow actually functions, not just how to configure one.
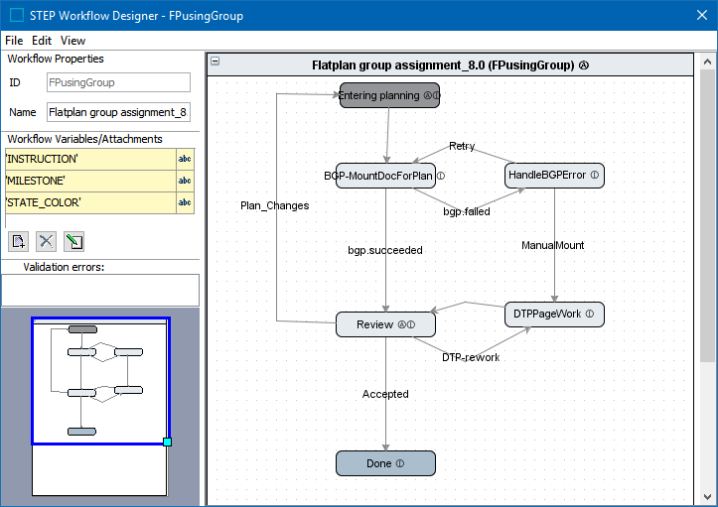
The following screenshot shows a very simple Flatplanner workflow configuration in the STEP Workflow Designer. This is the example used in this tutorial.
This topic does not explain how to create or configure a Flatplanner workflow and assumes the following:
- The Flatplanner workflow is already created in STEP. If not, refer to the Configuring Flatplanner Workflows topic
- The planned page has already been initiated into the workflow. If not, refer to the Starting and Stopping Flatplanner Workflows topic
Note: As with any STEP Workflow, individual user requirements will determine the exact configurations. This sample merely illustrates some standard uses of Flatplanner workflows in general.
Planning the Page
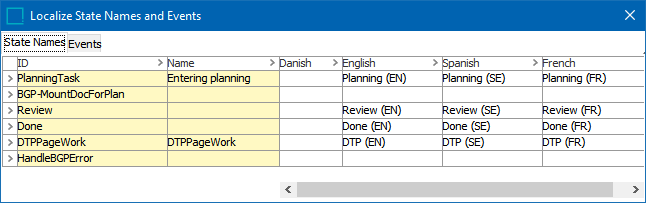
The first state of the example workflow is named Entering Planning. The name that displays on the STEP Workflow tab under Tasks is determined by locale. In this instance, the Entering Planning state is named Planning (EN) since this example uses an English version of STEP.
The typical task performed during this state is for a workbench user—for example, a merchandiser who determines product placement in catalogs—to plan the Flatplan pages. The central task of planning a page involves linking products into frames on a Flatplanner page spread (Planned Page). Page planning can be done without using a Flatplanner workflow, but the workflow enables you to receive your page planning assignments as tasks.
Claim and Submit a Planned Page
If you are a page planning user, follow these steps to plan a page in conjunction with this sample Flatplanner workflow.
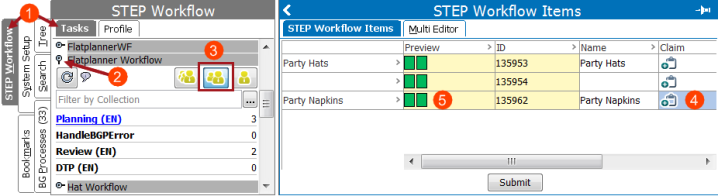
- To determine if you have been assigned a page planning task, click the STEP Workflow tab, and then click the Tasks tab.
- Navigate to the relevant Flatplanner workflow, then click the Flipper icon
 to view the tasks for the workflow.
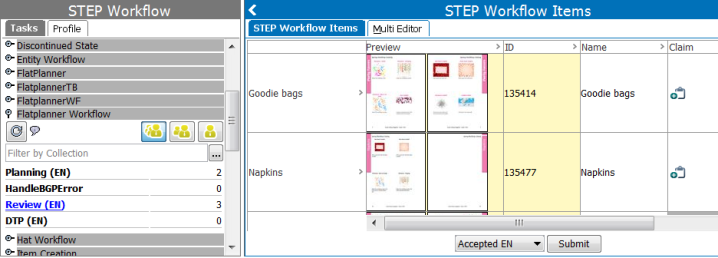
 - In the Tasks list, click the first state, Planning (EN), to view the pages that are in the Planning state. Unless the task has been assigned directly to you, you will need to click on the 'Show all items' (
 ) or 'Show all items assigned to me or any group I am a member of' icon (
 , outlined below in red frame) to view all available tasks to your User Group.
 - To claim a task and make it unavailable to other users in your User Group, click on the Claim icon.
- In the Preview column, click on the page spread that you would like to plan.
- The planned page spread displays in the Flatplanner on the Plan tab. Plan your page, and then click the Save icon
 in the toolbar to save the changes.
 - Click on the Tasks tab to navigate to the Tasks view.
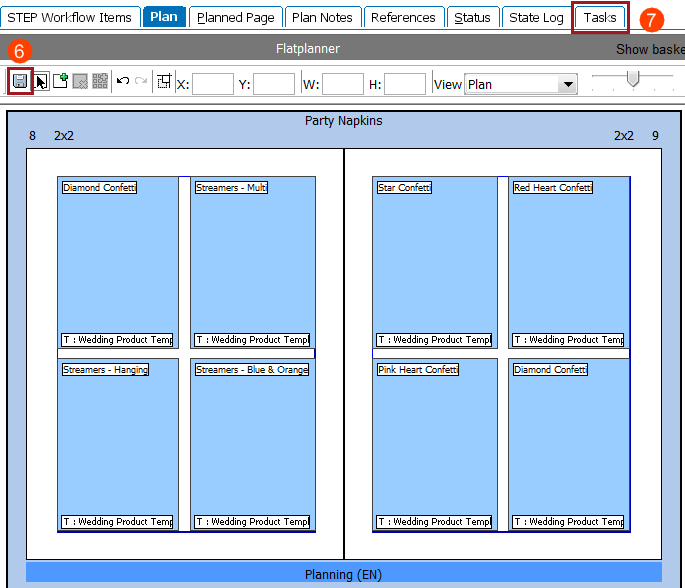
- On the Tasks tab, click Submit to move the spread to the next workflow state. A Submit items dialog displays where you can optionally enter information about the page.
- Click Submit Now. The page moves along to the next state in the workflow, a 'hidden' state named BGP-MountDocForPlan.
Alternate Submission Method - Plan Tab
When viewing multiple planned pages from the publication, section, or subsection level on the Plan tab, the same workflow assignment icons that display in the Tasks tab display in the upper right corner of the Flatplanner pane, as shown in the below screenshot.
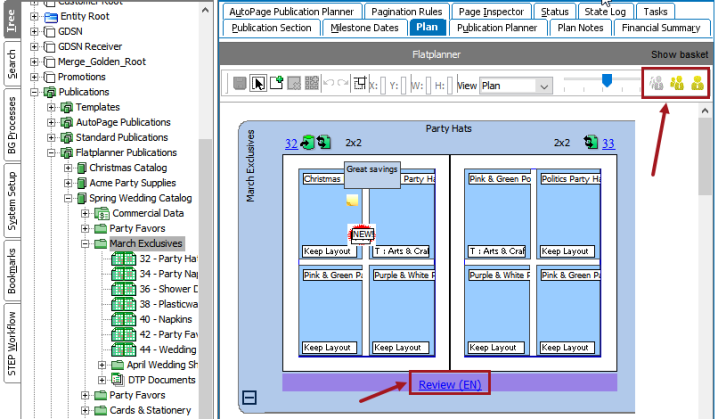
Click on the Show All Plans icon ( ) to view all plans. Click on Show Group Assigned Plans (
 ) to only view plans that are assigned to a user group. Click the Show Assigned Plans icon (
 ) to only view plans that are assigned to you.
When a plan is assigned to you, the name of the state will be hyperlinked, as shown in the above screenshot, e.g., Review (EN). This hyperlink enables you to submit the page to another workflow state.
- To submit the plan to another workflow state, click on the hyperlinked state name.
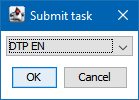
- In the Submit task dialog, select the relevant state from the dropdown list, then click OK.
- A Submit items dialog displays where you can optionally enter information about the page.
- Click Submit Now. The page moves to the specified workflow state.
Auto-generation of the Actual Page
In the BGP-MountDocForPlan state, a background process calls the InDesign server. The InDesign server then generates (mounts) the actual pages based on the information linked to the Flatplanner page spread. When completed, the InDesign server saves these actual pages into STEP.
Note: An InDesign server (sidecar) must be connected to your STEP system in order for this background process to run. For more information on the deployment of an InDesign server, contact Stibo Systems.
Once the InDesign server saves the actual pages to STEP, the actual pages are routed to the Review state.
If the background process fails (for reasons that could include the InDesign server being offline), and the actual pages are not generated by the InDesign server, then business rules may be put in place that will route the planned pages into the DTPPageWork state in order for a DTP (Desktop Publishing) operator to manually mount the Flatplan onto actual pages in InDesign.
Reviewing the Actual Page
In a typical page reviewing state, you will look at the mounted actual pages to determine if the pages are OK as-is or if they need additional layout work performed in InDesign.
- To determine if you have been assigned a page reviewing task, follow steps 1 - 4 as outlined in the previous section, except this time click on the Review (EN) state.
- In the Preview column, click the page spread that you want to review.
- The actual page displays in the Flatplanner on the Plan tab in the Mounted Pages view.
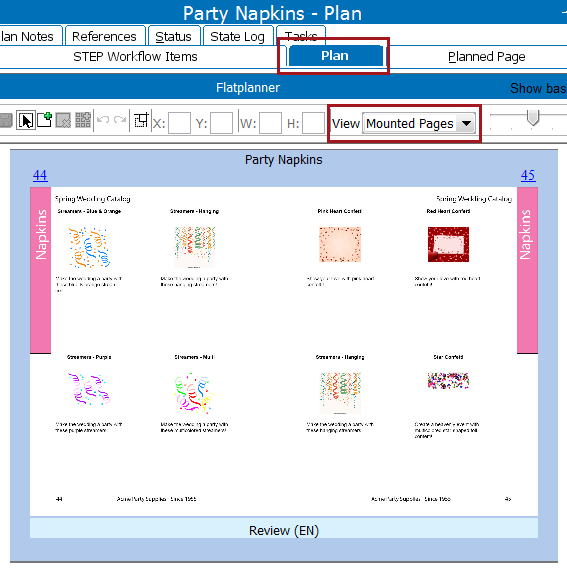
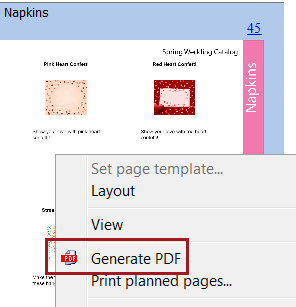
- To generate a PDF of the actual page, right-click anywhere on the displayed page and select Generate PDF. The system will call the InDesign server and a PDF of the page will generate and open automatically.
- When you have finished reviewing the page, the following Submit options are available in this sample workflow:
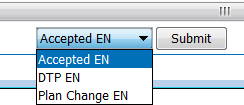
- Accepted EN: The page is approved and is sent to the Done state of the workflow, at which point it is removed from the workflow.
- DTP EN: The page needs some manual work performed on it by a DTP operator in InDesign. The page will be sent to the DTPPageWork state [DTP (EN)], which is a state in which the task must be accepted in InDesign.
- Plan Change EN: The Flatplan needs more planning work performed in the workbench. The page will be returned to the Planning (EN) state.
Accepting a DTP Task in InDesign
If the page reviewer chose the DTP EN transition from the Review state in the workbench, the page is routed to the DTPPageWork state [DTP (EN)] in this sample Flatplanner workflow. Tasks in the DTPPageWork state must be accepted from within InDesign.
To accept a Flatplanner workflow task from within InDesign:
- Open InDesign and log onto the relevant STEP system.
- Navigate to Window > STEP Tasks. The STEP Tasks panel displays.
- Click the arrow
 next to the relevant publication to expand all tasks that are available for that publication.
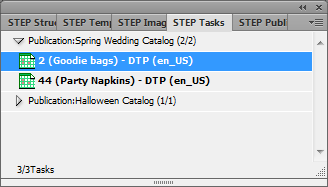
- Right-click on the relevant page, then click Accept Task. The Accept Task dialog displays.

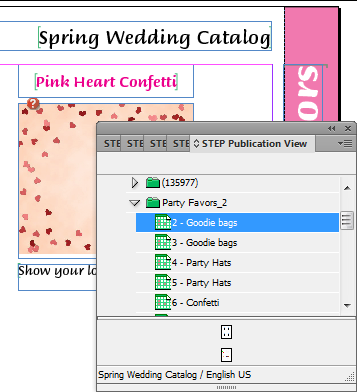
- Click Accept to simultaneously open the document and the STEP Publication View panel, where the accepted page will be highlighted.
Note: Open document and Goto in Publication view are checked by default in the Accept Task dialog. Uncheck Open document if you would like to finish claiming the task but open the document later. Uncheck Goto in Publication View if you do not want the STEP Publication View panel to automatically display when the page is opened.
- Once you have finished work on the pages, return to the STEP Tasks panel. Right-click the page that you were just working on (which is distinguishable by no longer being in bold text), then click Task Completed. The Task Completed dialog displays.
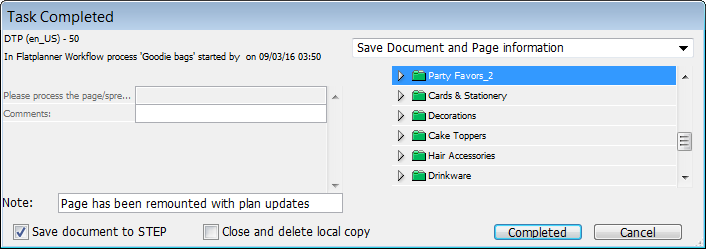
- To save the finished document back to STEP (which is the most common action at this stage of the workflow), check the Save document to STEP box, then click Completed. The section folder where the actual pages should be saved in STEP is highlighted automatically. Optionally, you may leave a comment in the Note field (and/or Comments field, if present, depending on your workflow's configuration).
If you prefer to not save your documents locally and only save them in STEP, then check Close and delete local copy before clicking Completed.
Note: The page must first be saved locally, regardless, before it can be saved back to STEP.
- In this sample workflow, the actual page will now be routed back to the Review state for final signoff by a page reviewer (e.g., the merchandiser).
Canceling a DTP Task in InDesign
If, after you claim the task in InDesign, you determine that you need to release it back to your user group so another user can claim it, you may cancel the task. To cancel the task, follow these steps:
- In the STEP Tasks panel, right-click on the page and select Cancel Task. The Cancel Task dialog displays.
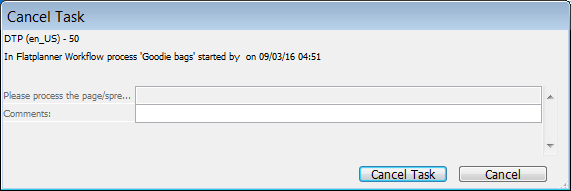
- Click Cancel Task to reject the task, enabling another user from your group to claim it. The task will remain in the STEP Tasks panel and return to bold text.
If your workflow has been configured with a Comments variable, you may optionally leave a comment in this field. For more instruction on how to configure the Tasks view in InDesign, refer to the Configuring Flatplanner Workflows section of the Print Flatplanner documentation
Final Review
When the InDesign page has been completed, or if it never needed to be updated in the first place, the page will be in the Review state of this sample Flatplanner workflow. To complete the journey of the page, follow these steps:
- Follow the same steps as outlined in the previous Reviewing the Actual Page section of this topic.
- When the page is completed, select Accepted EN to route the page to the Done state. Typically, an on-entry business rule action will be applied to the state to automatically remove the page from the workflow.