Planned Pages (also known as pages or spreads) can be initiated into a Flatplanner workflow both manually and automatically. By either method, planned pages can be initiated into a workflow on a one-at-a-time basis or in bulk actions where multiple pages are initiated at once.
Pages can be initiated manually from both the Publication Planner and Tree, and automatically upon their creation when the primary Flatplanner workflow is set to initiate automatically.
Planned Pages can be manually removed from a Flatplanner workflow from the same two locations where they can be manually initiated: the Publication Planner and the Tree.
Starting the Workflow Manually
If your Flatplanner workflow has not been configured to initiate automatically, you will need to manually initiate your Planned Pages into the workflow. Planned Pages can be initiated into a Flatplanner workflow from two locations: the Publication Planner and the Tree.
Method 1 - Publication Planner
To manually initiate a Planned Page into a Flatplanner workflow from the Publication Planner, follow these steps:
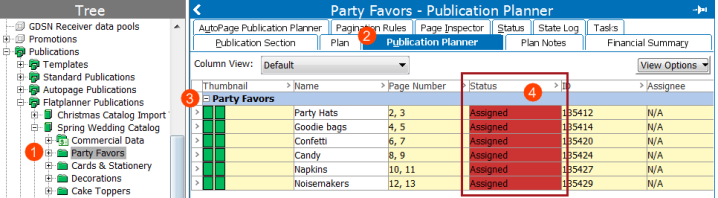
- In the Tree, expand the Publication hierarchy, and then select the relevant publication or section. The Publication Planner is accessible from both locations.
- Click on the Publication Planner tab.
- On the Publication Planner tab, click the plus + sign next to the relevant section to view the Planned Pages within the Section. If your Publication Planner view has not been configured with the 'Group by section' view option, the Section name and + sign will not appear.
- Planned Pages that are not already in a workflow will show a status of Assigned in the Publication Planner. Assigned means that the planned page will automatically be assigned to a User Group once the page is initiated into the workflow.
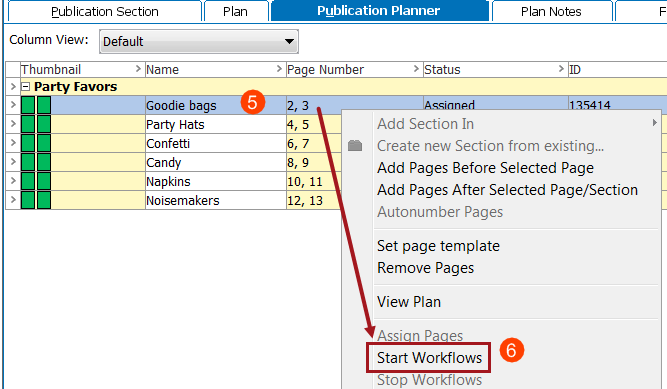
- Select the Planned Page spread or spreads that you would like to initiate into a Flatplanner workflow. Spreads may be multi-selected by holding Ctrl or Shift while making selections.
- Right-click and select Start Workflows. The Start Workflows dialog displays.
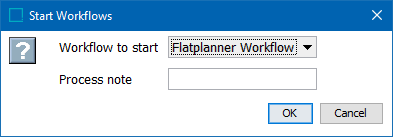
- In the Start Workflows dialog, select the relevant workflow from the Workflow to start dropdown list, then click OK. Optionally, you may enter a process note in the Process note field.
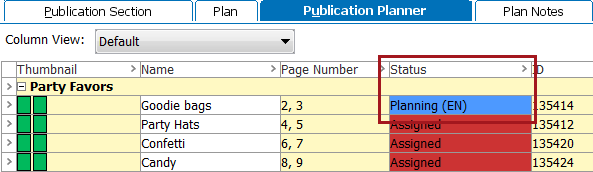
- The planned page is initiated into the initial state of the selected Flatplanner workflow.
Note: Once a Planned Page (spread) has been initiated into a Flatplanner workflow, it may not be initiated into another Flatplanner workflow.
Method 2 - Tree
To manually initiate a Planned Page into a Flatplanner workflow from the Tree, follow these steps:
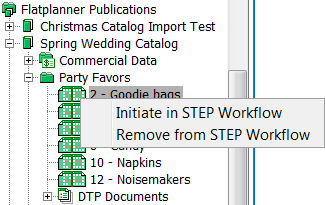
- In the Tree, navigate to the Planned Page(s) that you would like to initiate into the workflow.
- Right-click and select Initiate in STEP Workflow. Multiple Planned Page spreads may be chosen at once by holding Ctrl or Shift while making selections.
- In the Start Workflows dialog, select the relevant workflow from the Workflow to start dropdown list, then click OK. Optionally, you may also enter a process note in the Process note field.
- The Planned Page is initiated into the initial state of the selected Flatplanner workflow.
Note: Once a Planned Page has been initiated into a Flatplanner workflow, it may not be initiated into another Flatplanner workflow.
Start All Workflows Option in Publication Planner
As outlined in the steps in the previous two sections, multiple Planned Pages can be initiated into a workflow by multi-selecting them in the Tree or Publication Planner. A third option also exists to submit Planned Pages into a workflow at once: the Start All Workflows button in the Publication Planner.
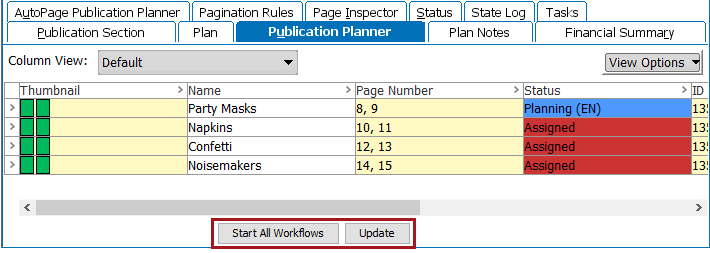
Clicking Start All Workflows is essentially the same thing as multi-selecting all Planned Pages in the Publication Planner, right-clicking, and selecting Start Workflows. This button merely provides the convenience of a one-click operation to achieve the same outcome.
Starting the Workflow Automatically
If the Flatplanner workflow is set to auto-initiate, new spreads will automatically appear in the initial state in the Publication Planner.
In order to allow Planned Pages to initiate automatically in the workflow, follow these steps, which are the same as for any standard STEP workflow:
- In System Setup, navigate to the relevant Flatplanner workflow.
- On the STEP Workflow Editor tab, check the Initiate automatically box.
- New Planned Pages will automatically initiate into this workflow when created.
Note: Though STEP systems of version 8.0 and above allow the existence of more than one Flatplanner workflow, only one Flatplanner workflow at a time should ever be set to auto-initiate. Allowing Planned Pages in more than one workflow at once can cause conflicts if more than one user is working on the same page at the same time, as STEP provides no version control to prevent multiple users from saving over each other's work.
Stopping the Workflow
Planned Pages may be manually removed from workflows in the same two locations where they can be started manually: in the Publication Planner and in the Tree.
Method 1 - Publication Planner
To remove a Planned Page from a Flatplanner workflow from the Publication Planner, follow these steps:
- In the Tree, expand the Publication hierarchy, and then select the relevant Publication or Section.
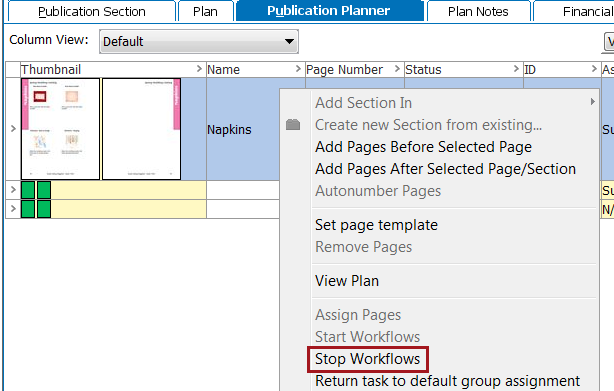
- On the Publication Planner tab, click the plus + sign next to the relevant Section to view the Planned Pages within the Section.
- Right-click the relevant spread(s) and click Stop Workflows.
- The Stop Workflows dialog appears. Click Yes.
- The spread is now removed from the workflow.
Method 2 - Tree
To manually remove a Planned Page from a Flatplanner workflow from the Tree, follow these steps:
- Navigate to the Planned Page(s) that you would like to remove from the workflow.
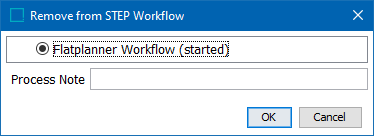
- Right-click and select Remove from STEP Workflow.
- In the Remove from STEP Workflow dialog, select the workflow that the spread is in, then click OK. (Typically, spreads are only in one workflow.) Optionally, you may also add a Process Note.
- The spread is now removed from the workflow.