A match tuning configuration allows users to analyze data and iterate on the matching algorithm before running an import.
The Evaluate Matching Algorithm action on a Match Tuning Configuration can generate a Pair Export report and a Match Codes Export report.
A data steward should use the reports to:
-
ensure the matching algorithm produces the correct results.
-
ensure the matching algorithm can work efficiently with the data.
Match Tuning is an iterative process, adjusting the match codes, match criteria, and thresholds, and then evaluating the results repeatedly until the algorithm is good enough.
Match Tuning goals should include:
-
No match code group size larger than 100 and generally, most objects (95 percent) should be in a match code group with a size of 10 or smaller since match codes have a huge impact on performance.
-
Use Replacement Lookup Tables to avoid comparisons where possible, paying attention to values like company main phone numbers or shared group email addresses.
-
In general, it is recommended to limit the number of records going into clerical review as much as possible, however, it is always a business evaluation where to set the thresholds for auto merge and auto reject. When not sufficiently limited, the result is often an extensive list of unhandled tasks in the clerical review task list.
For other tuning options, refer to the topic Match Tuning.
Prerequisites
-
Ensure that the initial setup is complete, as defined in the topic Initial Setup for Match Tuning.
-
Open the Matching component model and view the 'Match Tuning Asset Object Types' parameter to identify the asset object types used to store the profile data for match tuning. If none are selected, refer to the topic Configuring Matching Component Model.
-
In the Object Types & Structures node, open the Assets folder and verify the Match Tuning Asset Object Types have the 'Reference Target Lock Policy' parameter set to 'Strict.' For information on this parameter, refer to the topic Reference Target Lock Policy on Object Types of the System Setup documentation.
-
Create or identify a classification folder to hold sample import data used during match tuning.
-
Identify the matching algorithm to be fine-tuned.
-
Configure a data profile, as defined in the topic Data Profiles of the Data Profiling documentation. Be aware that since the data being profiled originates outside of STEP, features such as bulk update, search, and saving collections are not available.
-
Consider normalizing values that are always populated before using them in matching. For use case examples, refer to the topic Data Governance in the Solution Enablement: Customer & Supplier MDM documentation.
Configuration
Use the following steps to set up match tuning.
-
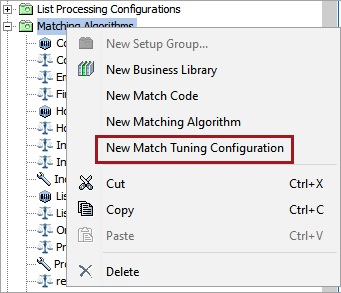
In the System Setup tab, right-click the match tuning configurations node and select 'New Match Tuning Configuration.' The name of the node on your system may be different than shown in the images.
-
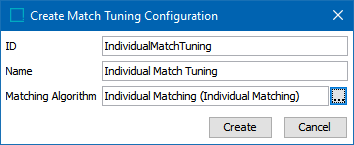
In the 'Create Match Tuning Configuration' dialog, add an ID, a Name, and specify a matching algorithm to test, Click the Create button.
-
Click the 'Match Tuning Configuration' tab to view the overall configuration.
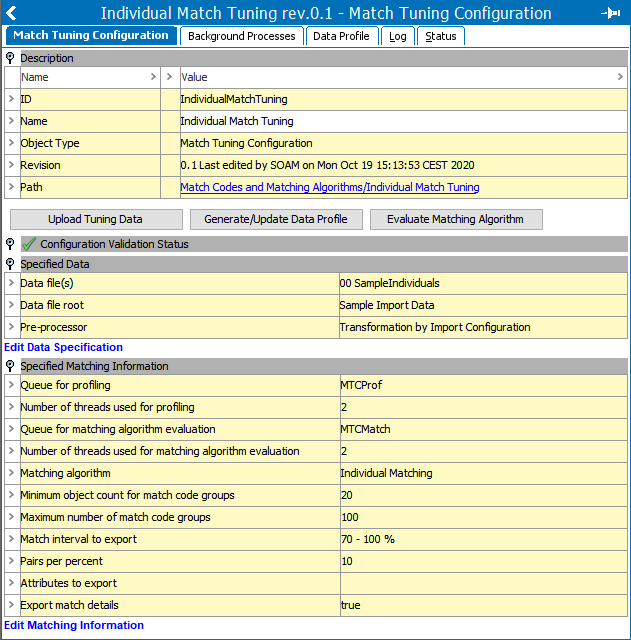
On the Configuration Validation Status flipper:
-
 a green check indicates that the configuration is valid.
 -
 a red X indicates errors exist. Open the flipper to review the errors.
-
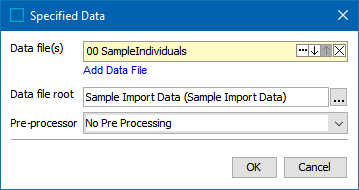
Open the 'Specified Data' flipper and click the Edit Data Specification link to display the 'Specified Data' dialog.
-
For the Data file(s) parameter, click the Add Data File link to select uploaded data files. The Data file root parameter (set below) defines the folder for the uploaded files.
-
For the Data file root parameter, click the ellipsis button (
 ) and specify the location where tuning data is stored and enable the Upload Tuning Data button.
 -
For the Pre-processor parameter, if required, select a pre-processor to convert non-STEPXML data. For more information on converting the CSV / Excel files in this way, refer to the topic IIEP - Configure Match and Merge Importer Processing Engine of the Data Exchange documentation.
-
Click the Upload Tuning Data button to display the Upload Match Tuning wizard. Uploading data saves it as an asset in STEP and makes it available for selection in the match tuning configuration.

The sample data used for tuning is uploaded as follows:
-
For the Source Location parameter, click the ellipsis button (
) and select a data file. Asset name must be less than 40 characters long. -
For the Select Asset Type parameter, specify the match tuning asset type.
-
For the Override Existing Assets parameter, when checked, previously uploaded tuning data is overwritten.
-
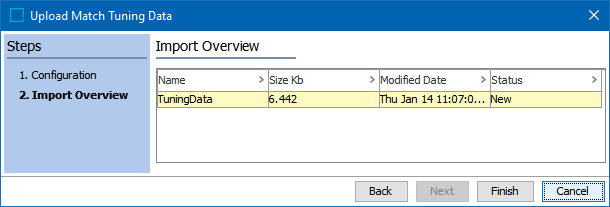
Click Next to review the Import Overview and click Finish to upload the tuning data. Any errors with the import are displayed.
-
Click the Generate / Update Data Profile button to generate the data profile. Monitor the background process for success or errors. Resolve any errors and repeat this step.
-
Click the Data Profile tab to review the results of the profiling process.
-
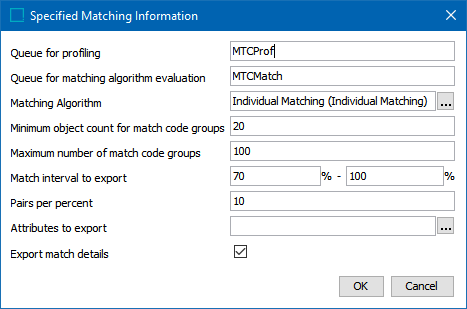
Click the Match Tuning Configuration tab, open the Specified Matching Information flipper and click the Edit Matching Information link to modify the relevant parameters:
-
Queue for profiling - The background process queue created for profiling.
-
Queue for matching algorithm evaluation - The background process queue created for matching algorithm evaluation.
-
Matching Algorithm - Click the ellipsis button (
) and browse or search for the matching algorithm the match tuning configuration should test. -
Minimum object count for match code groups - Enter the minimum number of objects to be exported per match code group.
-
Maximum number of match code groups - Enter the maximum amount of match code groups the tuning data can generate.
-
Match interval to export - Specify an interval that includes pairs expected to be both matches and non-matches, as well as pairs that are not clear matches or non-matches. Only pairs with scores within this interval are exported.
-
Pairs per percent - Enter the maximum number of pairs to be exported for each percentage point.
-
Attribute to export - Click the ellipsis button (
) and select the attribute values that should be exported. -
Export match details - Check the box to add additional columns with part scores from decision table comparators and sub decision tables.
-
Click the Evaluate Matching Algorithm button to start a background process that creates a pair export file and match codes export file.
-
Click the Background Processes tab, click the BGP link for the completed Matching process.
-
In the BGP Result flipper, download the exported file and review the profile data.