An email normalizer can normalize email data for use in the corresponding email matcher.
Input
When configuring the data element:
-
The Input Attribute field defines an attribute to be used as input.
-
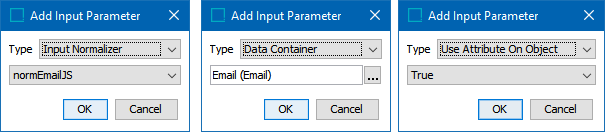
The Input Parameters field allows selection of:
-
'Use Attribute on Object' – by default, this option is set to ‘True’ and indicates to read attributes on the object itself. Click the Value dropdown to manually set it to 'False' when using information from a Data Container or an Input Normalizer.
-
'Data Container' – read attributes from the data container.
-
'Input Normalizer’ – read outputs from the selected Match Expression, as defined in the topic Matching Algorithms and Match Expressions.
-
Output
The output of an email normalizer is a java.util.Set< com.stibo.partydatamatching.domain.email.Email>
Functionality
The email normalizer automatically makes the following modifications to email for comparison purposes only in the order listed:
-
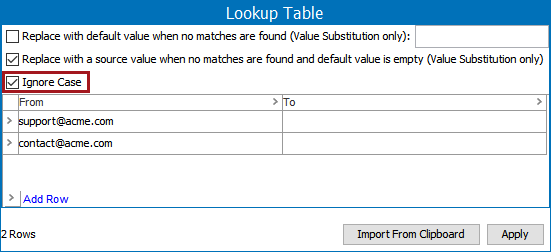
Applies the Replacement Lookup Table (the 'Ignore Case' option must be enabled)
-
Lower-case text
-
Remove leading and trailing white space
Optional
Transformation Lookup Tables can replace generic email values with empty strings, which prevents them from being used in matching records. The 'Ignore Case' option must be enabled. To create a Transformation Lookup Table for use in the email normalizer, refer to the topic Transformation Lookup Tables in the Resource Materials online help documentation.
Configuring an Email Normalizer Data Element
After adding the email normalizer in the Data Elements flipper of the Decision Table dialog (defined in the topic Match Criteria), configure it as follows:
-
Click into the Data Elements column and click the ellipsis button (
 ) to access the configuration dialog.
-
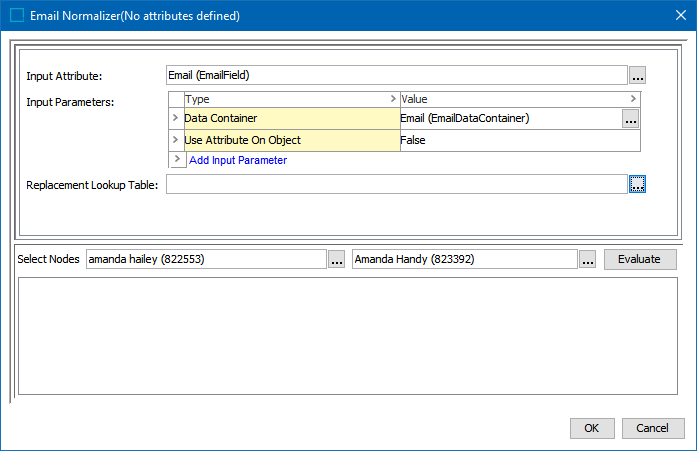
On the Email Normalizer dialog:
-
For the Input Attribute, click the ellipsis button (
) and select the email attribute. -
For the Input Parameters, define the source of the data to be normalized. Refer to the Input section above for details.
Right-click the arrow in the first column of the Input Parameters table for additional display and edit options. Although it appears that the default 'Use Attribute On Object' parameter can be removed, after closing the dialog it will continue to display. Instead, if a different input parameter is used, click the Value dropdown and manually set 'Use Attribute On Object' option to 'False.'
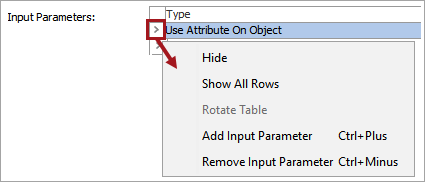
Click the Add Input Parameter link to add other input parameters.
-
For the Replacement Lookup Table, click the ellipsis button (
) and select the transformation lookup table asset.
-
-
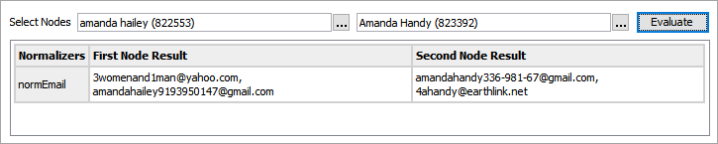
To test the configuration, for the Select Nodes parameters:
-
Click the ellipsis button (
) for each field and select two objects for comparison. -
Click the Evaluate button.
An empty result field indicates the value is not available in the selected node. Adjust as indicated by the Evaluator results and repeat the evaluation.
-
-
Click OK to save and display the configuration in the Data Elements flipper.
