This functionality is used by a Match and Merge solution. For more information, refer to the topic Match and Merge and the topic Configuring Match and Merge.
The unmerge process run by the Unmerge Wizard includes:
-
the Distribute Source Records step, where a user determines how values from source records should be used (or left unused) on the golden records, including moving source records, reactivating golden records, and creating new golden records.
-
the Select Survivorship Values step, where a user accepts or overrides the values for the modified golden records.
This topic includes:
-
The Managing Source Records and Golden Records section which includes steps to move a source record and steps to reactivate a golden record.
-
The Finalizing an Unmerge section which includes steps to complete the unmerge process.
Manage Source Records and Golden Records
Regardless of the way the unmerge is started, unmerging records is managed via the Unmerge wizard. Unmerging is only available for object types that are included in the 'Golden Record Object Types' parameter on the ‘Matching - Merge Golden Record’ component model.
-
Ad hoc unmerging is intended for users who are knowledgeable about the data and want to start the unmerge wizard. This is defined in the topic Unmerging Golden Records.
-
Workflow-based unmerging is intended to add a level of control to the unmerge process by initiating a merged record into the initial state of the unmerge workflow where a knowledgeable user can decide to continue or exit the unmerge process. This is defined in the topic Creating an Unmerge Golden Record Clerical Review Workflow.
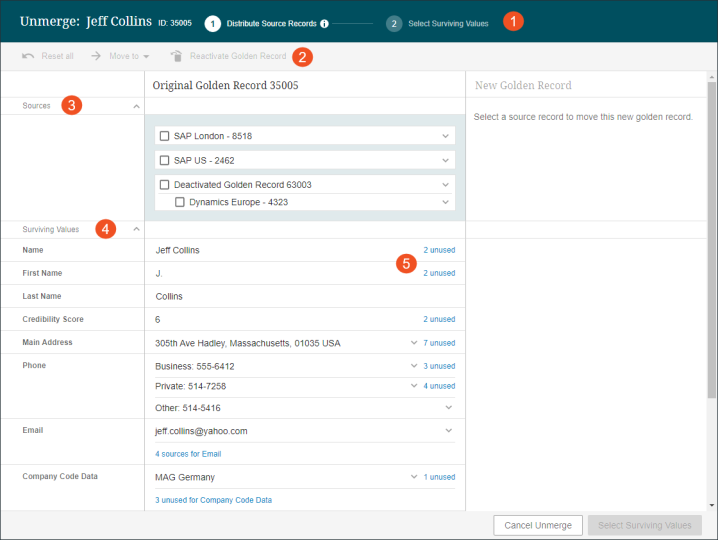
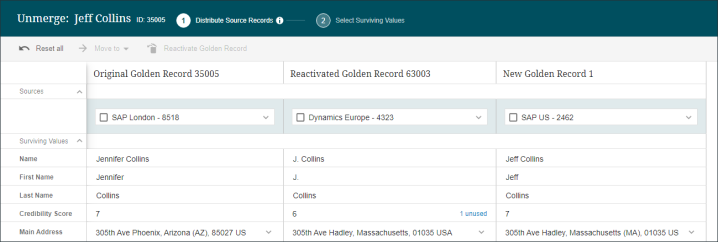
The unmerge screen includes the following elements:
- Unmerge Steps - the current step of the Unmerge process is highlighted.
- Action Bar - actions are enabled based on the status of the selected records:
- Reset all: reverts the screen back to the original state. All actions / changes that were made are lost.
- Move to: moves the selected source record(s) to another golden record or creates a new golden record. Refer to the Moving a Source Record section below.
- Reactivate Golden Record: reactivates the selected golden record that was previously merged into another golden record. All source records associated with this record are also moved. Refer to the Reactivating a Golden Record section below.
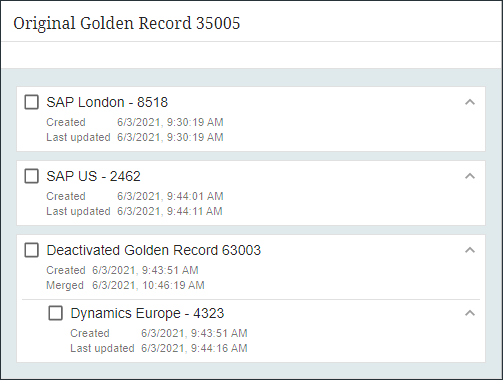
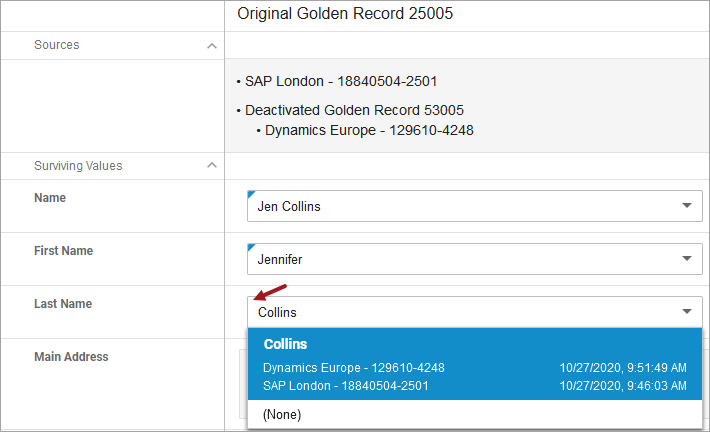
- Sources - records used to determine the original record. This section shows all deactivated golden records that were merged into the golden record being unmerged. As shown below, expand a record to display additional information.
If the system uses source record IDs when importing, those source records are shown in combination with the deactivated golden records. All source records shown are actively ‘assigned’ to the golden record being unmerged, while those that were previously actively assigned to the deactivated golden records are shown below them. This representation shows that the values might move along if the deactivated golden records are reactivated. For details on reactivation, refer to the Reactivating a Golden Record section below.
- Surviving Values - a preview of the configured surviving data values after a completed unmerge operation.
- Unused Values - values are determined based on data from deactivated golden records and source data. Since the data on the deactivated golden record can include several sources (and may be identical to the surviving value), traceability is required for a complete view of unused values. For more information, refer to the topic Match and Merge Traceability.

-
Blue link text on a surviving value row (the Name row in the image above) shows the number of unselected attribute values associated with the record that did not survive. Click the link to display a popup that includes details.
-
Blue link text below a surviving value row (the Main Address row in the image above) shows the unused references (grouped by reference target) and data containers (grouped by data container key). If no key is defined, the link shows the available sources in a list.
Moving a Source Record
Use the following steps to move source records to another golden record or to a new golden record.
-
On the Distribute Source Records step, select one or more source records.
-
Click the Move To action button.
-
Choose the desired golden record for the selected source record(s).
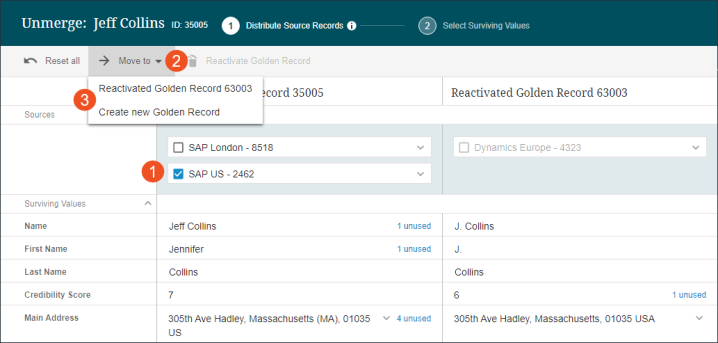
Unmerge displays the results for all golden records.
-
Click the Select Surviving Values button to continue with the unmerge or click Cancel Unmerge to close the dialog without making changes.
-
Complete the unmerge as defined in the Finalizing an Unmerge section below.
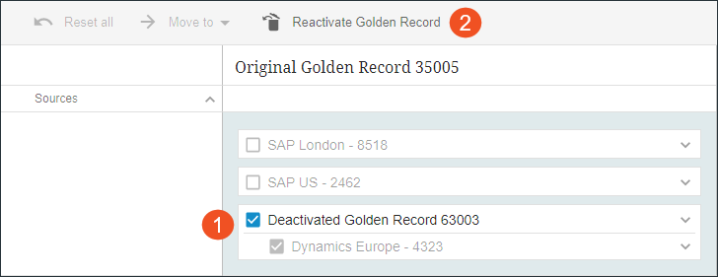
Reactivating a Golden Record
Use the following steps to reactivate a golden record.
-
On the Distribute Source Records step, select a deactivated source record and click the Reactivate Golden Record toolbar action button.
-
Review the assigned values, the unused values, and the unused references calculated by Unmerge for the original selected golden record and the one being reactivated.
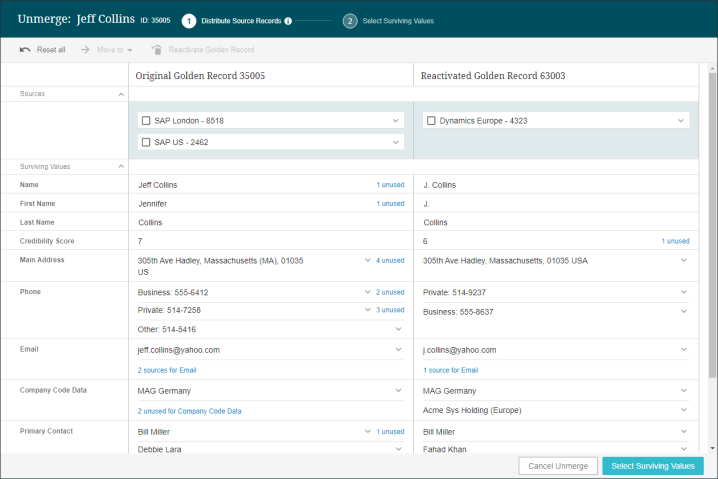
-
Click the Select Surviving Values button to continue with the merge or click Cancel Unmerge to close the dialog without making changes.
-
Complete the unmerge as defined in the Finalizing an Unmerge section below.
Finalizing an Unmerge
Once the new golden record is created, either from a merged record or a reactivated golden record, clicking the 'Select Surviving Values' button on the Distribute Source Records step displays the Selecting Surviving Values step.
Complete the merge process:
-
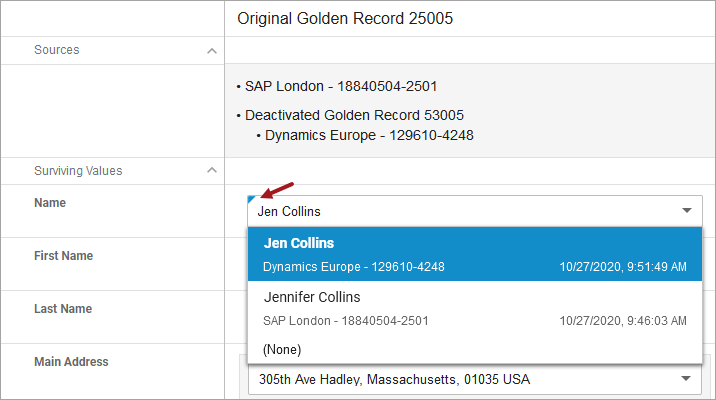
Verify the desired values are displayed for the golden records as follows:
-
A marker in the top left corner of a field indicates that multiple values exist. Click the dropdown to view the options, select '(None)' to erase the value.
-
On a field without a marker only has the value displayed. Click the dropdown and select '(None)' to erase the value.
-
On the Selecting Surviving Values step:
-
Click Back to return to the Distribute Source Records step.
-
Click Cancel Unmerge to close the dialog without making changes.
-
Click Complete Unmerge to confirm the changes.
-
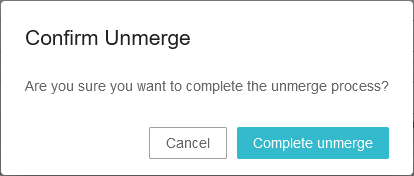
On the Confirm Unmerge dialog:
-
Click Cancel to return to the wizard.
-
Click Complete unmerge to continue.
-
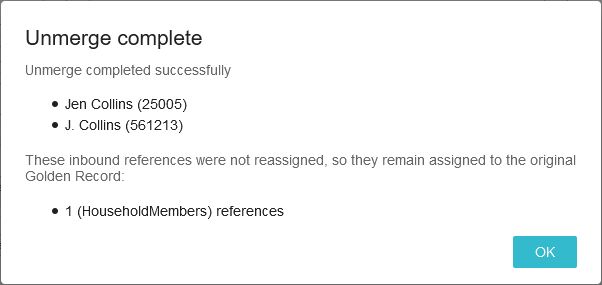
On the Unmerge Complete dialog:
-
Review the actions taken and note any references not reassigned to be resolved below.
-
Click OK to close the dialog.
-
Manually review all reference types noted above and resolve as required.