This section of the Experian Email Validation integration requires an understanding of the Web UI, how to create screens, and the necessary user permissions to do so. Refer to the Web UI Getting Started topic in the Web User Interfaces documentation for more information.
Validate Emails by Selecting from a List of Revalidation Conditions
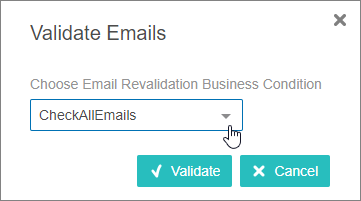
It is possible to configure more than one email revalidation condition, allowing users to narrow down the Experian email validation request by selecting from common business conditions. For more information, refer to the Configuring a Validate Emails Action Button for a Node List section below.
For information on using the Experian Email Validation in the Web UI, refer to the Using the Experian Email Validation Integration from the Web UI topic.
Handling Failed Email Validation
When a validation job fails, a collection of objects is created, and a link to the collection is displayed within the execution and summary report (within the 'Recent background processes' side panel). Go to the collection to find the list of customer accounts that have failed to be validated.
Configuring a Validate Emails Action Button for a Node List
The Validate Email action button can be added to a collection or node list and configured with a previously created Experian Email Validation Configuration. Optionally, one or more email revalidation business conditions can be added, allowing users to refine the collection of emails selected to be sent for email validation.
Prerequisites
Before configuring a Validate Emails action button, it is recommended to have a firm understanding of the Experian Email Validation Integration, and to have created the mandatory Experian Email Validation Configuration using the Experian Configuration object type.
For more information about the Experian Email Validation Integration, refer to the Experian Email Validation Integration topic.
For more information about action buttons on Node List, refer to the Action Button Configuration on a Node List section of the Web User Interfaces documentation.
Add a Validate Email Action Button to a Node List
Steps for adding a Validate Email action button to a node list are below.
-
Go to your Node List Properties > Child Components > Actions parameter.
-
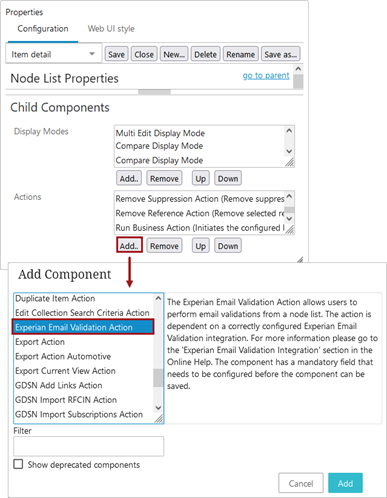
Click the Add button, and the Add Component dialog displays.
-
Select Experian Email Validation Action, click the Add button to close the dialog, and continue to the configuration steps.
Configure a Validate Email Action Button for a Node List
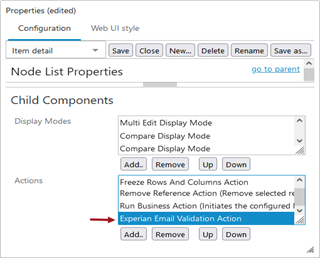
Once the Experian Email Validation Action component is added to the Node List Actions parameter, follow the steps below to complete the configuration.
-
From the Actions parameter list, double click the newly added Experian Email Validation Action as shown below.
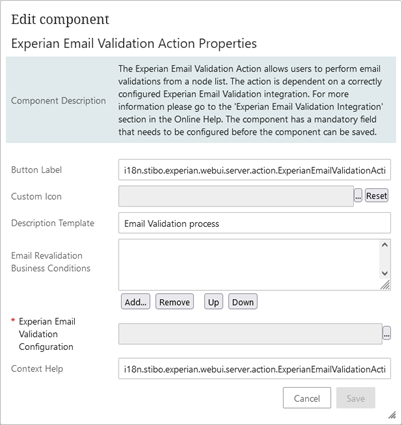
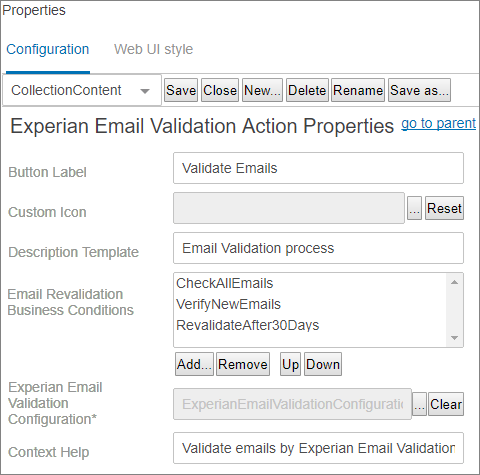
The Experian Email Validation Action Properties dialog displays as shown below.
-
Populate the mandatory Experian Email Validation Configuration parameter with an Experian Configuration object. Click the ellipsis button (
 ) next to the Experian Email Validation Configuration parameter, and the Select Node(s) dialog will display Experian Configuration object types only.
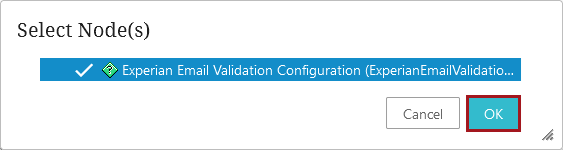
Note: If the Email Component model Easy Setup wizard was used to automatically create the Experian Email Validation Configuration object, then the configuration option will appear as shown above.
-
Select your Experian Configuration object and click the OK button. The Select Node(s) dialog closes, and the selected Experian Configuration object displays within the Experian Email Validation Configuration parameter.
-
Review and configure any of the optional parameters within the Experian Email Validation Action properties:
-
Button Label: Enter the text to be displayed as the label for the action button icon. The label will only be displayed if the 'Include Label' parameter on the parent Node List properties is enabled.
-
Custom Icon: Adding a custom icon overwrites the default icon displayed in Web UI. The recommended size of the icons is 20 (height) x 35 (width) pixels. It is recommended that icons use deep jewel toned colors that fade well when disabled.
-
Description Template: Enter the text to be used to identify the corresponding background process.
-
Context Help: Enter text to be displayed when a user hovers over the action button in Web UI.
-
Email Revalidation Business Conditions: Adding multiple Email Revalidation Business Conditions can help users quickly and easily narrow down their Experian email validation request by selecting from common business conditions (i.e., Validate new emails only, Validate new emails and emails that have not been validated in the last 30 days, or Validate emails with specific domains).
-
When business conditions are added to this parameter, they display for selection when a user clicks the Validate Emails action button in Web UI.
-
When the parameter is empty, and the Web UI user clicks the Validate Emails action button, the user is not prompted to select a business condition, and all selected emails will be sent for email validation.
-
-
Click the Save and Close buttons on the designer.
Add Email Revalidation Business Conditions
Below are steps to add a previously configured business condition to the Email Revalidation Business Conditions parameter.
-
Click the ellipsis button (
) next to the Email Revalidation Business Condition parameter to display a Select Node(s) dialog.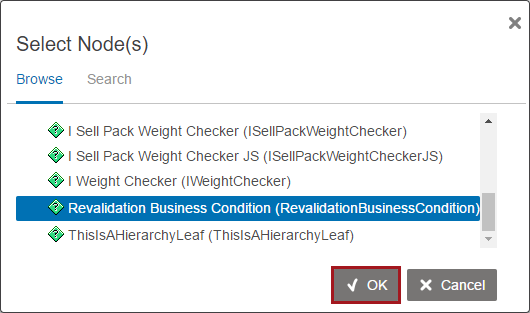
Note: If you used the Email Component model Easy Setup wizard to automatically create the revalidation business condition, then the condition will appear as shown above.
-
Browse or search to select your Revalidation Business Condition.
-
Click the OK button, the Select Node(s) dialog will close, and the selected Revalidation Business Condition will display within the Email Revalidation Condition parameter.
-
Optionally, repeat the above steps to add more than one email revalidation business condition.
Note: If one email revalidation business condition is added to the Email Revalidation Business Condition parameter, and the Web UI user clicks the Validate Emails action button, the user will not be prompted to select a business condition, and only the selected emails that comply with the configured email revalidation business condition will be sent for email validation. To allow Web UI users to choose a 'Check All Emails' option along with the added email revalidation business condition, then an additional 'Check All Emails' email revalidation business condition needs to be created and added to the Email Revalidation Business Condition parameter.
Below is an example of configuring multiple email revalidation business conditions.
For information on and images of the Email Validation business condition in the workbench, refer to the Using the Experian Email Validation Integration from the Web UI topic.