When you launch a data import process, STEP starts a background process. It assigns a unique process number and gives it the name assigned on the Save Import Configuration dialog. The starting process dialog is displayed:
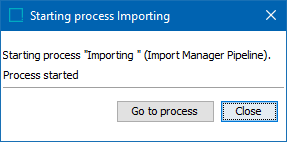
Click the Go To Process button to display the current background process on the BG Processes tab.
Monitoring the Import Process
On the BG Process tab, select the Import Manager Pipeline node. Select the process to monitor based on its status:
- For processes not yet started, open the Queued Processes folder.
- For processes that are currently being performed, look in Active Processes folder.
- For processes that have completed but had errors, look in Completed with Errors folder.
- For processes that have completed, look in Ended Processes folder.
The Properties section includes details about the import process.
For more information on background processes, refer to Background Processes and Queues in the System Setup documentation.
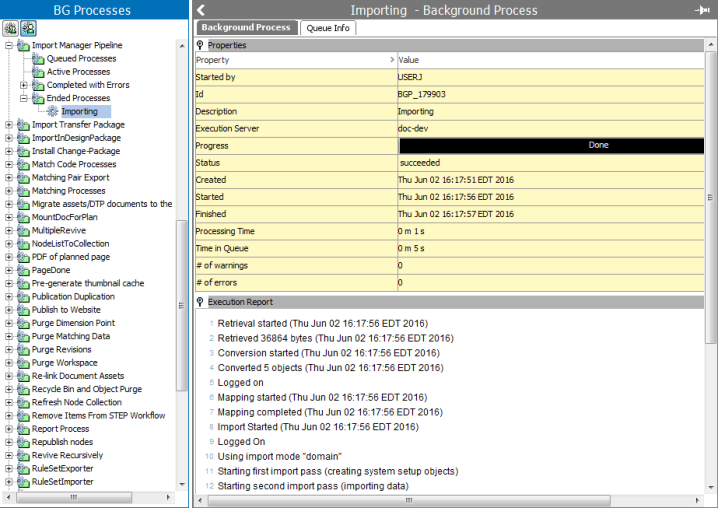
Properties Section
The following data is displayed in for the selected background process:
- Started by displays the ID of the user who started the import.
- ID is the Background Process ID which is generated sequentially and always starts with “BGP_” for each process that is started by a user.
- Description is the name that is given by the user for the import process.
- Execution Server is, by default, the application server where STEP is installed. However, it could also be a cluster server.
- Progress displays status bar with the completion percentage of the process.
- Status shows the status of the process, as defined below:
- Completed means that the process completed successfully.
- Completed with Errors indicates that the process was partially completed but with the errors included in the error file.
- Failed means that the process there was a fatal error and nothing was processed.
- Aborted means that the process was aborted by a user while the process was executing.
- Created is the date and time when the process was created and moved to a particular background process queue.
- Started is the date and time when the process started.
- Finished is the date and time when the process ended.
- Processing Time displays the number of hours, minutes, and seconds it took to complete the process.
- Time in Queue displays the total amount of time that the process was in the queue before it started executing.
- # of Warnings shows the number of warnings that were present after the process was executed. Corrections may be desired.
- # of Errors shows the number of errors that were present after the process was executed. Corrections are required to complete the import successfully.
Execution Report
The execution report gives information about the data import, including validation errors found during import.
Typically, an execution report can be very long, and it can be useful to copy and paste the information into a standard text editor. You can then go through the file to locate errors and warnings.
Handling Import Errors
Some imports result in errors, for example, importing a new object (product) that is linked to another new object (classification or asset) that is also being imported. The background process fails, but the user can use the execution report to identify the error and resolve it by referring to the list of common errors.
For more information, refer to the Import Error Messages topic and the Import Error Message Examples topic..
When the following errors are reported, the creation of new objects is skipped entirely:
- Specified parent object does not exist
- Specified Object Type is not valid below specified parent
- No ID is provided and no ID pattern is specified for the target Object Type
When an import process completes with errors, a file is created that contains just the rows with erroneous data. The file can be saved to disk or opened directly in the Import Manager.

When a data error is encountered, the error message reports the data it was attempting to load, including the attribute name and the object ID for the value, and the type of error encountered. The line number and column number are also given, but that is not always useful since it refers to the interim XML file that is created.
For Excel and CSV imports, the error file contains the rows from the original file with the defect data.
For XML files, the error file contains the objects with errors.
Reimporting a Corrected File
Use the error file to identify the problematic data in the import file and determine the next step:
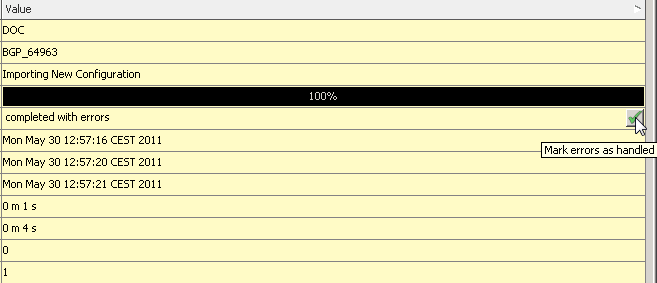
- If you can correct the data errors with transformations, re-import the same file and create the necessary transformation. When you re-import a file, the status of the background process changes from 'completed with errors' to 'succeeded' and the process is moved to the Ended Processes group.
- If transformations will not resolve the issues, edit the import file offline, save it and then import it. You can make the state transition by clicking the Mark errors as handled button as shown below.
Note: In some cases, users may prefer a more complete list of errors than is allowed by default in the execution report. If the default maximum number of displayed errors (1,001) must be adjusted, the Import.TotalErrorReportLimit property can be added to the sharedconfig.properties file and set to the desired maximum. It should be noted that the full list of errors will be available via an export of the error file; the maximum in this case refers only to the number of errors that display in the execution report. It should be noted that configuring a high maximum number of displayed errors could result in performance issues.